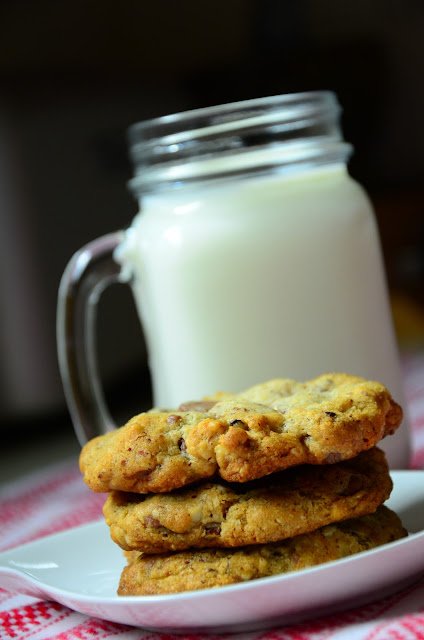
Tuesday, March 29, 2011

Steak Picadillo Soft Tacos


I would like to apologize for my unhealthy obsession with tacos.  Here was yet another interesting twist with a Picadillo-type steak filling topped with feta cheese, fresh cilantro and lime.  It is quite a fusion.  Picadillo is traditional to various countries and cultures.  It is has of often beef with various chopped veggies with a tomato base.  This combination seems to be sort of a Cuban version with peppers, tomatoes, green olives, raisins spiced with allspice and cumin.  

The recipe calls for skirt steak, but you really can use any marbled cut that you like.  One of the wonderful butchers at Whole Foods recommended that I try what is called "beef sirloin flap meat".  It is a more affordable cut of meat but still had plenty of fat to keep it from drying out while grilling it.  It was about $10.99/lb rather than the $16.99-$18.99/lb new york strip steak or skirt steak.  As I was talking with him and he was trying to find something else that could work rather than the traditional steaks, he actually said, "I can tell you aren't afraid of fat".  My first reaction was true pride.  And then I thought, "wait a minute..."  Jk.  I didn't really think that.  But it a funny thing to just come out and say.  That is why I love butchers.  Especially the ones at my Boulder store.    

And btw, the beef sirloin flap meat is amazing.  It isn't as fancy of a cut.  So, if you are serving it to guests or simply having a steak and potatoes meal, it isn't super pretty.  But chopped up in tacos, it is perfect.  He mentioned it has a buttery flavor and I have to agree.  A deliciously tender cut of meat.  

If you are wondering how these Cuban flavors with the feta and lime and cilantro all go together?  I wondered the same thing.  And it totally works.  


Steak Picadillo Soft Tacos
adapted from bon appétit, April 2011

1 tablespoons of canola oil
1 12 ounce strip of skirt steak or beef sirloin flap meat
1/2 cup 1/4 inch squares green bell pepper
3/4 cup canned diced tomatoes with green chiles
1/3 cup halved drained pimento-stuffed green olives
1/4 cup raisins
1 tablespoon tomato paste
1 teaspoon ground cumin
1/2 teaspoon ground allspice
8 corn tortillas
feta cheese
cilantro

Heat oil in a large skillet over medium-high heat. Sprinkle steak with salt and pepper. Add to skillet; cook 3 to 4 minutes per side for medium-rare. Transfer to plate and let rest for at least 5 minutes. Add bell peppers to skillet. Sauté 2 minutes. Add tomatoes with green chiles, olives, raisins, tomato paste, cumin and allspice. Simmer until sauce is thick, stirring often, 3 to 4 minutes. Season to taste with salt and pepper.

Cut steak in thin slices diagonal across the grain. Cut slices into smaller pieces or leave whole. Add steak and any juices to sauce in skillet; toss to blend.

Char tortillas over gas flame or in broiler until blackened in spots, 15 to 20 seconds per side. Divide filling among tortillas. Sprinkle with cilantro and feta and serve.

(Servings: 3-4, Cook time: 35 min., Difficulty: Easy)


foodforscot Ratings:  

Shanon (taste):  8/10
Scot (taste):  8/10
Effort:  2/5
Dishwashing Effort:  2/5

Wednesday, March 23, 2011

Ajiaco (Colombian Chicken and Potato Soup)


WANTED: an in-state little sister to peel all the ping-pong-sized red potatoes I bought for this dish.  What was I thinking?  I'll tell ya what I was thinking, I forgot I needed to peel the potatoes at the moment of picking out this grocery purchase.  It was like the scene in Pretty Woman..."slippery little suckers".  It was borderline miserable, but I got through it!


So, Ajiaco.  I have never been to Colombia, but my red headed, firecracker of a friend, Kim is there right now.  Several weeks ago, she told me all about how delicious this country's famous soup is.  It is often made at home, but lots of restaurants also make it, often as a special.  As soon as I started researching this recipe, I could not wait to make it.  

To summarize, this soup is a starchy, rich, thick potato soup with shredded chicken topped with Aji salsa, sour cream, capers, cilantro and avocado and chunks of corn of the cob floating around.  


Now, traditionally this recipe is not exactly how Ajiaco is made (but well adapted for the US dreamer).  First, the soup has three different kinds of potatoes in it.  One is a starchy Russet.  Another is a red potato.  The third is a waxy yellow potato, but a specific wild variety grown at the high altitude of Colombia called papsas criollas.  They are supposed to break down completely into the soup and help create the thick creamy texture.  The "best" substitution is a Yukon gold, which is what I used.  However, you may be able to find the papas criollas at a Latin market around you.  You can also buy online here or here.  

The second ingredient that is very traditional and very important is an herb called quascas.  It was also not available in Boulder (I checked everywhere).  I read the best substitute was a combination of bay leaves and parsley.  Quascas is often thought of as a weed in many parts of the world.  Someone suggested going to a park and looking for it (weird).  It is also a weed that spreads very quickly, so most people don't like to grow it.  In the US, it is known as "gallant soldier".  Apparently it adds a grassy or weedy taste to the soup, which, to me, seems like something parsley can do.  Kim said she isn't a huge fan when it tastes too weedy.  You can also buy online here or here.


Also, the corn used in Colombia is a little tougher with bigger kernels than the sweet corn we are used to.  Therefore, it is often cooked as long as the potatoes to tenderize the kernels.  US sweet corn is a perfectly fine substitution (maybe even better!) and only needs to be added at the end of the cooking time.  PS:  corn on the cob sucks bad right now.  


Lastly, the recipe I came up with first develops a nice homemade chicken broth with the addition of some tasty vegetables and then adds the potatoes later which simmer until they break down quite a bit.  Then, I whipped out the old immersion blender to give the soup a nice texture.  Traditionally, the soup is cooked forever and the potatoes are broken down by smashing them up against the side of the pot.  That would work just as well, but a little slower and takes more effort.  

The bottom line is that I really love this soup.  Even though it might not be exactly the same as the real Colombian version, having the Aji salsa (which, btw, is delicious...recipe included), capers and all the other toppings really make it delicious.  Plus, I have never had the real thing, so what do I know.  

Thank you to all the others who have already written about Ajiaco.


Ajiaco

For soup:
1 whole chicken, cut into pieces
6 quarts of water
1 small bunch of parsley
1 small bunch cilantro
3 bay leaves (traditionally quascas is used instead of the parsley, cilantro and bay leaves)
2 carrots, cut into thirds
2 stalks of celery, cut into thirds
1 large white onion, cut in half
1 leek, cut in half, cleaned well, whites only
6 chicken bouillon cubes
1 tbsp kosher salt
3 ears of corn
3 lbs Russet potatoes, peeled and diced into 1 inch cubes
4 lbs red potatoes, peeled and diced into 1 inch cubes
4 lbs Yukon gold potatoes (traditionally papas criollas are used, if you can find
them), peeled and diced into 1 inch cubes
kosher salt
black pepper

To serve:
Aji salsa (recipe follows)
Capers, drained
Avocado, diced + lemon/lime juice to avoid browning
Cilantro leaves
Sour cream

Place chicken pieces in large pot or Dutch oven, cover with 6 quarts of water. Bring pot to a boil.

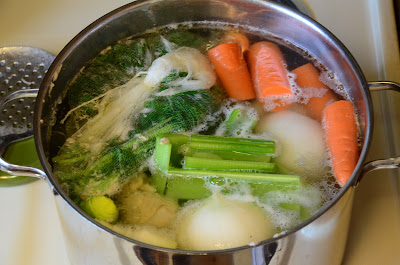
In a cheesecloth tied shut with kitchen twine, put parsley,1 small bunch of cilantro, and bay leaves (or quascas). Once the pot has come to a boil, skim the fat that floats to the top off with a spoon and discard. Continue doing this for about 10 minutes, then add the herbs, carrots, celery, white onion, leek chicken bouillon cubes, and 1 tbsp kosher salt. Bring back to a boil, reduce to a simmer and let cook for about 30 minutes or until the chicken is cooked through and tender.

Remove chicken from the pot and set aside to let cool. Add corn and cook for about 10-15 minutes, or until kernels are tender. Remove from pot and set aside. Remove carrots, celery, onion and leek from the pot and discard.

Add all the potatoes to the pot. If you are prepping as you go (which you should) add them in this order: Russet, red and Yukon (or papas criollas). Bring the pot to a boil, partially covered, reduce to simmer and cook for an hour or longer, until Yukon potatoes are falling apart. Cut ears of corn into thirds and add to the pot after about 30 minutes (also take out the herb bouquet at this time).

While the potatoes are cooking and once the chicken is completely cooled, remove all the skin and bones from the chicken and shred the meat. Depending on the timing, you might want to throw the shredded chicken into the fridge while the rest of the meal is prepared. Re-warm the chicken carefully/slowly before serving.

Taste soup for seasonings. Add a generous amount of black pepper and adjust salt (you will probably need to add quite a bit more salt, ~1.5 tsp). While the potatoes are cooking, you can smash them against the side of the pot to break up the potatoes and thicken the soup. Alternatively, at the end, you can smooth it out a bit with an immersion blender. Make sure to leave plenty of big chunks of potato, but blend enough to give a nice thick texture to the soup.

To serve the soup, ladle into a big bowl and top with shredded chicken. At the table pass around Aji salsa, capers, avocado, cilantro and sour cream to top the soup.

(Servings: 8-10, Cook time: 3 hrs., Difficulty: Easy)

Aji
from Fine Cooking

4 scallions (white and light green parts only)
1 medium tomato, peeled and seeded
1 small white onion, peeled
2 fresh Scotch bonnet or habanero chiles or 2 fresh hot red chiles, stems and
seeds removed (wear gloves, and don’t touch your eyes)
3 Tbs. fresh cilantro leaves
3 Tbs. white vinegar
1/4 tsp. kosher salt

In a food processor, pulse all the aji ingredients until they’re finely minced.  Transfer to a serving bowl.


foodforscot Rating:

Shanon (taste):  8/10
Scot (taste):  8/10
Effort:  5/5
Dishwashing Effort:  4/5

Tuesday, March 22, 2011

Banana Split Pie


Even though this banana split pie isn't some family recipe of mine, it does bring back many memories for me.  I can't remember all the times I have ever had it, but I do remember one specific moment in my life when it was a part of it (my life). 

My first job when I paid taxes.  I found income tax to be rude, by the way.  And social security?  That stuff was just messed up. 

Anyways, I was 14.  I went and got a working permit because I wasn't legal yet.  I applied and interviewed for a job at brand new, not even opened yet, grocery store.  They asked me weird questions that I probably had really awkward answers for.  They hired me.  And I am pretty sure anyone else who applied.  I bagged groceries for a while.  Then they put me as "sampling girl".  Sometimes I got to cut up apple pie and put it in little dishes with little spoons, but mostly I stood next to a container of cantaloupe and opened the lid for people to toothpick a piece.  It was really boring.

I eventually started mopping the floor in produce.  I am not sure if I was moving up or down the ladder, but it worked fine.  My friend and I had overlapping shifts sometimes and we would make up dances with our mops.  I am not sure why this wasn't ever a problem.  

Finally, in my last days as a grocery store employee, I worked for a while in the prepared food section.  You know, where the fried chicken and all those random deli salads are.  I made that stuff.  Mostly I just served it, but every once in a while, I'd get to put something simple together.  And one of the things was banana split pie!  

It is just a fun (and really easy) kid pie.  It is a graham cracker crust with a layering of bananas, vanilla pudding and whipped cream.  Then it it topped with nuts, chocolate syrup and a cherry.  You can make the pudding any way you want.  Make the Jello kind or make homemade.  You can even buy a pre-made graham cracker crust.  This is probably traditionally made with Cool Whip, but I just couldn't bring myself to go there.  I even tried.  But I found out it is frozen and non-dairy and it just weirded me out too much.  As a result, this pie probably needs to be eaten the day it is made otherwise the whipped cream will die.  This is a classic for me.  Also, obviously, I made mini versions.  

Banana Split Pie

5 unsalted butter, melted
1 1/2 cups graham cracker crumbs (about 10 graham crackers)
2 tablespoons sugar
4 cups of vanilla pudding, chilled
2 cups of heavy whipping cream
some powdered sugar
2 bananas, sliced
chocolate syrup
handful of chopped nuts (peanuts or pecans)
some maraschino cherries

To make graham cracker crust: Put oven rack in middle position and preheat oven to 350°F. Lightly butter pie 9- to 9 1/2-inch pie plate. Stir together all melted butter, graham cracker crumbs and sugar in a bowl and press evenly on bottom and up side of pie plate. Bake until crisp, 12 to 15 minutes, then cool on a rack to room temperature, about 45 minutes.

In cooled graham cracker crust, spread the 2 cups of chilled vanilla pudding in the bottom. Layer on the sliced bananas.

Whip cream and sweeten with powdered sugar, to taste. Fold half of the whipped cream into the remaining vanilla pudding. Spread the whipped cream/vanilla pudding mixture on top of the bananas. Top with the plain sweetened whipped cream. Drizzle on chocolate sauce, nuts and top with maraschino cherries.

(Servings: 8, Prep time: 1.5 hrs., Chill Time: 0-1 hr., Difficulty: Easy)


foodforscot Ratings:

Shanon (taste):  7/10
Scot (taste):  7/10
Effort:  2/5
Dishwashing Effort:  3/5

Wednesday, March 16, 2011

Milk Chocolate Hazelnut Cookies


Why is Nutella so good?  Why do I think it is ok to have it for breakfast when I am Europe?  

These cookies are obviously screaming Nutella.  But, if you make these, you need to follow three rules (I broke all of these at some point):

1.  Use blanched, skinless hazelnuts.  The skin is bitter.  
2.  Cut up a chunk of milk chocolate, don't use chips.
3.  Experiment with the baking temp and time to get the cookie the right (soft) consistency.


This is an interesting recipe because the dough needs to be refrigerated for at least 3-4 hours before baking.  We actually baked these to order over the week.  The dough is good for up to a week in the fridge.  But, unlike most "chocolate chip cookies", these honestly taste better completely cooled than they do warm.  

I did make some "high altitude" adjustments.  I think because of all the nuts and nut flour, these cookies do really well at high altitude regardless.  However, I did increase the temp and shorten the cooking time.  I did a little research online and it seems like others who have made these also decreased the baking temperature (by almost a half!)  And there was no indication that they were at high altitude.  

I have to say, I loved these!  There is tons of milk chocolate in these.  Normally, I put way less chocolate chips than what any recipe calls for.  I don't like an overwhelming amount of chocolate in my chocolate chip cookies.  But these...these are more like Nutella cookies.  Like chocolate cookies.  Finally!  I rate a dessert higher than Scot!


Milk Chocolate Hazelnut Cookies
from Flour by Joanne Chang

1 1/2 sticks butter, plus 1 tablespoon
2/3 cup granulated sugar
2/3 cup packed light brown sugar
2 eggs
1/2 teaspoon vanilla extract
1 1/2 cups blanched whole hazelnuts, toasted (remove skins)
1 1/2 cups unbleached all-purpose flour
1 teaspoon baking soda
3/4 teaspoon kosher salt
12 ounces milk chocolate, chopped into 1/2-inch pieces

Using a stand mixer, cream together the butter, granulated sugar, and brown sugar on medium speed for approximately 5 minutes (10 minutes if using a hand mixer), or until the mixture is light and fluffy. Stop the mixer a few times and use a rubber spatula to scrape the sides and bottom of the bowl to release any clinging butter or sugar.

Beat in the eggs and vanilla on medium speed for 2-3 minutes, or until thoroughly combined. Scrape the bowl again to make sure the eggs are thoroughly incorporated.

In a food processor, pulse 1/2 cup of the hazelnuts until ground to a fine powder (stop grinding once they are powdery; if you continue, they will become a paste). Roughly chop the remaining 1 cup hazelnuts.

In a medium bowl, stir together the ground and chopped hazelnuts, the flour, baking soda, salt, and chocolate. On low speed, slowly blend the flour mixture into the butter-sugar mixture and then mix just until the flour mixture is totally incorporated and the dough is evenly mixed.

For the best results, scrape the dough into an airtight container and let it rest in the refrigerator overnight (or at least for 3-4 hours) before baking. When you are ready to bake, position a rack in the center of the oven, and heat the oven to 350 degrees F (I baked mine at 365 degrees F).

Drop the dough in 1/4-cup balls onto a baking sheet, spacing them approximately 2 inches apart. Flatten each ball slightly with the palm of your hand.

Bake for 20-22 minutes (I baked mine for 5 minutes, rotated the pan 180 degrees and then baked for 2-3 minutes longer…even for sea level, I wouldn’t bake for 20 min., check every 5 min.), or until the cookies are golden brown on the edges and pale and slightly soft in the center. Let cool on the baking sheet on a wire rack for 5-10 minutes, then transfer the cookies to the rack to cool completely.

Note 1: Cookies can be stored in an airtight container at room temperature for up to 3 days. The unbaked dough can be stored in an airtight container in the refrigerator for up to 1 week.

Note 2: My adjustments are in italics. They may or may not be high altitude adjustments. All I know is that I baked four of these babies at 350 degrees F for 20 minutes and they were hard as a rock.

(Servings: 20-25 cookies, Prep time: 1 hr., Chill time: 3-4 hrs., Bake time: 40 min., Difficulty: Easy)


foodforscot Rating:

Shanon (taste):  8/10
Scot (taste):  7/10
Effort:  3/5
Dishwashing Effort:  4/5

Tuesday, March 15, 2011

Spaghetti with Salami, Fennel and Tomatoes


Fennel.  I love fennel.  But I haven't always been best friends with the fennel seed.  Ya know, they put it in sausage.  And usually when it is in my Italian sausage, I don't like it.  It is like, "yum, tasty sausage"...*crunch* explosion of fennel flavor...palate destroyed.  Throat on fire.

Fennel seeds also show up in some rye breads.  In fact, just last weekend, I was at the grocery store deciding on what rye bread to buy for my Reubens (corned beef...St. Patty's day...close enough).  I always get the dark brown loaf.  Scot said he wanted a lighter rye (random).  But I purposely made sure there were no stupid fennel seeds in my rye bread.  It is weird!  

Ok, maybe I am weird, because I know lots of people love the f. seed in both sausage and in rye bread.  

In conclusion, I was reluctant to put fennel seeds in this pasta.  I crushed them pretty good in the mortar and pestle.  I don't know what it was that was different about using them in this pasta, but I really liked it.  I thought maybe when combined with the fresh fennel, it balanced it all out.  Makes me wonder...maybe I just don't like bad Italian sausage that just happens to have fennel seeds in it?  Maybe the sausage makers should try crushing their fennel seeds a bit?  Who knows.  

Lastly, Scot loved this pasta dish.  He kept saying, "this tastes just like sausage".  He really likes sausage.  


Spaghetti with Salami, Fennel and Tomatoes
from Happy Days with the Naked Chef by Jamie Oliver

Extra virgin olive oil
5 ounces good spicy ltalian salami, sliced
2 cloves of garlic, peeled and finely sliced
1 tsp fennel seeds
1 bulb fennel, halved and finely sliced, feathery tops reserved and chopped
32 ounce can of plum tomatoes
1 dried chili, crumbled (optional)
Sea salt and freshly ground black pepper
1 lb dried spaghetti or linguine
2 handfuls of stale breadcrumbs
a sprig of fresh rosemary (optional)

Pour 2 good lugs of olive oil into a pan. Add your salami and your sliced garlic. Lightly crack the fennel seeds either in a pestle and mortar or with a knife and add to the pan. Cook for 1 minute on a low heat – the fat should cook out of the salami and it should begin to get crisp. Add your sliced fennel and stir, then put the lid on the pan and increase the heat to medium. Cook for 5 minutes, then add your tomatoes and even a little dried chili if you like. Cook slowly for 25 minutes until the mixture has thickened. Season to taste.

Cook your pasta in a large pot of fast boiling salted water until al dente. While it’s cooking, make some crunchy breadcrumbs, to give this dish a great texture and crunch. Just get a couple of good handfuls of coarse breadcrumbs and fry them with 4 or 5 tbsp of extra virgin olive oil until they go crispy. Throw in some rosemary sprigs as well to give extra flavor. When your pasta is cooked, drain it in a colander and immediately toss it with your lovely tomato sauce. Serve in a large bowl and sprinkle with the green fennel tops and your crispy breadcrumbs.

(Servings: 4, Prep time: 15 min., Cook time: 25 min., Difficulty: Easy)


foodforscot Ratings:

Shanon (taste):  7/10
Scot (taste):  9/10
Effort:  2/5
Dishwashing Effort:  3/5

Sunday, March 13, 2011

Honey-Cinnamon Ice Cream


When I was in 5th or 6th grade, I got my first job.  Illegal, I know.  My mom was the manager for the local farmer's market.  I would go with her to the Wednesday night farmer's market (left school early!).  At first, I just went for fun.  I'd run errands for people or just help the different vender's with various things.  Or played with another one of the younger girls.  

At one point, one of the farmers, Gene, asked me to work for him behind the stand.  Gene's Green Thumb.  He sold all sorts of veggies, apples, and honey.  And, at first, he paid me in honey sticks.  I LOVED honey sticks.  They are just honey.  In a stick.  After enough work, I was well stocked with honey and he had to supplement the payment with real cash.  

Growing up on Gene's honey sticks, I always laughed at the sight of "flavored" honey sticks, I would see at touristy places.  Why would you need to flavor honey?  It is perfect just the way it is.  Especially the honey from Gene's farm.  Although, the color would vary because the bees would get the nectar from a variety of plants on the farm, my favorite was always the lighter honeys.  I am no expert on which plant makes the darker or lighter honeys, but all I know is what I like.  

I ended up working for Gene, off and on, in the summers, for about 9 some years.  It is the best job I have ever had.  I usually worked at the stand, selling produce.  My teenage self giving people advice on how to prepare the different produce.  Which apple to use for what.  "Don't feed honey to your baby."  "Yeah, that is how brussels sprouts really grow."

So, honey brings me back.  I love (and often prefer) any dessert with honey in it.  When I saw this honey-cinnamon ice cream recipe in my awesome new cookbook, flour, it was like a match made in heaven.  Cinnamon ice cream is MY ice cream of choice.  Sweeten it with honey instead of sugar?  Please.  She mentions that honey often contributes to a exceptionally smooth ice cream and I agree.  And have you ever eaten like 10 honey sticks in a row?  No?  Weird.  Well, if you do, you get this kind of coating in the back of your throat.  In fact, your entire mouth has a similar feeling.  It is great.  This is what happens while eating this ice cream, as well.  I haven't had that feeling since I used to eat 10 honey sticks in a row.  And I love it.  


Honey-Cinnamon Ice Cream
from flour by Joanne Chang with Christie Matheson

2 cups (480 grams) milk
2 cups (480 grams) heavy cream
1 cinnamon stick, 2 inches long
8 egg yolks
3/4 cup (255 grams) honey
2 tablespoons sugar
1/2 teaspoon ground cinnamon
1/4 teaspoon kosher salt

In a medium saucepan, combine the milk and cream. Break up the cinnamon stick into several pieces and toss them into the pan. Scald the milk mixture over medium-high heat (bubbles start to form around the edge of the pan, but the liquid is not boiling). Remove from the heat and let the cinnamon steep in the milk mixture for about 1 hour.

In a medium bowl, whisk the egg yolks until blended, and then slowly whisk in the honey, sugar, and ground cinnamon until combined. Return the milk mixture to medium-high heat and scald again. Slowly add the hot milk mixture to the egghoney
mixture, a little at a time, whisking constantly. When all of the hot milk mixture has been incorporated, return the contents of the bowl to the saucepan, and return the saucepan to medium heat. Cook, stirring continuously with a wooden spoon, for 6 to 8 minutes, or until the mixture thickens and coats the back of the spoon. The mixture will seem watery at first, then it will start to steam, and then it will start to develop a little body and get thicker. Remove from the heat and immediately strain through a fine-mesh sieve into an airtight container. Whisk in the salt. Cover and refrigerate for at least 2 hours, or until cold, or up to overnight.

Churn in an ice cream maker according to the manufacturer's directions. When the ice cream has finished churning, freeze it for at least 2 hours to allow it to ripen. During the ripening process, the ice cream becomes harder and smoother and the flavors more fully develop. The ice cream can be stored in an airtight container in the freezer for up to 1 week.

(Servings: 1 1/4 qts, Prep time: 1 hrs., In active prep time: 5 hrs., Chill time: 30 min., Difficulty: Intermediate)


foodforscot Ratings:  

Shanon (taste):  8/10
Scot (taste):  8/10
Effort:  3/5
Dishwashing Effort:  3/5

Wednesday, March 9, 2011

Potato and Yam Soup with Bacon and Spinach


As I walked to the bus after school/work the past couple of days, I have been shocked by the light.  The sun!  I forgot about you!.  On work days.  

How does this happen?  Every.  Single.  Year.  Having sunlight is like surprise gift for me.  I am so lucky that I am clueless.  

I should also talk about how it is warming up.  But living in Boulder, it isn't really ever that cold...for that long.  Plus, it seems to take me about a month longer than everyone else to phase out the gloves, hats, and coats.  It has happened more than a few times that I find myself with all the fixings and the guy next to me is wear shorts and t-shirt.  I basically don't expose my skin to the fresh air until mid-April.  

I love soup.  JTLYK.


Potato and Yam Soup with Bacon and Spinach
from bon appétit Magazine, March 2011

6 slices applewood-smoked bacon (about 6 ounces), cut crosswise into 1/2 inch pieces
1 large onion, chopped
2 garlic cloves, pressed
1 teaspoon dried thyme
1 14.5-ounce can diced tomatoes in juice
1 10-ounce yam (red-skinned sweet potato), peeled, quartered lengthwise, cut crosswise into 1/3-inch-thick slices
2 medium Yukon Gold potatoes (about 10 ounces), quartered lengthwise, cut crosswise into 1/3-inch-thick slices
2 medium red-skinned potatoes (about 10 ounces), quartered lengthwise, cut crosswise into 1/3-inch-thick slices
4 to 5 cups low-salt chicken broth
1 5- to 6-ounce package baby spinach

Sauté bacon in large pot over medium heat until crisp. Transfer to paper towels to drain. Add onion to drippings in pot; increase heat to medium-high and sauté until beginning to brown, about 7 minutes. Add garlic and thyme; stir 1 minute. Add tomatoes with juice. Stir until almost all the liquid evaporates, about 2 minutes. Add all potatoes; stir to coat. Add 4 cups broth; bring to boil. Reduce heat to medium-low, cover with lid slightly ajar. Simmer until potatoes are tender, stirring occasionally, 10 to 12 minutes. Add spinach and bacon; stir until spinach wilts, about 1 minute, adding broth by 1/2 cupfuls if too thick. Season with salt and pepper.

(Servings: 4-6, Prep time: 30 min., Cook time: 20 min., Difficulty: Easy)


foodforscot Ratings:  

Shanon (taste):  7/10
Scot (taste):  7/10
Effort:  2/5
Dishwashing Effort:  2/5

Tuesday, March 8, 2011

Orzo Salad with Celery, Radishes, and Dill


When I first started cooking a lot, I made tons of pasta salad.  Not sure what it is about it, but me and pasta salad have always been like *that*.  They are great for an side dish that needs to be made in advance.  They are great for potlucks and as a grill out side.  


I was drawn to this recipe in bon appétit magazine because of three things:

1.  I have several (hundreds) boxes of orzo.  
2.  Our dill is...ready.  
3.  Goat cheese.

Ok, but I haven't had goat cheese in a loooong time.  And I need it in my life.  Why have I gone so long without it?  I must be delusional.  

I have a similar orzo salad that I posted last summer.  It is more of a mustard-dill dressing and has feta, tomatoes, green onions and cucumbers.  This new salad has a combination of dill, celery, radishes, tomatoes and goat cheese.  And the dressing is just oil and vinegar (white balsamic!)  Very tasty.  I love celery and radishes together.  And separate.  


Orzo Salad with Celery, Radishes, and Dill
from bon appétit Magazine, March 2011

2 cups orzo
1 1/2 cups very thinly sliced celery (about 3 stalks)
1 pint grape tomatoes, halved
1 bunch radishes, trimmed, thinly sliced
2/3 cup chopped fresh dill
5 tablespoon olive oil
4 tablespoon white balsamic vinegar
1 cup (about 5 ounces) crumbled soft fresh goat cheese

Cook orzo in large pot of boiling salted water until tender but still firm to bite, stirring occasionally. Drain. Rinse under cold water; drain. Transfer to large bowl; add celery, tomatoes, radishes, and dill.

Whisk oil and vinegar in small bowl. Season with salt and pepper and pour over salad; toss to coat. Season salad with salt and pepper. Fold in half of goat cheese.  Sprinkle remaining cheese over and serve.

(Servings: 8 sides, Prep time: 20 min., Cook time: 20 min., Difficulty: Easy)


foodforscot Ratings:  

Shanon (taste):  7/10
Scot (taste):  9/10
Effort:  2/5
Dishwashing Effort:  3/5

Sunday, March 6, 2011

Salmon with Puff Pastry and Pesto


Scot restarted our window herb garden a month or so ago.  And it is exploding right now.  My only goal this week when meal planning was to make sure each meal used a large amount of herbs.  What a great problem to have!

So, naturally, I made pesto with all the delicious basil we have.  This was my first time trying pesto with walnuts instead of pine nuts.  And to be honest, I couldn't even tell the difference.  Since pine nuts are more expensive, I will probably always just make it with walnuts now.  

This meal is very quick to throw together (if you have leftover pesto or store bought pesto).  Puff pastry is always fun to use.  I have only ever had the frozen stuff.  But if you are feeling particularly motivated (insane), you can make your own too.


Salmon with Puff Pastry and Pesto
by Giada De Laurentiis via FoodNetwork

4 pieces of purchased puff pastry, each cut to be just larger than a piece of salmon
4 (4 to 6-ounce) pieces salmon
1/4 cup sliced almonds
1/4 cup purchased pesto
2 tomatoes, sliced

Preheat the oven to 400 degrees F.

On a foil-lined baking sheet, place the 4 pieces of puff pastry. Also place the 4 pieces of salmon, being careful to make sure they are not touching. Sprinkle each piece of salmon with 1 tablespoon of the sliced almonds. Bake for 10 minutes. To serve, place each piece of puff pastry on a plate. Top each puff pastry with 1 tablespoon of pesto. Top the pesto with 2 slices of tomatoes each. Top the tomatoes with the salmon and serve.

(Servings: 4, Prep time: 10 min., Cook time: 15 min., Difficulty: Easy)


foodforscot Ratings:

Shanon (taste):  7/10
Scot (taste):  8/10
Effort:  2/5
Dishwashing Effort:  2/5

Wednesday, March 2, 2011

Ham, Black Bean and Corn Pizza with Fontina Cheese


Having pizza every night is fine if you put corn on it.  And black beans.  Those things are healthy.  

It is like...you think Mexican...but then you get a bite of Fontina.  Fontina ain't Mexican!  

That line should definitely be erased.  It makes no sense.  

I really have nothing to say.  But I already got this far.  


Ham, Black Bean and Corn Pizza with Fontina Cheese

pizza dough (1/2 this recipe)
1/2 cup of tomato sauce
1/4 cup of black beans, drained and rinsed
1/4 cup of frozen corn
1 cups of shredded mozzarella (I used whole milk)
4 thin slices of ham
2-4 ounces of Fontina cheese, sliced
2 green onions, chopped
1 tsp olive oil
pepper

Place pizza stone in oven on middle/bottom rack and preheat to 500 degrees F for at least 30 minutes.

Roll/stretch out dough. Using a pastry brush, brush the 1 tsp of olive oil on the outer rim of the dough. Spoon and spread out the tomato sauce on to the dough, leaving a half inch border around the edge. Add black beans, corn, shredded mozzarella, ham, fontina cheese and top with green onions. Bake for 10-15 minutes or until cheese and crust are golden brown.

(Servings: 4, Prep time: 30 min., Cook time: 15 min., Difficulty: Easy)


foodforscot Ratings:

Shanon (taste):  6/10
Scot (taste):  8/10
Effort:  1/5
Dishwashing Effort:  1/5

Tuesday, March 1, 2011

Buffalo and Mushroom Pizza


After arriving home from a trip that was full of fun, subzero temperatures and failing at life...I needed to cook.  I needed some success in my life.  I decided to dig deep into my roots (Omaha, NE) and make a pizza that you can only find in the city of beef.  Although, I didn't use beef.  I wanted to make it seem like a big deal. 

See in Omaha, you can always get ground beef on pizza.  Also known as "hamburger".  It is weird.  But I love it.  Check out my Restaurant page; all the Omaha pizza joints listed have a hamburger pizza on the menu.  And the hamburger and mushroom combo is classic.  

Since I am a CU Buff, I decided to be fancy and use ground buffalo.  Not sure how mentioning that our mascot is a buffalo makes eating buffalo meat sound like a good idea.  


But really, did you know at the CU football games, a real life buffalo runs a circle around the field.  Cowboys (and sometimes girls) are holding various ropes to direct him.  It looks dangerous.  It also looks like there is no way those cowboys could run any faster.  And usually I fear for the cheerleaders lives.  


Did you also know that our fake buffalo mascot, Chip, has parents that come during Family Weekend?  I thought it was hilarious.  But I am kind of lame.  


Buffalo and Mushroom Pizza

pizza dough (1/2 of this recipe)
2 tbsp olive oil
1/2 a medium onion, diced
6-8 medium Cremini mushrooms, diced
1/3 lb of ground bison meat or ground beef
1 tsp olive oil
1/2-1 cup of tomato sauce
4 tbsp of Parmesan cheese, grated
1-2 cups of shredded mozzarella (I used whole milk)
salt and pepper

Place pizza stone in oven on middle/bottom rack and preheat to 500 degrees F for at least 30 minutes.

In a medium skillet, heat up the 2 tbsp of olive oil over medium-high heat. Add onions and cook for 2-3 minutes. Add mushrooms and cook until soft. Add meat and cook until just done or slightly underdone. Don’t overcook. Season mixture with salt and pepper.

Roll/stretch out dough. Using a pastry brush, brush the 1 tsp of olive oil on the outer rim of the dough. Spoon and spread out the tomato sauce on to the dough, leaving a half inch border around the edge. Add meat mixture, a layer of Parmesan cheese, and top with mozzarella. Bake for 10-15 minutes or until cheese and crust are golden brown.

(Servings: 4, Prep time: 30 min., Cook time: 15 min., Difficulty: Easy)


foodforscot Ratings:

Shanon (taste):  7/10
Scot (taste):  8/10
Effort:  2/5
Dishwashing Effort:  2/5