Showing posts with label sweets. Show all posts

Monday, June 3, 2013

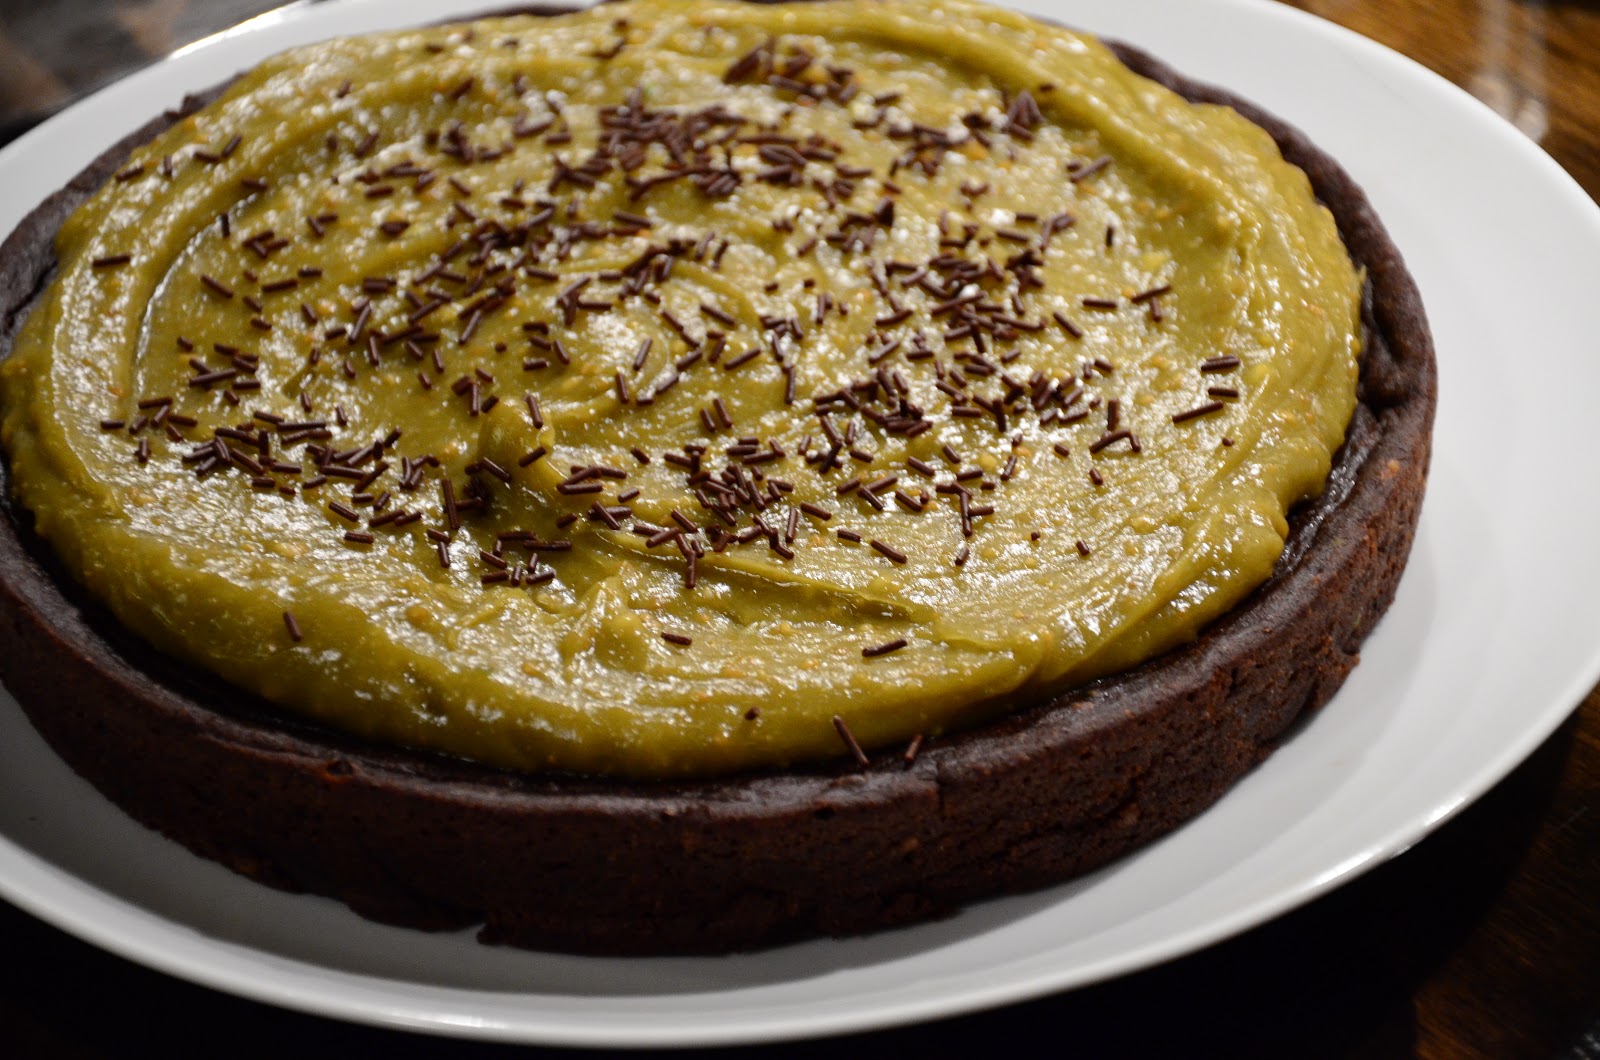
Chocolate Cake with Avocado Peanut Butter Frosting


Things have happened.  I have thought about my blog come back on and off for the past year.  Where have I been?  Nowhere in particular that forced me to stop blogging.  I just fell of the wagon and never got back on.  Now a lot has happened and I don't know where to start.

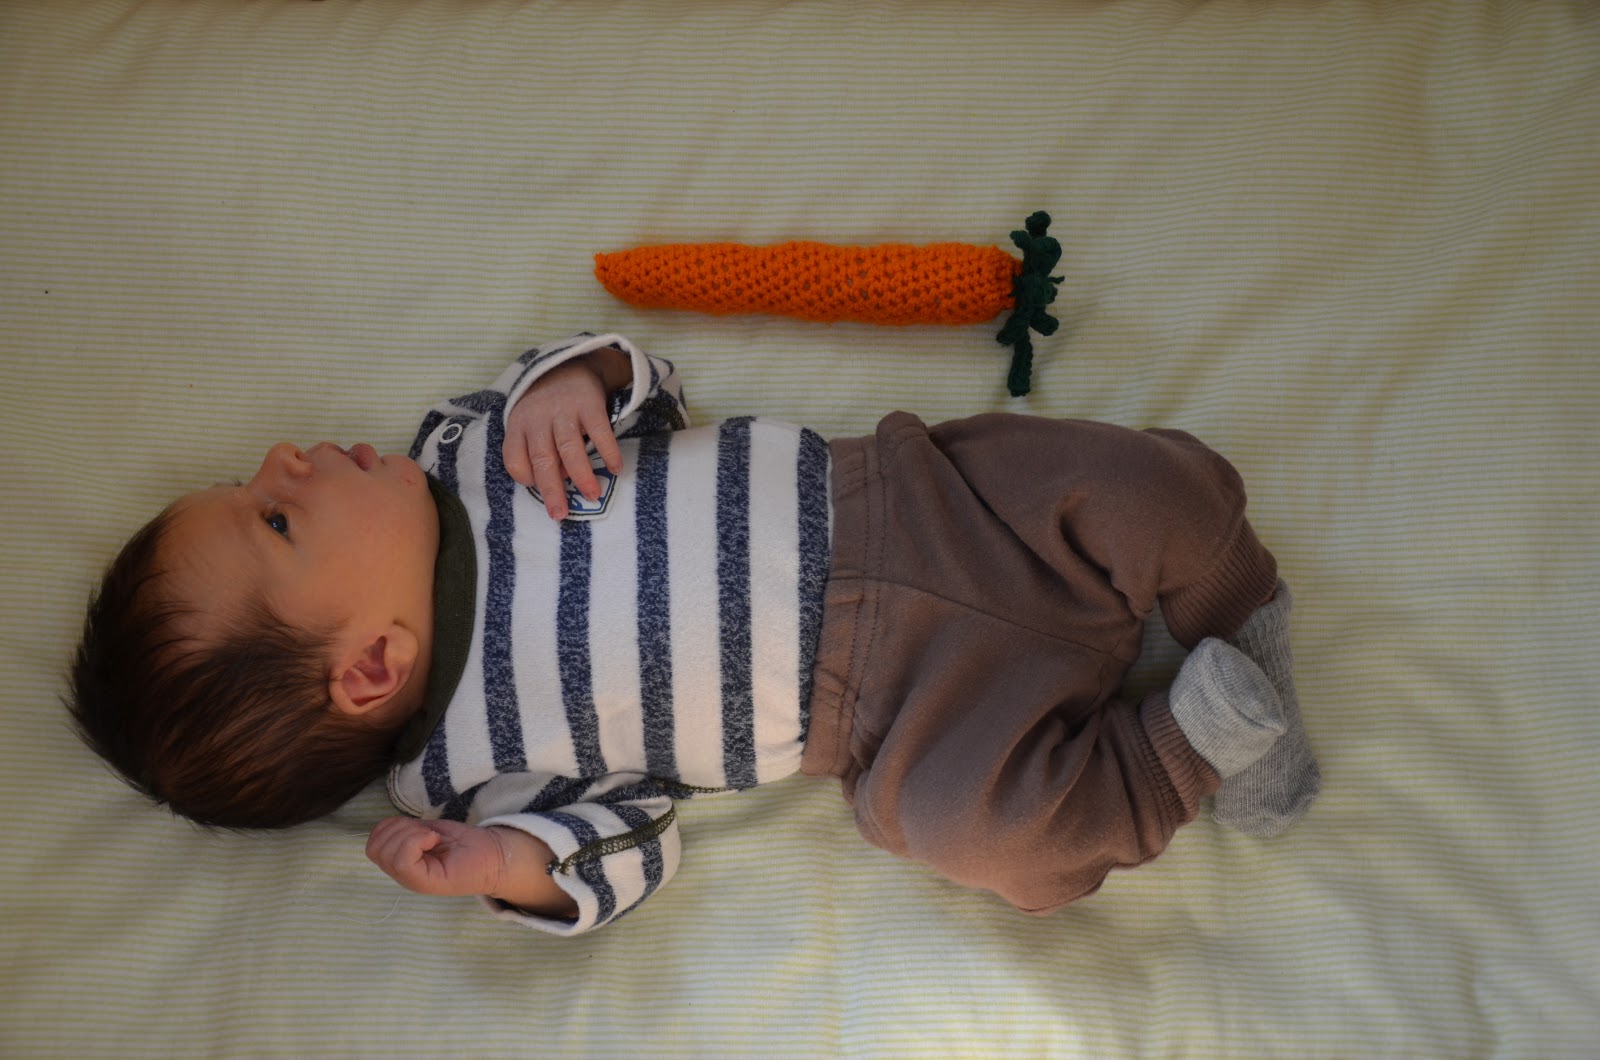
I was impregnated.  Grew a baby.  Now, we have little Birk Oliver!

He can't eat food yet, but it sure will be fun when he can.  I am quite enjoying him being the adorable baby that he is, so I am in no rush.  
So, that was one big thing that happened.  The other...Scot and I have crossed over to the vegetarian world.  We have always been so close.  But now we are closer.  We basically don't eat meat anymore.  For all practical purposes, we are vegetarians.  For the unpractical purposes, I talk Scot into eating bacon with me zero, once, or twice a month.

The thing is...Scot is a much better vegetarian than me.  He would probably never eat meat again if it weren't for me.  Something I would have never predicted when I met 21 year old Scot.  Little Birk will now grow up vegetarian.

What is worse, we feel guilty eating any animal protein (kidding about the worse thing).  Not that it stops us.  We have done little things like replacing our milk with almond milk.  Thinking more about whether dairy is necessary for different dishes.  We have experimented with vegan favorites like chia seeds instead of eggs, coconut oil, non-dairy milks, etc.

What I am trying to say is...please don't be scared away!  I am still a true foodie.  Cooking vegetarian is easy.  Cooking vegan is actually fascinating.  I am still mostly human.

This year for Scot's birthday, he tasked me with the impossible.  Make him a cake that is healthy so that when he eats a piece everyday for the week following...he doesn't feel AS guilty.  What does healthy mean?  Vegan.  And no white sugar or flour.  So gross, basically.

I told him I couldn't do the refined flour/sugar thing.  It is your birthday not national diabetes awareness day.  But I almost achieved the goal.


I ended up making a chocolate cake.  It is sweetened with maple syrup.  The fat comes from an avocado.  Flour is of the whole wheat variety.  It was a solid chocolate cake.  I underbaked it on purpose and it was anything but dry.

For frosting, I made an avocado frosting.  This has been on my radar for about 5 years.  Replace the butter in frosting with an avocado.  I was most excited to have a beautiful green frosting.  This limited the additional flavor additions.  I ended up going with peanut butter and avocado frosting since it would leave the green.  I would imagine a chocolate avocado frosting would be delicious too, but not green.  Since I used freshly ground peanuts, my frosting was not as smooth as the original.

The frosting recipe is a recommendation at best.  And it has the one nasty, illegal ingredient:  powdered sugar!  Hopefully we survive.

In true foodforscot fashion, I made this late at night.  So enjoy the horrible photos!  But seriously, Scot did very much enjoy his birthday cake.  He ate the entire thing, except the one piece I had on his birthday.  It is really everything Scot is about in cake form.

PS:  Scot is the father.

Chocolate Cake with Avocado Peanut Butter Frosting
adapted from The Diva Dish

For cake:
1.5 cups whole wheat pastry flour
1/3 cup cocoa powder
1 tsp. baking soda
½ tsp. salt
1 avocado, mashed
1 cup almond milk
¾ cup maple syrup
2 tsp. vanilla
1 tsp. apple cider vinegar
handful of chocolate chips (optional)

For Frosting:
1 avocado, mashed
1-2 cups powdered sugar
1-2 tbsp almond milk
½ cup peanut butter (I used freshly ground)

For Cake: Mix dry ingredients in a bowl and set aside. In a separate bowl, mix wet ingredients until combined. Make sure avocado isn’t lumpy (it will probably be a little lumpy, just saying).

Add wet to dry and mix until incorporated.

Pour into a greased 8-inch cake pan and bake in a preheated 350 degree oven for about 20 minutes (check every few minutes after 20 until done).

Once cake is done, remove from oven and let cool completely.

For Frosting: Blend all the ingredients in a food processor until creamy.

Spread frosting on cake and sprinkle with some chocolate jimmies!

(Servings: 6-8, Prep time: 30 min., Bake time: 30 min., Frost time: 20 min., Difficulty: Easy)

Printable Version

foodforscot Ratings:

Shanon (taste): 6/10
Scot (taste): 8/10
Effort: 1/5
Dishwashing Effort: 2/5

Monday, August 29, 2011

Oatmeal Butterscotch Cookies


I have been kind of all over the place lately.  Probably 7 out of the past 8 weeks, I have been without my own kitchen.  Or without my kitchen stuff.  So, I have borrowed plenty of people's kitchens.  And made lots of salads and sandwiches.  And smoothies, because for some reason a blender was one of the kitchen tools I have kept by my side (and my knives, which now go everywhere with me).  Now, I am finally back at home.  With all my kitchen gear.  I was so ready to cook and eat real food.  And eat whatever I want.  And to eat VEGETABLES!  Summer is almost over!  Ahhhh!

Unfortunately, Hurricane Irene has left us without power...in our kitchen.  We are pretty lucky since tons of people have no power at all.  We live by a main road so we got our power turned back on right away.  However, there is some damage and our whole house is only getting half the power.  We will just be using our grill and eating all the delicious fresh produce available right now.  The tomatoes are completing my life.  Why can't someone invent a way to eat summer tomatoes all year round?

Anyways, I just returned home from one heck of a wedding celebration.  Weddings are somewhat life-changing.  Each one in their own way.  I love participating in a close friend's wedding and then meeting all of her close friends and family.  I feel like weddings make me love people again.  And relationships.  


I made these cookies for the bridal shower.  Although the entire menu for the shower was inspired by the bride (lots of comfort food), these cookies were my own selfish preference.  During the shower and bachelorette party, everyone was raving about the other options (Cookie Dough Truffles and Lemon Poppyseed Cookies) and it seemed to me that many people didn't even try the oatmeal cookies.  However, I couldn't stop thinking about them.  I normally can control myself around sweets.  I usually get sick of whatever I make after eating it once or twice.  But I probably ate at least 15 of these cookies.  I gave some to Scot's grandparents when we went over there for dinner.  They ate them the next morning (for breakfast, which by the way is an excellent idea).  Grandma R. called me up immediately after finishing off the entire batch I gave her and said they are the best thing ever.  I had a similar (somewhat emotional) reaction myself, so I was so glad to share the same taste with Grandma R.  

These are a soft oatmeal cookie with butterscotch chips, toffee bits, and a little shredded coconut.  They have some flour in them which I find essential for soft, chewy, non-flat oatmeal cookies.  One of my favorite cookies in a long time.  


Oatmeal Butterscotch Cookies
originally from Taylor Takes a Taste via Annie’s Eats

3/4 cup all-purpose flour
1/2 tsp. baking soda
1/2 tsp. ground cinnamon
1/4 tsp. salt
8 tbsp. unsalted butter, at room temperature
1/2 cup brown sugar
1/4 cup granulated sugar
1 large egg
1/2 tsp. vanilla extract
1 1/2 cups old fashioned oats
3/4 cup shredded coconut
1/2 cup butterscotch chips
1/4 cup toffee bits

Preheat the oven to 350° F. Line baking sheets with silicone baking mats or parchment paper. In a bowl, combine the flour, baking soda, cinnamon and salt.  Stir to blend, and set aside. In the bowl of an electric mixer, combine the butter and sugars and beat on medium-high speed until light and smooth, about 2-3 minutes. Beat in the egg until incorporated. Blend in the vanilla. With the mixer on low speed, mix in the dry ingredients just until incorporated. With a spatula, fold in the oats, coconut, butterscotch chips and toffee bits until evenly combined.

Drop scoops of dough (about 2 tablespoons each) onto the prepared baking sheets, a few inches apart. Bake for 12-15 minutes, until just set and light golden, rotating the pans halfway through baking. Let cool on the pans about 5 minutes, then transfer to a wire rack to cool completely.

(Servings: 24 cookies, Prep time: 30 min., Bake time: 30 min., Difficulty: Easy)


foodforscot Ratings:

Shanon (taste):  10/10
Scot (taste):  8/10
Effort:  2/5
Dishwashing Effort:  2/5

Thursday, June 30, 2011

Snickerdoodle Cupcakes


I was home for my little sister's graduation party.  She graduated from high school.  She used to be 3 years old.  Now she is 18.  It makes no sense how these things happen.  

I am 9 years older than this little sister.  9 years!  Which is exactly how long I have been in post-"high school" school.  Therefore, we graduated together this year.  Me from all school forever.  Her from high school.  This was something I always thought about once I decided to go ahead and do the 5 year grad school program.  


Anyways, growing up, I was really a second mom for her.  Not in like a loving, caring kind of way.  In more of a bossy kind of way.  I picked out her outfits.  I did her hair.  I fed her.  All of these things were non-negotiable.  She never once complained or argued with my decisions.  That is the glory of 9 years separation.  It is not too much older, where we didn't even know each other.  But old enough where ANYthing I said goes.  Having a little sister slave was a wonderful, wonderful thing.  


During her pre-teen/teenage years, she was a mild inconvenience for me.  Although she was probably 400 times better than I was when I was a teenager, she still had a 'tude.  She sometimes didn't like the outfits I picked out.  She said things like "that is really more your style than mine".  Ughs!  She texted while we were having important conversations.  I should say:  she actually never wasn't texting someone from the age of 14-17.  She had boyfriends.  Ew.  She had the nerve to actually have opinions on things.  WHO does she think she is?


Now, she has grown into quite the lady.  She lost most of her 'tude.  I have gained back some of my older sister respect.  She listens to my fashion opinion.  She still texts like a crazy person and likes boys, which is super gross, but I will take what I can get.  And now, she has graduated into official adult-ness.  Tear.  


For her partay, my sister and I made 200+ mini cupcakes and spelled out her name with them.  Scot designed the layout and figured out with x many white cupcakes, y many brown cupcakes, this is the optimal design.  The two cupcakes flavors were Snickerdoodle and Cookies N' Cream.  The snickerdoodle cupcakes are a cinnamon cupcake with a vanilla buttercream and a mini snickerdoodle on top.  The cookies n' cream cupcakes were a chocolate cupcake with a cream cheese frosting (with oreo crumbles mixed in) and an Oreo on top.  We wanted the colors to be opposite so that is why we laid the cookies flat on top of the cupcake.  This is also allowed imperfect piping.  I was not a fan of the Cookies N' Cream cupcakes.  I mostly didn't like the chocolate cake part.  But these Snickerdoodle cupcakes were spot on.  Delish.  


Snickerdoodle Cupcakes
from Annie’s Eats (cupcakes, frosting, cookies)

For the cupcakes:
11/2 cups all-purpose flour
11/2 cups cake flour, sifted
1 tbsp. baking powder
1 tsp. salt
1 tbsp. ground cinnamon
2 sticks (1 cup) unsalted butter, at room temperature
13/4 cups sugar
4 large eggs
2 tsp. vanilla extract
11/4 cups milk

For the frosting:
20 tbsp. (2 1/2 sticks) unsalted butter, softened 2 1/2 cups confectioners’ sugar,
sifted 1/8 tsp. salt 2 tsp. vanilla extract 2 tbsp. heavy cream

For garnish:
1 tsp. ground cinnamon (optional)
2 tbsp. sugar (optional)
Mini snickerdoodles (1/2 of recipe below)

To make the cupcakes, preheat the oven to 350° F. Line cupcake pans with paper liners. Combine the flours, baking powder, salt and cinnamon in a medium bowl; whisk to combine. In the bowl of an electric mixer, beat the butter and sugar on medium-high speed until light and fluffy, about 3 minutes. Beat in the eggs one at a time, mixing well after each addition. Blend in the vanilla. With the mixer on low speed, add in the dry ingredients in three additions alternating with the milk, beginning and ending with the dry ingredients. Beat each addition just until incorporated.

Divide the batter evenly between the prepared cupcake liners, filling each three quarters full. Bake, rotating the pans halfway through, until a toothpick inserted in the center comes out clean, about 18-20 minutes (8-10 minutes for minis). Allow to cool in the pans about 5 minutes before transferring to a wire rack to cool completely.

To make the frosting, in a stand mixer fitted with the whisk attachment, beat butter at medium-high speed until smooth, about 20 seconds. Add confectioners’ sugar and salt; beat at medium-low speed until most of the sugar is moistened, about 45 seconds. Scrape down the bowl and beat at medium speed until mixture is fully combined, about 15 seconds. Scrape bowl, add vanilla and heavy cream, and beat at medium speed until incorporated, about 10 seconds. Then increase the speed to medium-high and beat until light and fluffy, about 4 minutes, scraping down bowl once or twice.

Frost the cooled cupcakes as desired. In a small bowl, whisk together the ground cinnamon and sugar. Sprinkle a pinch of the cinnamon-sugar on top of each frosted cupcake. Garnish with mini snickerdoodles.

(Servings: 60 ish Minis, Prep time: 30 min., Cook time: 1 hr., Difficulty: Easy)

Mini Snickerdoodles

2 1/4 cups (11 1/4 oz.) unbleached all-purpose flour
2 tsp. cream of tartar
1 tsp. baking soda
1/2 tsp. salt
12 tbsp. unsalted butter, softened but still cool
1/4 cup vegetable shortening
1 1/2 cups (10 1/2 oz.) granulated sugar, plus 3 tbsp. for rolling dough
2 large eggs
1 tbsp. ground cinnamon, for rolling dough

Adjust oven racks to upper- and lower-middle positions. Preheat the oven to 400 degrees F. Line baking sheets with parchment paper. In a medium bowl, whisk together the flour, cream of tartar, baking soda and salt; set aside. In the bowl of an electric mixer fitted with the paddle attachment, cream the butter, shortening and 1 1/2 cups sugar on medium speed until well combined, 1 to 1 1/2 minutes. Scrape down the sides of the bowl, add the eggs, and beat again until combined, about 30 seconds. Add in the dry ingredients and beat at low speed until just combined, about 20 seconds.

In a small, shallow bowl, combine the 3 tablespoons sugar and the cinnamon for rolling the dough. Stir or shake well to combine. Working with a little dough each time, roll the dough into 1/2-inch to 3/4-inch balls. Roll the balls in the cinnamon sugar mixture and place them on the prepared baking sheets, about 2 inches apart. Use a drinking glass with a flat bottom to gently flatten the dough balls (butter the bottom of the glass before starting, and dip it in sugar between cookies if it begins to stick).

Bake until the edges of the cookies are beginning to set and the center are soft and puffy, 8-10 minutes, rotating the baking sheets front to back and top to bottom halfway through the baking time. Let the cookies cool on the baking sheets 2-3 minutes before transferring them to a wire rack to cool completely.

(Servings: 120, Prep time: 30 min., Cook time: 1 hr., Difficulty: Easy)


foodforscot Ratings:

Shanon (taste):  9/10
Scot (taste):  8/10
Effort:  4/5
Dishwashing Effort:  4/5

Saturday, May 21, 2011

Chocolate Toffee Shortbread Bars


My favorite quote at Jimmy John's is, "Every driver believes they are an above average driver."

One time, when I was like...6/7/8, we were sitting at the dinner table.  Me and the fam (minus the little sister who was negative years old).  I am sure my other little sister was babbling on and on about something really random like ponies, tree trunks or overalls.  My brother...he was definitely picking his nose.  I was probably being perfect.  As usual.  My dad was staring out the window.  His eyes were glazed over and he was totally out of it.  I asked, "hey dad, what are you staring at?"  His answer was, "peace".

Another time, I was driving and this lady behind me was bumper huggin' me.  I made a right turn into a parking lot.  Parked.  Got out.  Then all of a sudden that same lady was all up in my face, straight up yelling at me for not using my blinker when I made my right hand turn.  I was making a right hand turn into a car repair shop to fix my blinker light bulb, which was burnt out.  I didn't tell her that.  She was really mad.  This was at least 6/7/8 years ago.    

I made these chocolate toffee shortbread bars for those cookie baskets I gave out around the Whole Foods video contest time. They are pretty simple to make, ship well and taste good for about a week after making them.  All requirements for successful cookie baskets.  Kinda like a candy bar.  

Chocolate Toffee Shortbread Bars

For the shortbread base:
11/2 cups all-purpose flour
1/2 tsp. salt
1/4 tsp. ground cinnamon
2 sticks (1 cup) unsalted butter, at room temperature
1/2 cup brown sugar, packed
1/4 cup granulated sugar
1 tsp. vanilla extract
3 oz. bittersweet or semisweet chocolate, finely chopped

For the topping:
6 oz. bittersweet or semisweet chocolate, finely chopped
11/2 cups toffee bits

Preheat the oven to 375° F. Line a 9 x 13″ baking dish with foil and spray lightly with cooking spray. To make the shortbread, combine the flour, salt and cinnamon in a small bowl; stir to blend and set aside. In the bowl of an electric mixer, combine the butter and sugars and beat on medium-high speed until light and fluffy, about 3 minutes. Blend in the vanilla. With the mixer on low speed, beat in the dry ingredients just until incorporated. Stir in the chopped chocolate until evenly distributed.

Transfer the dough to the prepared baking dish and press into an even layer covering the bottom of the pan. Bake for 18-20 minutes, or until the shortbread is bubbling. Remove the pan from the oven and transfer to a wire rack.

Sprinkle the 6 ounces of chopped chocolate evenly over the top of the cookie base. Cover the pan with foil and let sit for 5 minutes. Remove the foil and use an offset spatula to spread the melted chocolate evenly over the crust in a thin layer.  Immediately sprinkle the toffee bits over the melted chocolate and press down gently to adhere. Let the bars cool to room temperature. Once the pan has cooled, you may speed chilling by transferring to the refrigerator or freezer.  When the topping is set, remove from the pan, transfer to a cutting board and
slice into bars.

(Servings: 30 bars, Prep time: 30 min., Cook time: 30 min., Difficulty: Easy)


foodforscot Ratings:

Shanon (taste):  7/10
Scot (taste):  8/10
Effort:  2/5
Dishwashing Effort:  3/5

Tuesday, May 17, 2011

Cinnamon Sugar Biscotti


Biscotti is an overcooked biscuit.  But since it is Italian, we consider it a specialty rather than a mistake.  Now, I know it is technically "twice baked" not "overbaked", but in all other matters in life, this delicious treat would be considered a bad biscuit.  

How about some respect?  The technique for biscotti was likely developed in order to have nonperishable food for traveling and for the army.  So, that is a good idea.

Because I am high maintenance, I love to dip biscotti in coffee, but can't stand drinking the coffee that has been dipped in.  It is all crumby.  Also, in Italy, biscotti is often dipped in a sweet dessert wine.  

Cinnamon is my favorite and this is a classic biscotti recipe.  


Cinnamon Sugar Biscotti

2 cups flour
1 1/2 teaspoons ground cinnamon
1 teaspoon baking powder
1/4 teaspoon salt
1 cup granulated sugar
6 Tablespoons (3/4 stick) unsalted butter, at room temperature
1 egg
1 egg yolk
1 teaspoon vanilla
For Topping:
1/4 cup granulated sugar
1 teaspoon ground cinnamon
1 beaten egg (for brushing biscotti before baking)

Preheat oven to 325 degrees F and arrange two baking racks in the upper portion of the oven. Line two baking sheets with parchment paper and set aside. In a medium bowl, whisk together flour, cinnamon, baking powder and salt. Set aside.

Also whisk together the cinnamon and sugar for the topping and set aside.

In the bowl of a stand mixer, fit with a paddle attachment, cream the butter and sugar until light and fluffy, about 4 minutes. Scrape down the down and beat in the egg followed by the egg yolk. Beat in the vanilla extract.

Add the dry ingredients to the creamed butter all at once. With the mixer or just with a spatula, bring all of the ingredients together until a somewhat stiff dough is formed.

Divide the dough in two on the two making sheets. Shape each half of dough into a 9-inch long and 1 1/2-inch wide log. Brush with the beaten egg and sprinkle very generously with cinnamon sugar. Bake the two sheets on two different racks in the oven for 20 minutes. Rotate the cookie sheets for even baking and bake for 20-25 more minutes until golden and firm to the touch.

Remove from the oven but keep the oven on. Let biscotti cool until able to handle. Using a serrated knife, cut logs into 1/2-inch wide diagonal slices. Place biscotti cut side down on baking sheet and sprinkle with more cinnamon sugar. Bake again until pale golden, about 10-15 minutes.

Store in an airtight container for up to one week.

(Servings: 20, Prep time: 30 min., Cook time: 45 min., Difficulty: Easy)


foodforscot Ratings:  

Shanon (taste):  8/10
Scot (taste):  8/10
Effort:  2/5
Dishwashing Effort:  3/5

Sunday, May 15, 2011

PW’s Best Chocolate Sheet Cake Ever


I have hives.  And I thought this would be the best way to lure you into this cake.  I am not sure what is giving my hives.  Possible options:  grass, gluten, lettuce, graduation, sunlight, PIL.  Ha!  Jk!  I seriously have no idea what my problem is.  But it is very inconvenient.  I did get a mild sunburn.  Which isn't that rare for me at the beginning of the summer when I reveal my translucent skin to the world.  I barely peeled and only just a little on my shoulders.  Apparently you CAN get hives from too much sun.  Dumb.


I made this cake for a friend's birthday.  It was kind of a last minute decision.  I wanted to make something really easy and quick.  Which is exactly why I wanted to share this recipe and my experience with it.  It is SO simple to throw together.


Now, is it the BEST chocolate sheet cake ever?  Ummmm.  I actually haven't had many chocolate sheet cakes in my life.  Plus, I argue that this is borderline brownie.  But Scot and I really enjoyed eating this.  BTW, it is pretty big.  So we enjoyed it for about a week.  I love that this only uses one dish for mixing (for the cake and the frosting).  The frosting is made from powdered sugar, so it hardens similar to an icing.  And is delicious.  I also like how you don't have to wait for the cake to cool before pouring the frosting over the top.  It is just such a low maintenance and no fuss cake to throw together.  And considering how easy it is to make, I think it is way good and so worth it.  


PW’s Best Chocolate Sheet Cake Ever

For the cake:
2 cups Flour
2 cups Sugar
1/4 teaspoons Salt
4 Tablespoons (heaping) Cocoa
2 sticks Butter
1 cup Boiling Water
1/2 cups Buttermilk
2 whole Beaten Eggs
1 teaspoon Baking Soda
1 teaspoon Vanilla

For the frosting:
1/2 cups Finely Chopped Pecans
1-3/4 stick Butter
4 Tablespoons (heaping) Cocoa
6 Tablespoons Milk
1 teaspoon Vanilla
1 pound (minus 1/2 Cup) Powdered Sugar

Note: I use an 18 by 13 inch sheet cake pan.

In a mixing bowl, combine flour, sugar, and salt.

In a saucepan, melt butter. Add cocoa. Stir together. Add boiling water, allow mixture to boil for 30 seconds, then turn off heat. Pour over flour mixture, and stir lightly to cool.

In a measuring cup, pour the buttermilk and add beaten eggs, baking soda, and vanilla. Stir buttermilk mixture into butter/chocolate mixture. Pour into sheet cake pan and bake at 350-degrees for 20 minutes.

While cake is baking, make the icing. Chop pecans finely. Melt butter in a saucepan. Add cocoa, stir to combine, then turn off heat. Add the milk, vanilla, and powdered sugar. Stir together. Add the pecans, stir together, and pour over warm cake.

Cut into squares, eat, and totally wig out over the fact that you’ve just made the best chocolate sheet cake. Ever.

(Servings: 20, Prep time: 20 min., Cook time: 20 min., Difficulty: Easy)


foodforscot Ratings:  

Shanon (taste):  7/10
Scot (taste):  8/10
Effort:  1/5
Dishwashing Effort:  2/5

Monday, April 25, 2011

Sticky Sticky Buns


Sticky Sticky Buns.  No comma.  

Have you ever tried these?  These are the famous sticky buns from the bakery, Flour, in Boston.  I had the privilege of tasting these babies about a year ago at Flour.  

The real Sticky Buns from the Flour bakery in Boston
I wouldn't label myself as a "sticky bun person".  Or a "caramel roll person".  Or a "pecan roll person".  I mean...who would really?  That would be pretty embarrassing.  No, but seriously...if no one told me to try the sticky buns at Flour, I never would have.  


Bonus points for me.  I did try them.  And they are perfect.  As a die hard caramel lover, these complete me.  

The Goo

What makes them special is that they are made from a rich and decadent Brioche dough.  To make the dough, you need to throw every ounce of trust into your stand mixer.  To be honest, after minute 27 of my mixer chugging along, I doubted its endurance.  I was actually just waiting for it to blow up.  I put on my apron, hoping that would somehow spare my life.  And although the housing motor arm thing was at least 480 degrees.  Celsius.  It survived!  It did it!  So what I am trying to say here is:  you are going to need a stand mixer to pull off this Brioche dough.  And you will also need some patience and 5 eggs.  And just a tiny bit of butter.  


Now, I have to admit that I messed up the recipe.  There have been several corrections to the original printing of the Flour cookbook.  None of which I was aware of until today.  And what a bummer that one of the corrections was to this very (famous) sticky bun recipe.  In the book, it says to use an entire batch of Brioche dough listed on page 73.  Unfortunately, it should say use half the batch.  I used the whole batch.  The recipe below is the correct version.


There are really worse things in life than having monster sticky buns.  Lucky for me, I also used the wrong yeast and I live in Colorado, so I didn't get much rise out of them before baking.  Even with the multiple mistakes (even though they may have cancelled each other out), these were still amazing.  They tasted just like I remember.  Not sure why, but even with twice the dough, these weren't super dense or heavy.  Killer.


Speaking of killer, that is the reason I did not wait to try these again with the right amount of dough and the right yeast.  These are an annual breakfast treat.  But I love them and couldn't wait that long to share them.  But at the same time, I didn't want to risk my slender/tan winter bod.  Ya know what I mean?


These will make you happy.  Share them.  Be a good person.

Sticky Sticky Buns
by Joanne Chang, Flour

Goo:
3/4 cup (1 1/2 sticks; 170 grams, 6 ounces) unsalted butter
1 1/2 cups (345 grams) firmly packed light brown sugar
1/3 cup (110 grams) honey
1/3 cup (80 grams) heavy cream
1/3 cup (80 grams) water
1/4 teaspoon kosher salt
Basic Brioche Dough, (1/2 the recipe below)
1/4 cup (55 grams) light brown sugar
1/4 cup (50 grams) granulated sugar
1/8 teaspoon ground cinnamon
1 cup (100 grams) pecan halves, toasted and chopped

To make the goo: In a medium saucepan, melt the butter over medium heat. Whisk in the brown sugar and cook, stirring, to combine (it may look separated, that's ok). Remove from the heat and whisk in the honey, cream, water, and salt. Let cool for about 30 minutes, or until cooled to room temperature. You should have about 2 cups. (The mixture can be made up to 2 weeks in advance and stored in an airtight container in the refrigerator.)

On a floured work surface, roll out the brioche dough into rectangle about 16 by 12 inches and 1/4-inch thick. It will have the consistency of cold, damp Play-Doh and should be fairly easy to roll. Position the rectangle so a short side is facing you.

In a small bowl, stir together the brown sugar, granulated sugar, cinnamon, and half of the pecans. Sprinkle this mixture evenly over the entire surface of the dough. Starting from the short side farthest from you and working your way down, roll up the rectangle like a jelly roll. Try to roll tightly, so you have a nice round spiral. Trim off about 1/4- inch from each end of the roll to make them even.

Use a bench scraper or a chef's knife to cut the roll into 8 equal pieces, each about 1 1/2-inches wide. (At this point, the unbaked buns can be tightly wrapped in plastic wrap and frozen for up to 1 week. When ready to bake, thaw them, still wrapped, in the refrigerator overnight or at room temperature for 2 to 3 hours, then proceed as directed.)

Pour the goo into a 9 by 13-inch baking dish, covering the bottom evenly. Sprinkle the remaining pecans evenly over the surface. Arrange the buns, evenly spaced, in the baking dish. Cover with plastic wrap and put in a warm spot to proof until the dough is puffy, pillowy, and soft and the buns are touching-almost tripled in size, about 2 hours.

Position a rack in the center of the oven, and heat to 350 degrees F.

Bake until golden brown, about 35 to 45 minutes. Let cool in the dish on a wire rack for 20 to 30 minutes. One at a time, invert the buns onto a serving platter, and spoon any extra goo and pecans from the bottom of the dish over the top.  The buns are best served warm or within 4 hours of baking. They can be stored in an airtight container at room temperature for up to 1 day, and then warmed in a 325 degree F oven for 10 to 12 minutes before serving.

(Servings: 8, Prep time: 10 hrs.+, Cook time: 45 min., Difficulty: Intermediate)

Brioche Dough*

2 1/4 cups (315 grams) unbleached all-purpose flour
2 1/4 cups (340 grams) bread flour
1 1/2 packages (3 1/4 teaspoons) active dry yeast or 1-ounce (28 grams) fresh
cake yeast
1/3 cup plus 1 tablespoon (82 grams) sugar
1 tablespoon kosher salt
1/2 cup cold water
5 eggs
1 3/8 cups (2 3/4 sticks; 310 grams) unsalted butter, at room temperature, cut into 10 to 12 pieces

In a stand mixer fitted with the dough hook, combine the all-purpose flour, bread flour, yeast, sugar, salt, water, and 5 of the eggs. Beat on low speed for 3 to 4 minutes, or until all the ingredients are combined. Stop the mixer, as needed, to scrape the sides and bottom of the bowl to make sure all the flour is incorporated into the wet ingredients. Once the dough has come together, beat on low speed for another 3 to 4 minutes. The dough will be very stiff and seem quite dry.

On low speed, add the butter one piece at a time, mixing after each addition until it disappears into the dough. Continue mixing on low speed for about 10 minutes, stopping the mixer occasionally to scrape the sides and bottom of the bowl. It is important for all the butter to be thoroughly mixed into the dough. If necessary, stop the mixer occasionally and break up the dough with your hands to help mix in the butter.

Once the butter is completely incorporated, turn up the speed to medium and beat until the dough becomes sticky, soft, and somewhat shiny, another 15 minutes. It will take some time to come together. It will look shaggy and questionable at the start and then eventually it will turn smooth and silky. Turn the speed to medium-high and beat for about 1 minute. You should hear the dough make a slap-slap-slap sound as it hits the sides of the bowl. Test the dough by pulling at it; it should stretch a bit and have a little give. If it seems wet and loose and more like a batter than a dough, add a few tablespoons of flour and mix until it comes together. If it breaks off into pieces when you pull at it, continue to mix on medium speed for another 2 to 3 minutes, or until it develops more strength and stretches when you grab it. It is ready when you can gather it all together and pick it up in 1 piece.

Place the dough in a large bowl or plastic container and cover it with plastic wrap, pressing the wrap directly onto the surface of the dough. Let the dough proof in the refrigerator for at least 6 hours or up to overnight At this point you can freeze the dough in an airtight container for up to 1 week.

*Note: You will only need half this recipe for Brioche dough for the sticky buns. However, I used the whole batch of dough and they still turned out wonderful.


foodforscot Ratings:

Shanon (taste):  9/10
Scot (taste):  9/10
Effort:  5/5
Dishwashing Effort:  4/5

Thursday, April 21, 2011

Oatmeal-Maple Scones


Lots of people say that you shouldn't humanize your dog.  But I say, it is fine.  My dog basically is a human.  I believe he has deep thoughts.  One example is with food.  There is no doubt in my mind that my dog likes good food.  He doesn't just eat, he tastes and enjoys his food.  

Yes, I know he eats grass.  But to be honest, it is tasty.  I used to eat clovers growing up.  They are salty and herby.  


So, I have been eating a lot of jelly beans lately (for obvious reasons), and I am a Jelly Belly fan.  However, I am anti-buttered popcorn jelly bean flavor.  Why?  Why do you have to put those in my bag of assorted jelly beans?  I eat by the handful (still one at a time tho, I am no glutton) and every once in awhile, I don't investigate my batch before chowing.  When I accidentally put one of those buttered popcorn jelly beans in my mouth, I regret my entire life's worth.  I cannot shallow those things.  

Anyways, my point is that I give them to my dog.  And he loves them.  He doesn't just shallow them.  He chews them, tastes them, savors them.  And Scot says it is because dogs taste things to make sure they aren't poisonous.  Lies.  If that was true, he would never know if bacon was poisonous.  Because he pretty much inhales that stuff.  We all have weaknesses.  

For the record, I also hate the chocolate jelly beans.  But I just give those to Scot.  

One flavor that Scot and I may love equally is maple.  Syrup.  And I knew these would be a hit with him because they also have oatmeal, golden raisins and pecans in them.  A very hearty and rustic scone.  Like the Honey-Cinnamon Ice Cream I made from the Flour cookbook, which was sweetened completely with honey, these scones are sweetened only with maple syrup.  And I have the good stuff, straight from New York.  Personally, I am not a huge fan of powdered sugar glazes.  I have a problem that I can't get over, where I can taste the powdered sugar from which it is made.  I don't know how else to explain it.  It just bothers me.  And I think these glazes are too sweet.  Sorry to bother you with my personal issues.  I know Scot likes them, so I did give this maple glaze a try.  Scot is one of those, "Is there is sugar in syrup?" types of people, if you know what I mean.  It was fine with the glaze, but I probably would prefer the scones without it.  


Oatmeal-Maple Scones
by Joanne Chang, Flour

1 1/4 cups (210 g) unbleached all-purpose flour
1 1/4 cups (125 g) old-fashioned rolled oats
1 1/2 teaspoons baking powder
1/4 teaspoon baking soda
1/4 teaspoon kosher salt
1/2 cup (50 g) pecan halves, toasted then chopped
1/2 cup (80 g) golden raisins
1/2 cup (1 stick 114 g) cold unsalted butter, cut into 8-10 pieces
1/2 cup (80 g) cold heavy cream
1/2 cup (160 g) maple syrup
1 cold egg

Glaze
1 cup (140 g) confectioner's sugar
3 tablespoons maple syrup
1-2 tablespoons water

Position a rack in the center of the oven, and heat the oven to 350F.

Using a stand mixer fitted with a paddle (or handheld mixer), mix together the flour, oats, baking powder, baking soda, salt, pecans, and raisins on low speed for 10 to 15 seconds, or until combined. Scatter the butter over the top and beat on low speed for about 30 seconds, or until the butter is somewhat broken down and grape-size pieces are still visible.

In a small bowl, whisk together the cream, maple syrup, and egg. On low speed pour the cream mixture into the flour mixture and beat for 10-30 seconds, or just until the dough comes together. It will be fairly wet.

Remove the bowl from the mixer stand. With a rubber spatula, scrape the bottom and sides of the bowl to ensure that all of the dry ingredients are mixed into the dough. Using a 1/3-cup dry-measuring cup, drop mounded scoops of the dough onto a baking sheet, forming 8 scones and spacing them 2 to 3 inches apart. Bake for about 40 minutes, or until the scones are golden brown on top. Transfer to a wire rack to cool for 30 minutes.

To make the glaze, mix the ingredients together, using enough of the water to make a smooth, pourable glaze. Pour over the cooled scones and serve.

(Servings: 8, Prep time: 30 min., Bake time: 40 min., Difficulty: Easy)


foodforscot Ratings:  

Shanon (taste):  7/10
Scot (taste):  9/10
Effort:  2/5
Dishwashing Effort:  2/5