Showing posts with label chocolate. Show all posts

Monday, September 18, 2017

No-Bake Energy Balls


I was reading something recently that it is important that we let kids experience boredom.  I also went to Paula Poundstone's show a month or so ago, and she also emphasized the importance of this.  I think adults need to experience boredom more too.  Some of us get into the habit of putting on our headphones and listening to a podcast or music while doing every task imaginable.  I have been known to listen to podcasts while reading Birk the same book I have read to him 100 times.  While its ok to do (not the book reading thing, that is ridiculous), I have my best ideas and thoughts when I just let myself think.  There are plenty of times while commuting (even in the car), that I just let there be silence.  That way, I can experience my thoughts.

For example, how much do you think about flip-flops?  I think about them a lot because I really do not like to wear them.  Some people work all day, waiting for that moment when they get home and they can put on their flops.  Others go about their lives dreaming of the job that allows them to wear flip flops.  Me...I find flip flops incredibly invasive but also too exposing.  To be honest, I can barely handle opened toed shoes.  As I am walking through the streets with my toes exposed, I feel as though all I am doing is putting my feet through an awful lot.  They are getting dirtier, drier, older, sun burnt, calloused.  It just seems as though shoes were designed so that we didn't have to expose our feet to such things.  I can't imagine a situation where I need them and I can't just be barefooted instead?

However, the other thing that I have been thinking about regarding flip flops is that I truly believe there is a positive correlation between people who like flip flops and how much fun a person is.  Story checks out for me.  I am definitely the least fun person I know.  And all my friends, who love flip flops, are way fun.  No way those commas are placed correctly.  See how fun I am!  The question is:  what is wrong with me?  Why can't I be more fun?

You have heard of these energy balls, right?  There are so many versions of these, so I thought I would post mine.  You may think they are for Birk, and they are, but they are more for Scot.  I have made these 4 times so far, and I think I have only ever consumed two balls.  I rarely have an appetite or taste for foods this dense.  Surely this is tied to my love for sitting.  Big fan of sitting.  But I am definitely in the minority, most people really love this kind of thing.


I have really liked having these around because they are so quick.  Birk is endlessly hungry these days.  Scot LOVES these.  This snack is Scot in ball form.  I strongly recommend mini chocolate chips, because the regular sized chips make it difficult to form a ball.  If you look below, I made batch of these with full size m&m's and peanuts, and they were harder to keep together.  I really like the "Enjoy Life" mini chocolate chip brand.  I feel like these need peanut butter (for both flavor and texture), as opposed to a nut butter substitute but I have not experimented.  I would recommend a fairly creamy version, for example, something like Justin's would be too dry.  However, you could probably make it work by adding more honey.

You will find a lot of versions of these if you google "energy balls".  Many include chia seeds and flax seeds, which would be a fine addition.  Many include vanilla extract, which you CANNOT taste the difference in peanut butter recipes of this nature, so I don't use it anymore.  


PS:  I hardly ever share such deep posts about myself here.  But if you have been reading these posts for a while, you now have to great gift ideas for me:  flip flops and edible arrangements.

No-Bake Energy balls
by everyone on the internet

2 cups oats
1 cup unsweetened shredded coconut
~3/4 cup creamy peanut butter
~1/2 cup honey
1/2 cup mini chocolate chips

Combine all ingredients except chocolate chips in a bowl (I find that a rubber spatula works best).  Don't measure "~" quantities (just eyeball it) because who wants to measure honey or peanut butter?  Might need to adjust quantities, depending on humidity.  Add more oats if too sticky, add more honey/peanut butter if too dry.

When mixture is at a consistency that allows you form a ball, add the chocolate chips and mix to combine.  Roll into balls.  This makes about 15 balls that are approximately 2-3 Tablespoons big.  But it doesn't matter.  Just make them however big you want.  If you are having trouble rolling them, you can also refrigerate for a half hour and roll after.

Keep refrigerated (tastes better cold anyway).

Monday, June 3, 2013

Chocolate Cake with Avocado Peanut Butter Frosting


Things have happened.  I have thought about my blog come back on and off for the past year.  Where have I been?  Nowhere in particular that forced me to stop blogging.  I just fell of the wagon and never got back on.  Now a lot has happened and I don't know where to start.

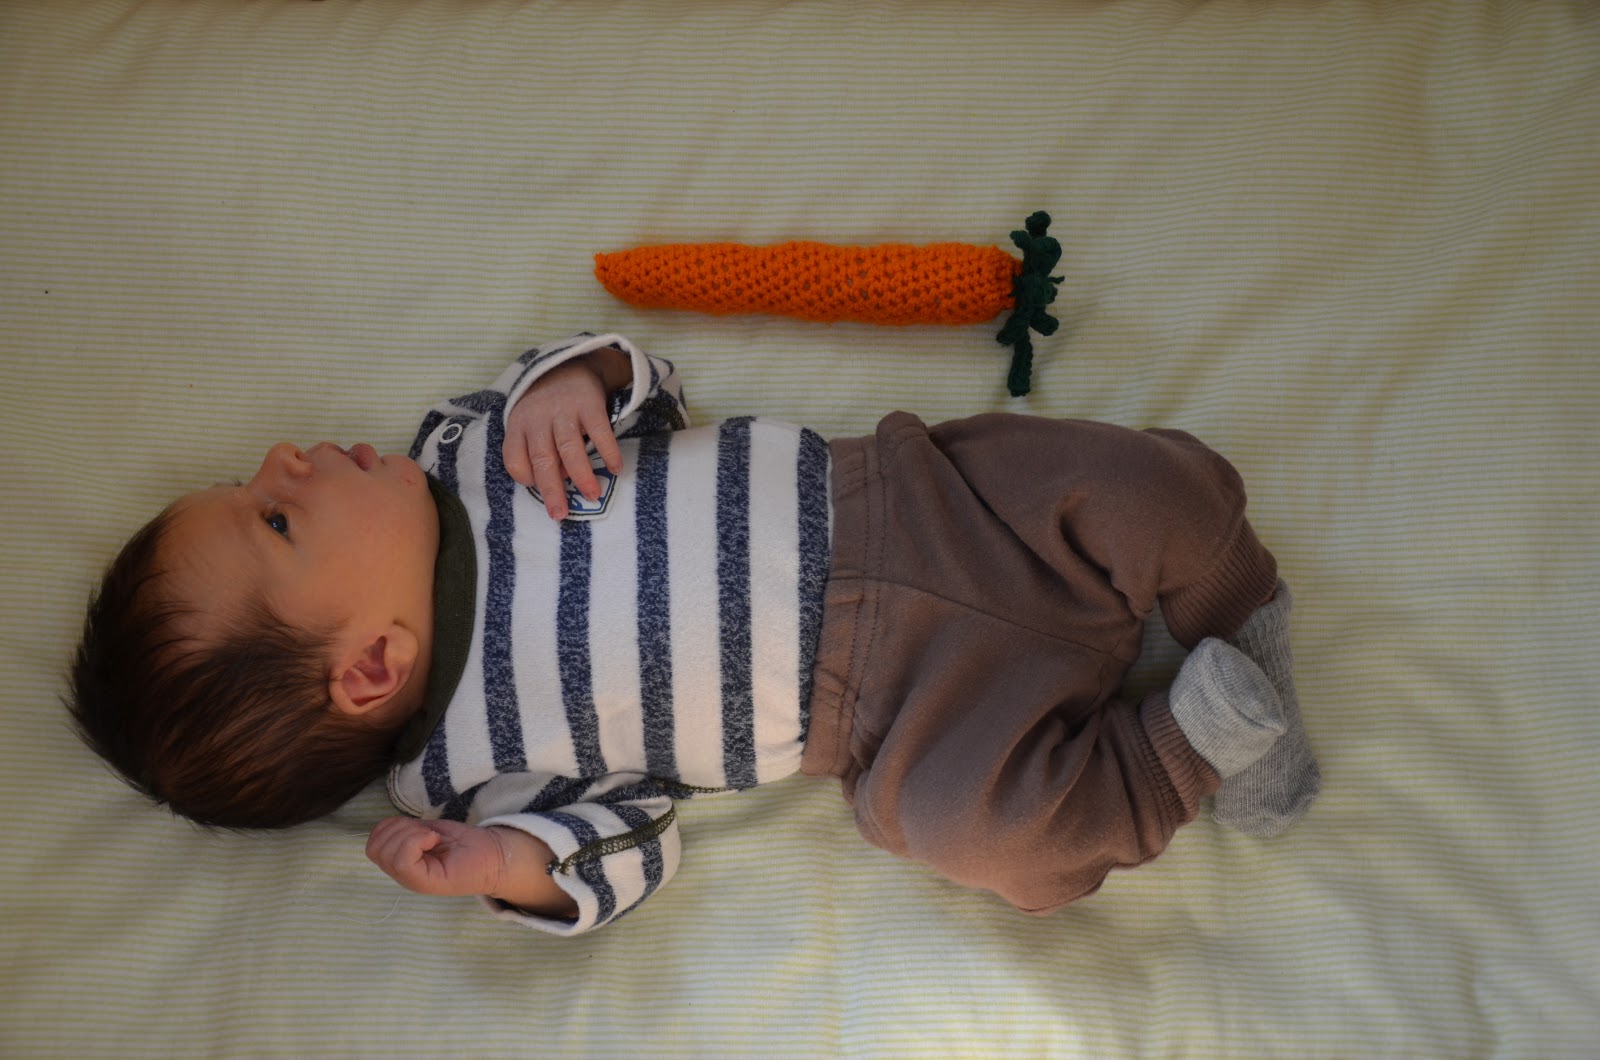
I was impregnated.  Grew a baby.  Now, we have little Birk Oliver!

He can't eat food yet, but it sure will be fun when he can.  I am quite enjoying him being the adorable baby that he is, so I am in no rush.  
So, that was one big thing that happened.  The other...Scot and I have crossed over to the vegetarian world.  We have always been so close.  But now we are closer.  We basically don't eat meat anymore.  For all practical purposes, we are vegetarians.  For the unpractical purposes, I talk Scot into eating bacon with me zero, once, or twice a month.

The thing is...Scot is a much better vegetarian than me.  He would probably never eat meat again if it weren't for me.  Something I would have never predicted when I met 21 year old Scot.  Little Birk will now grow up vegetarian.

What is worse, we feel guilty eating any animal protein (kidding about the worse thing).  Not that it stops us.  We have done little things like replacing our milk with almond milk.  Thinking more about whether dairy is necessary for different dishes.  We have experimented with vegan favorites like chia seeds instead of eggs, coconut oil, non-dairy milks, etc.

What I am trying to say is...please don't be scared away!  I am still a true foodie.  Cooking vegetarian is easy.  Cooking vegan is actually fascinating.  I am still mostly human.

This year for Scot's birthday, he tasked me with the impossible.  Make him a cake that is healthy so that when he eats a piece everyday for the week following...he doesn't feel AS guilty.  What does healthy mean?  Vegan.  And no white sugar or flour.  So gross, basically.

I told him I couldn't do the refined flour/sugar thing.  It is your birthday not national diabetes awareness day.  But I almost achieved the goal.


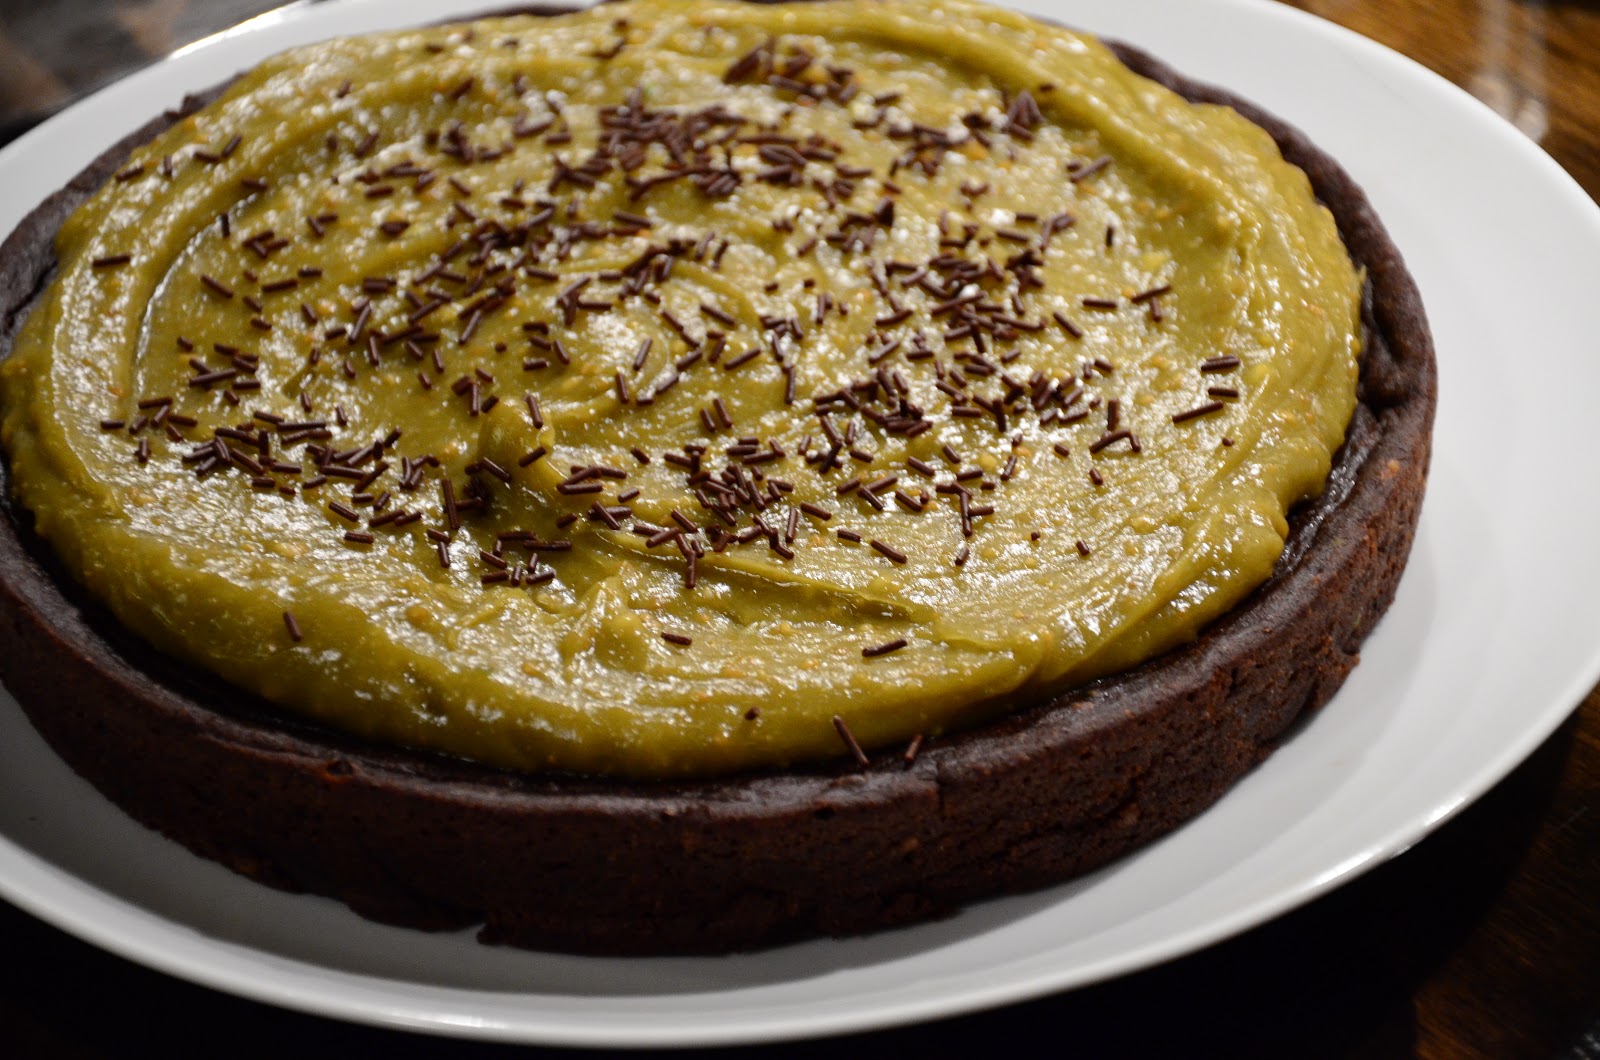
I ended up making a chocolate cake.  It is sweetened with maple syrup.  The fat comes from an avocado.  Flour is of the whole wheat variety.  It was a solid chocolate cake.  I underbaked it on purpose and it was anything but dry.

For frosting, I made an avocado frosting.  This has been on my radar for about 5 years.  Replace the butter in frosting with an avocado.  I was most excited to have a beautiful green frosting.  This limited the additional flavor additions.  I ended up going with peanut butter and avocado frosting since it would leave the green.  I would imagine a chocolate avocado frosting would be delicious too, but not green.  Since I used freshly ground peanuts, my frosting was not as smooth as the original.

The frosting recipe is a recommendation at best.  And it has the one nasty, illegal ingredient:  powdered sugar!  Hopefully we survive.

In true foodforscot fashion, I made this late at night.  So enjoy the horrible photos!  But seriously, Scot did very much enjoy his birthday cake.  He ate the entire thing, except the one piece I had on his birthday.  It is really everything Scot is about in cake form.

PS:  Scot is the father.

Chocolate Cake with Avocado Peanut Butter Frosting
adapted from The Diva Dish

For cake:
1.5 cups whole wheat pastry flour
1/3 cup cocoa powder
1 tsp. baking soda
½ tsp. salt
1 avocado, mashed
1 cup almond milk
¾ cup maple syrup
2 tsp. vanilla
1 tsp. apple cider vinegar
handful of chocolate chips (optional)

For Frosting:
1 avocado, mashed
1-2 cups powdered sugar
1-2 tbsp almond milk
½ cup peanut butter (I used freshly ground)

For Cake: Mix dry ingredients in a bowl and set aside. In a separate bowl, mix wet ingredients until combined. Make sure avocado isn’t lumpy (it will probably be a little lumpy, just saying).

Add wet to dry and mix until incorporated.

Pour into a greased 8-inch cake pan and bake in a preheated 350 degree oven for about 20 minutes (check every few minutes after 20 until done).

Once cake is done, remove from oven and let cool completely.

For Frosting: Blend all the ingredients in a food processor until creamy.

Spread frosting on cake and sprinkle with some chocolate jimmies!

(Servings: 6-8, Prep time: 30 min., Bake time: 30 min., Frost time: 20 min., Difficulty: Easy)

Printable Version

foodforscot Ratings:

Shanon (taste): 6/10
Scot (taste): 8/10
Effort: 1/5
Dishwashing Effort: 2/5

Monday, October 31, 2011

Oatmeal Pumpkin Chocolate Chip Cookies


Halloween.  Is today.  My dog is sleeping next to me and still wearing his pumpkin shirt.  He was supposed to be an alien, but I don't know if that ever happened.  

Fall has been weird this year.  I have been waiting on the edge of my seat for the colors to change.  Then, it happened.  And I am pretty sure I missed it.  Here is the only (semi decent) pic we have of the fall colors.


And then this happened (slightly different angle, but same spot more or less).


And before any of that happened, I was filling every second of my free time with Broadway shows.  I am not complaining, but weird October.  

I wouldn't say I did pumpkin justice this October (and I know I still have November), but I did make these cookies.  Ever since the pumpkin shortage several years ago, I am incapable of buying only one can of pumpkin puree.  So, I had all these ingredients on hand when I scheming up this mixture of oatmeal and pumpkin.  Yes, I am obsessed with oatmeal everything.  

I am also obsessed with pumpkin and chocolate together.  We have a local ice cream place that sells delicious pumpkin ice cream and I get it combined with the chocolate ice cream.  Not mixed.  Just side by side.  


Anyways, make sure you use extra fancy cinnamon.  Vietnamese cinnamon, that is.  These really won't turn out without it.  

Oatmeal Pumpkin Chocolate Chip Cookies
adapted from Simply Recipes

1 cup butter, room temperature
1 cup packed brown sugar
3/4 cup granulated sugar
1 cup pumpkin puree
1 large egg
1 teaspoon vanilla extract
1 cups whole wheat flour
1 cups all-purpose flour
1 1/3 cups quick or old-fashioned oats
1 teaspoon baking soda
1 teaspoon ground cinnamon
1/2 teaspoon salt
1 cup chopped pecans
1 cup semi-sweet chips

Preheat the oven to 350° F.

Beat the butter and sugars together until light and fluffy, about 3 minutes.

Add the egg, vanilla, and pumpkin puree and beat for another 3 minutes.

In a separate bowl combine the flours, oats, baking soda, salt, and cinnamon and whisk together. Slowly add it to the butter mixture until just combined, being sure to scrape down the sides and bottom once or twice to ensure even mixing.

Fold in the pecans and chocolate chips. Drop spoonfuls of dough on cookie sheets lined with parchment paper. Bake for 13-15 minutes. Allow to cool on the tray for a minute or two to set, then move to a wire rack to finish cooling.

(Servings: 48 cookies, Prep time: 30 min., Bake time: 1 hr, Difficulty: Easy)


foodforscot Ratings:

Shanon (taste):  7/10
Scot (taste):  8/10
Effort:  2/5
Dishwashing Effort:  3/5

Friday, June 24, 2011

Chocolate Peanut Butter Torte


Peanut butter and jelly sandwiches.  How do you feel about them?  Do they make you think happy thoughts?  Do they bring you back to your childhood?  Do they provide the stability in your life to get you through a lunch crunch?  

Well, I hate them.  

To me peanut butter and jelly is like blah and blah.  Peanut butter is like butter, but worse.  Jelly is like fruit that got too old.  And together?  They are like Mr. and Mrs. lamey-pants.  

Seriously, PB&J's have never done much for me.  Sometimes, I wish they would because they are SO easy.  And I do eat them on occasion for that reason.  With whining, obviously.  


But, the real thing is that I have learned through the years that I don't really dig the whole nut butter thing.  Did you ever know anyone who brought a jar of peanut butter on their trip to Europe so they KNEW they would have some food they loved with them along the way...in case of emergencies...?  Those are the real peanut butter lovers of the world.  Give me some salami and a pickle, please.  

Therefore, this dessert is just not my thing.  And I knew it wouldn't be.  This was Scot's birthday cake this year.  And chocolate and peanut butter are in his Top 5 favorite combos (of chocolate and something else).  I was very excited to make this because so many people raved about it.  I thought maybe even I would like it.  But I could barely eat two bites of this insanely rich dessert (which means, yes, Scot ate half and then I had to intervene, gave the rest to friends).  And I am a true believer that there is about 400% too much filling per chocolate and crust.  Scot actually agreed.  Seriously, like half the filling would be good.  I am just posting this because I want to spread the word.  


"Yo, world.  Too much filling!"

Anyways, Scot still thoroughly enjoyed this.  He loves peanut butter and jelly sandwiches, btw. 


Chocolate Peanut Butter Torte
by Dorie Greenspan via Brown Eyed Baker

11/4 cups finely chopped salted peanuts (for the filling, crunch, and toppings)
2 teaspoons sugar
1/2 teaspoon instant espresso powder (or finely ground instant coffee)
1/4 teaspoon ground cinnamon
Pinch of freshly grated nutmeg
1/2 cup mini chocolate chips (or finely chopped semisweet chocolate)
24 Oreo cookies, finely crumbled or ground in a food processor or blender
1/2 stick (4 tablespoons) unsalted butter, melted and cooled
Small pinch of salt
21/2 cups heavy cream
11/4 cups confectioners’ sugar, sifted
12 ounces cream cheese, at room temperature
11/2 cups salted peanut butter – crunchy or smooth (not natural)
2 tablespoons whole milk
4 ounces bittersweet chocolate, finely chopped

Getting Ready: Center a rack in the oven and preheat the oven to 350 degrees F. Butter a 9-inch springform pan and place it on a baking sheet lined with parchment or a silicone mat.

Toss 1/2 cup of the chopped peanuts, the sugar, espresso powder, cinnamon, nutmeg and chocolate chips together in a small bowl. Set aside.

Put the Oreo crumbs, melted butter and salt in another small bowl and stir with a fork just until the crumbs are moistened. Press the crumbs evenly over the bottom and up the sides of the springform pan (they should go up about 2 inches on the sides). Freeze the crust for 10 minutes.

Bake the crust for 10 minutes, then transfer it to a rack and let it cool completely before filling.

Working with a stand mixer fitted with the whisk attachment or with a hand mixer in a large bowl, whip 2 cups of the cream until it holds medium peaks. Beat in 1/4 cup of the confectioners’ sugar and whip until the cream holds medium firm peaks. Scrape the cream into a bowl and refrigerate until needed.

Wipe out (no need to wash) the bowl, fit the stand mixer with the paddle attachment if you have one, or continue with the hand mixer, and beat the cream cheese with the remaining 1 cup confectioners’ sugar on medium speed until the cream cheese is satiny smooth. Beat in the peanut butter, 1/4 cup of the chopped peanuts and the milk.

Using a large rubber spatula, gently stir in about one quarter of the whipped cream, just to lighten the mousse. Still working with the spatula, stir in the crunchy peanut mixture, then gingerly fold in the remaining whipped cream. Scrape the mousse into the crust, mounding and smoothing the top. Refrigerate for at least 4 hours, or overnight; cover with plastic wrap as soon as the mousse firms.

To Finish the Torte: Put the chopped chocolate in a heatproof bowl and set the bowl over a saucepan of simmering water. Leave the bowl over the water just until the chocolate softens and starts to melt, about 3 minutes; remove the bowl from the saucepan.

Bring the remaining 1/2 cup cream to a full boil. Pour the cream over the chocolate and, working with a rubber spatula, very gently stir together until the ganache is completely blended and glossy.

Pour the ganache over the torte, smoothing it with a metal icing spatula. Scatter the remaining 1/2 cup peanuts over the top and chill to set the topping, about 20 minutes.

When the ganache is firm, remove the sides of the springform pan; it’s easiest to warm the pan with a hairdryer, then remove the sides, but you can also wrap a kitchen towel dampened with hot water around the pan and leave it there for 10 seconds. Refrigerate until ready to serve.

Serving: I like to serve the torte with strong espresso, but it lends itself to being paired with black tea, hot cocoa or even a not-too-thick not-too-sweet coffee milkshake.

Storing: Well covered, the torte will keep in the refrigerator for about 2 days; just make sure to keep it away from foods with strong odors.

(Servings: 8+, Make time: 1.5 hrs., Chill time: 4+ hrs., Difficulty: Easy)


foodforscot Ratings:

Shanon (taste):  5/10
Scot (taste):  7.5/10
Effort:  3/5
Dishwashing Effort:  3/5

Saturday, May 21, 2011

Chocolate Toffee Shortbread Bars


My favorite quote at Jimmy John's is, "Every driver believes they are an above average driver."

One time, when I was like...6/7/8, we were sitting at the dinner table.  Me and the fam (minus the little sister who was negative years old).  I am sure my other little sister was babbling on and on about something really random like ponies, tree trunks or overalls.  My brother...he was definitely picking his nose.  I was probably being perfect.  As usual.  My dad was staring out the window.  His eyes were glazed over and he was totally out of it.  I asked, "hey dad, what are you staring at?"  His answer was, "peace".

Another time, I was driving and this lady behind me was bumper huggin' me.  I made a right turn into a parking lot.  Parked.  Got out.  Then all of a sudden that same lady was all up in my face, straight up yelling at me for not using my blinker when I made my right hand turn.  I was making a right hand turn into a car repair shop to fix my blinker light bulb, which was burnt out.  I didn't tell her that.  She was really mad.  This was at least 6/7/8 years ago.    

I made these chocolate toffee shortbread bars for those cookie baskets I gave out around the Whole Foods video contest time. They are pretty simple to make, ship well and taste good for about a week after making them.  All requirements for successful cookie baskets.  Kinda like a candy bar.  

Chocolate Toffee Shortbread Bars

For the shortbread base:
11/2 cups all-purpose flour
1/2 tsp. salt
1/4 tsp. ground cinnamon
2 sticks (1 cup) unsalted butter, at room temperature
1/2 cup brown sugar, packed
1/4 cup granulated sugar
1 tsp. vanilla extract
3 oz. bittersweet or semisweet chocolate, finely chopped

For the topping:
6 oz. bittersweet or semisweet chocolate, finely chopped
11/2 cups toffee bits

Preheat the oven to 375° F. Line a 9 x 13″ baking dish with foil and spray lightly with cooking spray. To make the shortbread, combine the flour, salt and cinnamon in a small bowl; stir to blend and set aside. In the bowl of an electric mixer, combine the butter and sugars and beat on medium-high speed until light and fluffy, about 3 minutes. Blend in the vanilla. With the mixer on low speed, beat in the dry ingredients just until incorporated. Stir in the chopped chocolate until evenly distributed.

Transfer the dough to the prepared baking dish and press into an even layer covering the bottom of the pan. Bake for 18-20 minutes, or until the shortbread is bubbling. Remove the pan from the oven and transfer to a wire rack.

Sprinkle the 6 ounces of chopped chocolate evenly over the top of the cookie base. Cover the pan with foil and let sit for 5 minutes. Remove the foil and use an offset spatula to spread the melted chocolate evenly over the crust in a thin layer.  Immediately sprinkle the toffee bits over the melted chocolate and press down gently to adhere. Let the bars cool to room temperature. Once the pan has cooled, you may speed chilling by transferring to the refrigerator or freezer.  When the topping is set, remove from the pan, transfer to a cutting board and
slice into bars.

(Servings: 30 bars, Prep time: 30 min., Cook time: 30 min., Difficulty: Easy)


foodforscot Ratings:

Shanon (taste):  7/10
Scot (taste):  8/10
Effort:  2/5
Dishwashing Effort:  3/5

Sunday, May 15, 2011

PW’s Best Chocolate Sheet Cake Ever


I have hives.  And I thought this would be the best way to lure you into this cake.  I am not sure what is giving my hives.  Possible options:  grass, gluten, lettuce, graduation, sunlight, PIL.  Ha!  Jk!  I seriously have no idea what my problem is.  But it is very inconvenient.  I did get a mild sunburn.  Which isn't that rare for me at the beginning of the summer when I reveal my translucent skin to the world.  I barely peeled and only just a little on my shoulders.  Apparently you CAN get hives from too much sun.  Dumb.


I made this cake for a friend's birthday.  It was kind of a last minute decision.  I wanted to make something really easy and quick.  Which is exactly why I wanted to share this recipe and my experience with it.  It is SO simple to throw together.


Now, is it the BEST chocolate sheet cake ever?  Ummmm.  I actually haven't had many chocolate sheet cakes in my life.  Plus, I argue that this is borderline brownie.  But Scot and I really enjoyed eating this.  BTW, it is pretty big.  So we enjoyed it for about a week.  I love that this only uses one dish for mixing (for the cake and the frosting).  The frosting is made from powdered sugar, so it hardens similar to an icing.  And is delicious.  I also like how you don't have to wait for the cake to cool before pouring the frosting over the top.  It is just such a low maintenance and no fuss cake to throw together.  And considering how easy it is to make, I think it is way good and so worth it.  


PW’s Best Chocolate Sheet Cake Ever

For the cake:
2 cups Flour
2 cups Sugar
1/4 teaspoons Salt
4 Tablespoons (heaping) Cocoa
2 sticks Butter
1 cup Boiling Water
1/2 cups Buttermilk
2 whole Beaten Eggs
1 teaspoon Baking Soda
1 teaspoon Vanilla

For the frosting:
1/2 cups Finely Chopped Pecans
1-3/4 stick Butter
4 Tablespoons (heaping) Cocoa
6 Tablespoons Milk
1 teaspoon Vanilla
1 pound (minus 1/2 Cup) Powdered Sugar

Note: I use an 18 by 13 inch sheet cake pan.

In a mixing bowl, combine flour, sugar, and salt.

In a saucepan, melt butter. Add cocoa. Stir together. Add boiling water, allow mixture to boil for 30 seconds, then turn off heat. Pour over flour mixture, and stir lightly to cool.

In a measuring cup, pour the buttermilk and add beaten eggs, baking soda, and vanilla. Stir buttermilk mixture into butter/chocolate mixture. Pour into sheet cake pan and bake at 350-degrees for 20 minutes.

While cake is baking, make the icing. Chop pecans finely. Melt butter in a saucepan. Add cocoa, stir to combine, then turn off heat. Add the milk, vanilla, and powdered sugar. Stir together. Add the pecans, stir together, and pour over warm cake.

Cut into squares, eat, and totally wig out over the fact that you’ve just made the best chocolate sheet cake. Ever.

(Servings: 20, Prep time: 20 min., Cook time: 20 min., Difficulty: Easy)


foodforscot Ratings:  

Shanon (taste):  7/10
Scot (taste):  8/10
Effort:  1/5
Dishwashing Effort:  2/5

Wednesday, March 16, 2011

Milk Chocolate Hazelnut Cookies


Why is Nutella so good?  Why do I think it is ok to have it for breakfast when I am Europe?  

These cookies are obviously screaming Nutella.  But, if you make these, you need to follow three rules (I broke all of these at some point):

1.  Use blanched, skinless hazelnuts.  The skin is bitter.  
2.  Cut up a chunk of milk chocolate, don't use chips.
3.  Experiment with the baking temp and time to get the cookie the right (soft) consistency.


This is an interesting recipe because the dough needs to be refrigerated for at least 3-4 hours before baking.  We actually baked these to order over the week.  The dough is good for up to a week in the fridge.  But, unlike most "chocolate chip cookies", these honestly taste better completely cooled than they do warm.  

I did make some "high altitude" adjustments.  I think because of all the nuts and nut flour, these cookies do really well at high altitude regardless.  However, I did increase the temp and shorten the cooking time.  I did a little research online and it seems like others who have made these also decreased the baking temperature (by almost a half!)  And there was no indication that they were at high altitude.  

I have to say, I loved these!  There is tons of milk chocolate in these.  Normally, I put way less chocolate chips than what any recipe calls for.  I don't like an overwhelming amount of chocolate in my chocolate chip cookies.  But these...these are more like Nutella cookies.  Like chocolate cookies.  Finally!  I rate a dessert higher than Scot!


Milk Chocolate Hazelnut Cookies
from Flour by Joanne Chang

1 1/2 sticks butter, plus 1 tablespoon
2/3 cup granulated sugar
2/3 cup packed light brown sugar
2 eggs
1/2 teaspoon vanilla extract
1 1/2 cups blanched whole hazelnuts, toasted (remove skins)
1 1/2 cups unbleached all-purpose flour
1 teaspoon baking soda
3/4 teaspoon kosher salt
12 ounces milk chocolate, chopped into 1/2-inch pieces

Using a stand mixer, cream together the butter, granulated sugar, and brown sugar on medium speed for approximately 5 minutes (10 minutes if using a hand mixer), or until the mixture is light and fluffy. Stop the mixer a few times and use a rubber spatula to scrape the sides and bottom of the bowl to release any clinging butter or sugar.

Beat in the eggs and vanilla on medium speed for 2-3 minutes, or until thoroughly combined. Scrape the bowl again to make sure the eggs are thoroughly incorporated.

In a food processor, pulse 1/2 cup of the hazelnuts until ground to a fine powder (stop grinding once they are powdery; if you continue, they will become a paste). Roughly chop the remaining 1 cup hazelnuts.

In a medium bowl, stir together the ground and chopped hazelnuts, the flour, baking soda, salt, and chocolate. On low speed, slowly blend the flour mixture into the butter-sugar mixture and then mix just until the flour mixture is totally incorporated and the dough is evenly mixed.

For the best results, scrape the dough into an airtight container and let it rest in the refrigerator overnight (or at least for 3-4 hours) before baking. When you are ready to bake, position a rack in the center of the oven, and heat the oven to 350 degrees F (I baked mine at 365 degrees F).

Drop the dough in 1/4-cup balls onto a baking sheet, spacing them approximately 2 inches apart. Flatten each ball slightly with the palm of your hand.

Bake for 20-22 minutes (I baked mine for 5 minutes, rotated the pan 180 degrees and then baked for 2-3 minutes longer…even for sea level, I wouldn’t bake for 20 min., check every 5 min.), or until the cookies are golden brown on the edges and pale and slightly soft in the center. Let cool on the baking sheet on a wire rack for 5-10 minutes, then transfer the cookies to the rack to cool completely.

Note 1: Cookies can be stored in an airtight container at room temperature for up to 3 days. The unbaked dough can be stored in an airtight container in the refrigerator for up to 1 week.

Note 2: My adjustments are in italics. They may or may not be high altitude adjustments. All I know is that I baked four of these babies at 350 degrees F for 20 minutes and they were hard as a rock.

(Servings: 20-25 cookies, Prep time: 1 hr., Chill time: 3-4 hrs., Bake time: 40 min., Difficulty: Easy)


foodforscot Rating:

Shanon (taste):  8/10
Scot (taste):  7/10
Effort:  3/5
Dishwashing Effort:  4/5

Wednesday, February 2, 2011

Flourless Chocolate Cupcakes with Salted Caramel Filling


I was SO excited about these.  First, it was my first time trying flourless chocolate cake.  Delicious.  Who even needs flour?  


Second, salted caramel is the only thing in my life that is right.  But, from my many failed attempts at making caramel, I am not here to tell you it is easy.  I think it is especially hard for me because I am at high elevation.  But I can't say that for sure since I have never tried making it at sea level.  The recipe says to cook until 360 degrees F, and I cooked it to 348 degrees F.  It is often recommended for candy making to decrease 2 degrees F for each 1000 ft above sea level, but I find you need to decrease even more.  I would have liked a slightly softer caramel than what I got, so I would recommend going to about 345 degrees F.  My caramel was about the consistency of a soft candy caramel, and I would have liked it to be even softer.  More like a thick caramel sauce.  


Having the caramel in the middle of the cupcake can make the second bite a little messy (perfect first bite jsyk).  But I am not so picky because I loved salted caramel so much.  


Scot really liked the chocolate cake, but wasn't a fan of how hard it was to eat after bite one.  He also wished it was a chocolate frosting.  I prefer the vanilla since the chocolate cupcake is a very dark chocolate.  


Flourless Chocolate Cupcakes with Salted Caramel Filling
cupcakes from Pennies on a Platter

For flourless chocolate cupcakes:
1 1/2 cups (10 1/2 oz) bittersweet chocolate chips
1 cup (2 sticks) butter
4 eggs
4 egg yolks
1/2 cup sugar
2 tbsp. Dutch-process cocoa powder, sifted
1 tsp vanilla extract

To assemble cupcakes:
Salted Caramel Filling (recipe below)
Easy Vanilla Buttercream (recipe below)

Preheat the oven to 375°F. Place 12 paper baking cups in a muffin pan. Put the chocolate and butter in a double boiler, or medium bowl over a pan of simmering water, and stir until completely melted. Set aside to cool. In large bowl, cream the eggs and sugar with an electric mixer until pale and thick. Gently fold in the melted chocolate and remaining ingredients.

Spoon the batter into the cups. Bake for 20 minutes. Remove pan from the oven and cool for 5 minutes. Then remove the cupcakes and cool on a rack.

Cut out a small hole in the top of each cupcake. Prepare salted caramel and while it is still warm (but slightly cooled to thicken a bit) pour into small hole of each cupcake. Once completely cooled, frost and enjoy.

Salted Caramel Filling
by Martha Stewart via 52 Cupcakes

1 1/4 cups sugar
1/3 cup water
1/2 tablespoon light corn syrup
3/8 cup heavy whipping cream
1 1/4 teaspoons sea salt, preferably fleur de sel

Heat sugar with the water and corn syrup in a heavy saucepan over high, stirring occasionally, until syrup is clear; clip a candy thermometer to side of pan and stop stirring.

Cook until syrup comes to a boil, washing down sides of pan with a wet pastry brush as needed. Boil, gently swirling pan occasionally, until mixture is caramelized and just reaches 360°F. Remove rom heat and slowly pour in cream; stir with a wooden spoon until smooth. Stir in sea salt.

Use immediately; if caramel begins to harden reheat gently until pourable.

Easy Vanilla Buttercream

10 tbsp. (1 1/4 sticks) unsalted butter, softened
1 1/4 cups confectioners’ sugar, sifted
pinch of salt
1 tsp. vanilla extract
1 tbsp. heavy cream

In a stand mixer fitted with the whisk attachment, beat butter at medium-high speed until smooth, about 20 seconds. Add confectioners’ sugar and salt; beat at medium-low speed until most of the sugar is moistened, about 45 seconds.

Scrape down the bowl and beat at medium speed until mixture is fully combined, about 15 seconds. Scrape bowl, add vanilla and heavy cream, and beat at medium speed until incorporated, about 10 seconds. Then increase the speed to medium high and beat until light and fluffy, about 4 minutes, scraping down bowl once or twice.

(Servings: 12, Total time: 3 hrs., Difficulty: Advanced)


foodforscot Ratings:  

Shanon (taste):  7/10
Scot (taste):  6/10
Effort:  4/5
Dishwashing Effort:  3/5

Tuesday, December 14, 2010

Buckeyes


Another holiday treat!  Scot, the baking man chef, made these guys too.  Are you wondering why?  Lemme tell you.  I wanted to bring a few things to a Christmas party that we attended last weekend.  However, there were lots of errands to be run.  But mostly...Christmas shopping.  And that boy is not a shopper.  And that is actually an understatement.

The thing is:  I am not sure I believe the "I am not a shopper, I am buyer" thing.  When we go to REI, he sure is a shopper.  And I am the one dragging him out of the store.  In fact, this weekend we were at Play It Again Sports.  We left with a whole car load of equipment that we didn't go in there to buy.  So in response to my mother-in-law's tweet about how Scot's dad is also a bad shopper...I would say these men are most probably what I like to call "selective shoppers".  

Booyah.  

The point is, our compromise was that he helped me out by making these treats while I held down the Christmas shopping fort.  And everything he made was excellent!  

These buckeyes (also known as Peanut Butter Balls...clearly not as impressive of a name) are just like a Reese's peanut butter cup, but probably not quite as sweet.  We recently came across a real life Buckeye tree in LA.  Very pretty!


I worked with some Ohio students several years ago and they went on and on about buckeye this and buckeye that.  During a presentation once, they actually passed out buckeye candy!  I must say, they are good!


Buckeyes
adapted from Baked Explorations via smitten kitchen

1/4 cup (2 ounces) cream cheese, softened
1 1/2 cups smooth peanut butter
1 cup graham cracker crumbs (from about 14 graham crackers)
1/4 tsp table salt
3 cups confectioners’ (powdered) sugar
10 tablespoons unsalted butter, melted and cooled
12 ounces dark chocolate (60 to 72%), coarsely chopped or milk chocolate

Make the filling: In the bowl of an electric mixer, beat the cream cheese and peanut butter together until combined. Add the graham cracker crumbs and beat for 10 seconds. Add the sugar and butter, and mix on the lowest speed until it stops floating off everywhere, then increase the speed until the ingredients are combined. Scrape down the whole bowl well, then mix again. The mixture will be quite sturdy and a little dry — perfect for shaping. Set it aside while you prepare the coating.

Make the coating: Melt the chocolate either over a double boiler, stirring until it is completely smooth or in a microwave in 30 then 10 second increments, stirring before you start it again until it is completely smooth. Let it cool to tepid (about 100 degrees, though I’d go a little cooler next time for a thicker coating; I had a few ounces of chocolate leftover) while you shape the peanut butter centers.

Assemble the candies: Line a sheet pan with parchment paper. Scoop out slightly more than one tablespoon’s worth of filling (their suggestion; I used a scoop that made them a little smaller) and use your hands to form it into a ball. Place the ball on the prepared sheet and repeat the process until all of the candies have been shaped. They can sit close to each other but make sure they are not touching.

Using a fork or large skewer, dip each ball into the chocolate and roll it about so that almost the entire candy is coating, leaving a small circle uncoated. Play around with a few practice pieces; I found it easiest to stick the skewer in the side, angle the bowl I was using towards it and make sure it became submerged as I rolled the candy around. But don’t fuss too much; even the “ugly” ones won’t go to waste.

Chill the buckeyes until they are set, about 30 minutes.

(Servings: 36-42 pieces, Prep time: 1 hour, Chill time: 30 min., Difficulty: Easy)


foodforscot Ratings:

Shanon (taste):  7/10
Scot (taste):  8/10
Effort:  2/5
Dishwashing Effort:  2/5

Sunday, December 12, 2010

Chocolate Dipped Toasted Coconut Macaroons


It is crazy how much more common a gluten intolerance is nowadays.  I know quite a few people who can't or don't want to have gluten for one reason or another.  I am always trying to find good gluten-free recipes to bring to our different events and potlucks.  I don't mind substituting one of the many gluten-free flours into some recipes like sauces, soups, breadings, etc.  However, I am not a big fan of turning gluten-full foods into gluten-free foods.  I feel like it never lives up to expectations.  I will leave the gf breads, cookies and cakes to the experts.  

However, there are tons of options for gluten free dishes that just naturally don't have any gluten in them.  Think butter.  Think chocolate.  Cream.  Veggies.  Fruits.  And a macaroon is a great gluten-free dessert.  


I know this is called foodforscot, but these babies are foodbyscot.  He made them!  And I have to say, they were amazing.  And everyone at the party loved them too.  He likes dark chocolate, so he dipped some in dark chocolate, the rest in milk chocolate (my preference).  


Chocolate Dipped Toasted Coconut Macaroons
by Alton Brown via Joy the Baker

4 large egg whites
pinch of salt
1/2 cup sugar
12 ounces sweetened shredded coconut, toasted
2 (3 ounce) kosher milk chocolate bars, coarsely chopped

Preheat oven to 350 degrees F. Place coconut on a baking sheet, spread out evenly and place in the oven. Return to the oven every five minutes to stir the browning coconut. Once evenly browned, after about 15 minutes, remove from the oven and allow to cool.

In a mixer fitted with a whip attachment. whip egg whites and salt until they become white and begin to stiffen. Add sugar in 3 parts. Continue to whip until the egg whites are very stiff. Fold in toasted coconut.

On parchment lined cookie sheets, drop a teaspoon of the mixture leaving 1 to 2 inches around each cookie. Place into the oven and bake for 15 to 20 minutes.  The outside should be golden brown but the insides should still be moist.

Place chocolate chunks in a heatproof bowl. Place bowl over a pan of simmering water so that the bottom of the bowl does not touch the simmering water. Allow to melt. Stir until loose and creamy. Partially dip the macaroons in the chocolate then allow to cool and harden on a parchment lined sheet. You can place the pan of chocolate dipped cookies in the refrigerator to speed up the hardening process.

(Servings: 32-40 pieces, Prep time: 45 min., Cook time: 45 min., Difficulty:  Easy)


foodforscot Ratings:

Shanon (taste):  7/10
Scot (taste):  8/10
Effort:  3/5
Dishwashing Effort:  3/5