Showing posts with label appetizer. Show all posts

Tuesday, October 4, 2011

Wilted Bitter Greens with Crispy Walnut Goat Cheese


Breaded goat cheese?  Please.  You know I made this within 24 hours of recipe access.

You know I ate two disks of goat cheese with enough bitter greens necessary to eat two disks of goat cheese.  I don't recommend that.  It is hard to digest two disks of goat cheese. 

But one serving of this is like...super wicked good.  What I love the most about this recipe is that I have more goat cheese patties frozen in my freezer.  And I can just whip those babies up anytime I want.  At any given time, you can guarantee that my freezer will be pretty empty.  We usually have frozen fruit and sometimes a pint of ice cream.  I am not that good about freezing stuff (but even worse about eating the stuff I have frozen).  I can't wait to eat the rest of these!

PS:  I just followed the recipe as is after completely freezing them for several days before using them.  They turned out great!

Wilted Bitter Greens with Crispy Walnut Goat Cheese
by Anne Burrell via Food Network

For Goat Cheese:
3/4 cup walnuts
4 slices Pullman loaf bread, or other tight crumb white bread, crusts removed
1/2 bunch fresh chives, finely chopped
1/2 bunch fresh flat-leaf parsley, finely chopped
1 (11-ounce) log goat cheese, cut into 6 equal pieces
Kosher salt
2 eggs, beaten with 1 tablespoon water

For Salad:
Extra-virgin olive oil
1 shallot, minced
1 tablespoon Dijon mustard
2 to 3 tablespoons sherry vinegar
1 head radicchio, cut into bite-size pieces
2 cups baby arugula, washed
2 heads Belgian endive, cut into 1/2-inch lengths crosswise
Directions

For the goat cheese: In a food processor, pulse the walnuts until they are coarsely chopped. Tear the bread into pieces and pulse in the food processor with the chopped walnuts until they become coarse breadcrumbs. Transfer the breadcrumb mixture to a wide, flat dish. Stir in the chopped chives and parsley. Flatten each piece of goat cheese into a disk and season with salt. Dip each disk in the beaten egg mixture and then coat with the breadcrumbs, packing the crumbs onto each disk. When all the goat cheese has been coated, chill them in the fridge for at least 1 hour.

Preheat the oven to 200 degrees F.

To help facilitate the frying process, pop the disks in the freezer for 15 minutes before frying.

Coat a large, nonstick saute pan generously with olive oil and bring to a mediumhigh heat. Carefully fry the goat cheese disks in the hot oil on both sides until they are golden brown and crispy, about 2 minutes per side.

When all of the disks have been fried, keep them warm in the oven.

Remove the oil and any burned bits from the pan and give a splash of new oil. Reduce the heat to low, add the shallots to the pan, and let them cook as the pan cools slightly. Add the Dijon and sherry vinegar to the pan and whisk to combine. Add the radicchio, arugula, and endive and season with salt. Toss to fully incorporate with the vinaigrette and to allow the salad to slightly wilt. Taste to make sure it is delicious.

Divide the wilted salad between serving plates and top each salad with a goat cheese disk.

(Servings: 6, Prep time: 25 min., Inactive Prep time: 1 hr 15 min., Cook time: 25 min., Difficulty: Easy)


foodforscot Ratings:

Shanon (taste):  9/10
Scot (taste):  7/10
Effort:  3/5
Dishwashing Effort:  3/5

Tuesday, August 23, 2011

Ham and Cheese Pretzel Bites


Sometimes people ask me how I have time to cook all the time.  Or how I have time to cook such elaborate things.

In some ways, I do see people's point.  Making things like pretzel bites, doesn't make too much sense.  They aren't that easy.  Not to mention, that aren't all that necessary.  And I do often make unnecessary things like pretzel bites, because I think it is fun.  And I knew my little sister would like them.

But in general, I cook all the time because we need to eat.  And I don't understand how some people eat but don't cook.  How does that even work?  Sometimes I wonder when people say they don't cook if they mean they just eat out.  Or maybe they mean the just eat cereal and PB&J's?  Or maybe they mean they just make salads and sandwiches?  Or maybe they mean they eat frozen pizzas and hungry-man?  Or maybe they mean they eat Reese's and Doritos?  So many options.

I do know that I do have time to cook/prepare food.  It is almost always at night.  It is almost always dark outside (no matter what the season).  I am always in a hurry.  But there is no other option, food doesn't have to be convenient, yo!

As I was making these, I was cursing in my head about how long they took and how we needed to be done before our movie.  Story of my life.  My little sister helped out.  We got them done and eaten before the movie.  They were delicious.  They smell amazing.  They might be a good party appetizer if you make them in advance and warm them quickly in the oven before serving.  I wouldn't want to mess with boiling and baking them while the guests were there.


Ham & Cheese Pretzel Bites

1 package (1/4 oz) active dry yeast (or instant yeast)
2 Tablespoons plus 1 teaspoon packed brown sugar, divided
1/4 cup warm water (110-115°F)
1 cup warm milk (110-115°F)
2 1/2 to 3 cups flour
1/2 cup finely chopped ham (about 3 ounces)
1/2 cup shredded cheese of choice (I used cheddar)
6 cups water
4 teaspoons baking soda
4 Tablespoons unsalted butter, melted
1-2 Tablespoons coarse salt

Combine the yeast, 1 tsp brown sugar, and warm water in a large bowl. Set aside until foamy, 5-8 minutes. (If using the instant yeast, you can skip this step and just add it to the flour.) In another bowl, stir together the remaining 2 Tbsp brown sugar and warm milk until dissolved.

Add 2 1/2 cups flour and milk mixture to the yeast. Stir with a wooden spoon until a soft dough forms. Add the remaining flour as needed. Turn the dough out onto a lightly floured surface and gently knead a few times, forming a smooth ball.

Brush the inside of a large clean bowl with olive oil. Transfer the dough to the bowl and cover tightly with plastic wrap. Allow to rise in a warm, draft free area for about 2 hours, until dough has doubled in size and bubbles appear on the surface.

Turn out the dough onto a lightly floured surface. Divide into 4 equal pieces. Lightly dust your hands and rolling pin with flour. Roll one of the four sections into a 12°—4-inch rectangle. With the long side facing you, gently press 1/4 of the ham and cheese into the bottom third of the dough, and roll as tightly as possible, starting with the end that has the filling. Cut into 12 1-inch pieces and transfer to a sheet pan lined with parchment paper. Repeat with remaining 3 portions of the dough.

Let rest, uncovered, at room temperature for 30 minutes. (Again, if using instant yeast you may choose to skip this step as it only requires one rise.) Meanwhile, preheat oven to 400°F.

Bring 6 cups of water to a boil. Add the baking soda and reduce heat to a gentle simmer. Boil pretzels in batches, cooking about 20 seconds each, turning once.  They should be slightly puffed. Use a slotted spoon to transfer them back to the baking sheets.

Bake until puffed and golden-brown, about 15 minutes.

Brush warm pretzel bites with melted butter and sprinkle with salt. Serve warm or at room temperature.

(Servings: 48 bites, Prep time: 3.5 hrs., Bake time: 30 min., Difficulty: Intermediate)


foodforscot Ratings:

Shanon (taste):  7/10
Scot (taste):  7/10
Cindy (taste):  7/10
Effort: 3/5
Dishwashing Effort:  3/5

Tuesday, July 19, 2011

Prosciutto Wrapped Figs and Blue Cheese


When I ate one of these for the first time, I cursed in my head.  If there is a more perfect bite in the world, I don't even want to know.  

I need to tell you something.  I am not really fancy.  But I pretend to be.  And for the longest time, I was intimidated by fancy ingredients.  I have always been frugal.  And even though most people probably wouldn't consider me frugal nowadays, I used to be hardcore (and I have gradually loosened up as I have gotten older...and richer).  I used to question buying Green Giant canned green beans or just go with the Kroeger brand.  I used to think it was frivolous to buy deli meat at the deli counter rather than the prepackaged deli "meat".  And I used to buy frozen chicken breasts in those zippy bags.  So believe me, I have been there.  

For those of you who worry and budget and stress about your grocery bill, have no fear.  I am here to tell you that fancy food does not need to be expensive.  I know I go on and on about Whole Foods, but it is my favorite place on earth.  It is what inspired me to make these...because Black Mission Figs just started showing up.  And are on sale.  $3.99/lb.  The nice thing about Whole Foods is that you can always buy exactly how much you want.  This is what it came to for me:

Figs:  $3 
Prosciutto:  $4
Goat's milk blue cheese (amazing):  $2.50

I know it ain't no pigs in a blanket...$3 for 30 people-kind of appetizer.  But it isn't as scary as I once thought.  

Don't go crazy with the prosciutto.  Ask for it to be sliced as thin as possible.  I don't like it to completely cover the fig, because then it just tastes like pork fat.  Share with bro-in-law over skype.  


Prosciutto Wrapped Figs and Blue Cheese
recipe courtesy Michael Chiarello via FoodNetwork

8 Black Mission figs
1/2 cup blue cheese, cut into cubes
8 prosciutto (thinly sliced, cut in half lengthwise)
2 tablespoons extra-virgin olive oil
Sea salt and freshly ground black pepper

Preheat grill. You will need medium to high heat for grilling. The key is to crisp the prosciutto quickly and leave the blue cheese just melted with the inner part of the fig cool in temperature.

Cut the figs in half and place a piece of blue cheese on each fig half. Wrap the prosciutto around each fig half, covering the cheese. The ends of the prosciutto should overlap.

Grill each piece until the prosciutto begins to color and crisp, about 2 minutes on each side. Remove from grill, lightly drizzle with extra virgin olive oil and season with sea salt and pepper. Serve warm.

(Servings: 4-8, Prep time: 10 min., Cook time: 10 min. Difficulty: Easy)


foodforscot Ratings:

Shanon (taste):  10/10
Scot (taste):  9/10
Effort:  1/5
Dishwashing Effort:  1/5

Wednesday, July 6, 2011

Texas Caviar


I had never heard of Texas Cavier until a few months ago when TWO different friends brought it to TWO different potluck events.  Good story.  But the truth is:  this stuff is wicked good.

Might as well just call it black-eyed pea de gallo.  It is really your typical pico but with beans!  The Texas Caviar that is pictured here has some random additions that I just threw in to use stuff up (black beans and corn...and some tomato).  But, I have since made the exact recipe below and it is a wonderful combination.  In reality, you can throw whatever veg. you want in with the beans.  

I personally believe that black eyed peas are the most delicious bean out there.  Everywhere like such as.  I have recently discovered that I am a lover of white-ish beans.  Including but not limited to black eyed peas, cannellini beans, great northern beans, navy beans, and lima beans.  And edamame.  So, I guess I like green too.  I know you were all dying to know what my favorite beans were.  

PS:  This is also known as Cowboy Caviar.  I'd like to avoid conflict with Texas, so I will give this to them.  Oh yeah, and I don't care.   


Texas Caviar
adapted from Allrecipes

2 (15.8 ounce) cans black-eyed peas, drained and rinsed
1 cup diced jicama
2 fresh medium jalapenos, stemmed, seeded and minced
1/2 small red onion, cut into small dice
1 yellow bell pepper, stemmed, seeded and cut into small dice
1 red bell pepper, stemmed, seeded and cut into small dice
1 bunch cilantro, minced
6 tablespoons red wine vinegar or lime juice
6 tablespoons light cooking oil
1/2 teaspoon salt
1/2 teaspoon ground black pepper
1/2 teaspoon garlic powder (optional)
1 teaspoon dried oregano (optional)
1 1/2 teaspoons ground cumin (optional)

Mix all ingredients in a medium bowl; cover and refrigerate 2 hours or up to 2 days. Before serving, adjust seasonings to taste, adding extra vinegar, salt and pepper. Transfer to a serving bowl.

(Servings; 8-10, Prep time: 30 min., Difficulty: Easy)


foodforscot Ratings:

Shanon (taste):  8/10
Scot (taste):  8/10
Effort:  2/5
Dishwashing Effort:  1/5

Tuesday, May 10, 2011

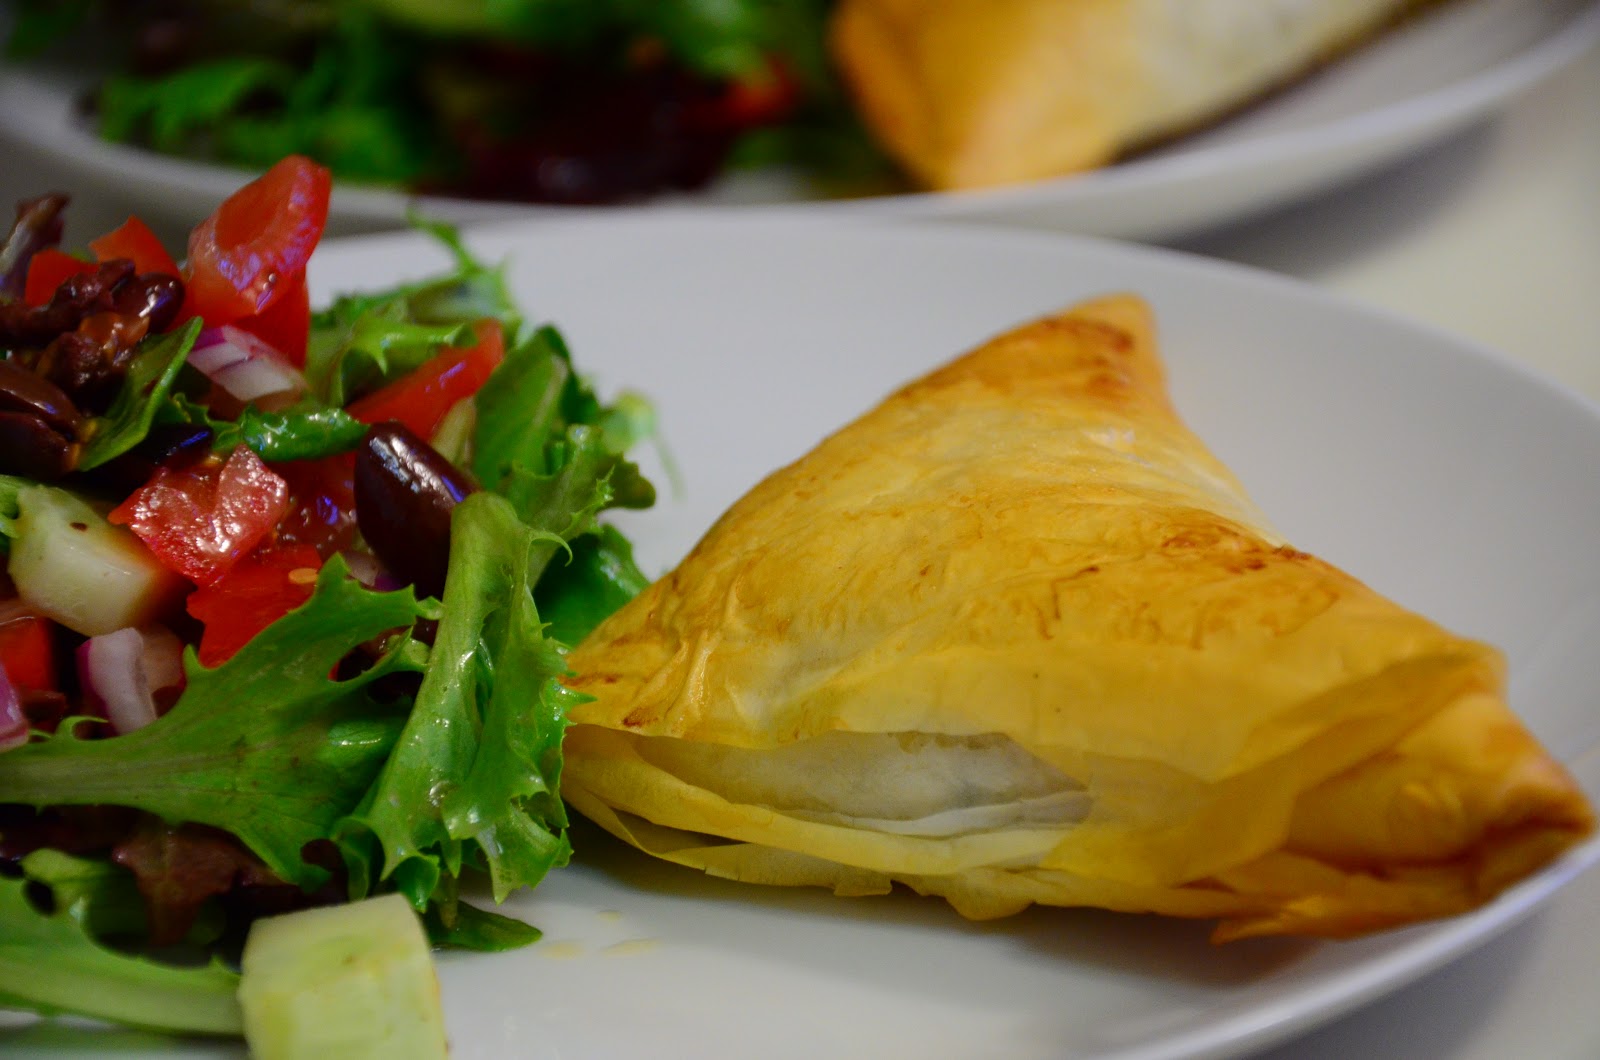
Spanakopita


I have told a few stories on here about my wonderful memories growing up with a job at the farmer's market.  These spanakopita (or spinach pies, as we called them) also bring me back to my Saturday mornings at the market.  There probably aren't spinach pies at every farmer's market, but they were (and still are) a staple at mine.  Next to the woman yelling "egg row, egg row".  Across from the ridiculously good fresh sliced bread (with the best butter ever).  On the diag from Frenchie, who for some reason only sold really small produce items, like herbs.  And had a fragrant body odor.  

So many wonderful things.  And these spinach pies always hit the spot.  I have learned since that spanakopita is often served as a snack in Greece too.  The farmer's market in Omaha, NE knows what's up.  They were also always served room temperature, which is actually quite tasty.  I probably prefer them served warm, but they are surprisingly good at room temperature.  I also added some dill to mine, because we have enough dill to last us until 2012.  Anyone need some dill?  Or any other herb?  Tarragon, sage, oregano, or thyme.  Our dill hits the roof, we cut it down, and in a week, it hits the roof again.  Anyways, I liked the addition of dill.  I also sometimes didn't.  Depended on the day and how many high fives I had given on that particular day.  Actually I think I was mostly indifferent to the dill.  


Spanakopita

2 tablespoons olive oil
1 medium onion, peeled and minced
12 ounces (325g) fresh spinach, well-washed and towel dried
salt and freshly-ground pepper
8-10 ounces (230-250g) feta cheese
2 tablespoons finely-chopped flat leaf parsley
pinch of freshly-grated nutmeg
1 large egg, at room temperature
lemon juice
16 sheets filo dough (about 12 ounces, 350g), thawed, if frozen
Melted butter (2-3 ounces, 60-90g)

Heat oil in a large saucepan or skillet. Add the onions and cook, stirring frequently, until translucent.

Add the spinach and a bit of salt and pepper, cover, and cook until the spinach is completely wilted, stirring once or twice to hasten the process.

Scrape the spinach into a colander and let cool completely. Once cool, firmly squeeze out the excess liquid then chop the spinach with a chef’s knife into smallish pieces.

Mix the spinach in a small bowl with the feta and parsley until chunky. Taste, and add nutmeg and a squirt of lemon juice, plus more salt and pepper if desired. Stir in the egg.

Unwrap and unroll the filo and keep it covered at all times with a damp tea towel. Working quickly lay one sheet of filo on the counter and brush it lightly, but thoroughly, with butter. Lay another sheet on top of it and brush it with butter as well.

Set a scant 1/4 cup (50g) of the filling in the center, about 1-inch (3cm) from the edge of the sheets of filo, then roll the two edges of the dough over, lengthwise, to encase the filling. You should have a long rectangle with filling underneath the top far end.

Brush the exposed surface of the filo with butter and fold one corner diagonally over the filling, then continue folding keeping the triangle shape (as you’d fold a flag) and brushing the exposed surfaces of the filo with butter, until you have a neat triangle. Brush the top with butter and set on a baking sheet in the freezer.

Continue making more spanakopitas with the remaining filling. Once all the spanakopitas are frozen, store them in a freezer bag until ready to bake. If well wrapped, they’ll keep for a couple of months.

To bake the frozen spanakopita, preheat the oven to 350F (180C) and put the frozen triangles on a baking sheet, then brush each with butter. Bake for 30 minutes, or until deeply-golden brown. If you’re baking them without freezing them first, they’ll take less time to bake, so check them before the recommended baking time.

(Servings: 8, Prep time: 1 hr., Cook time: 30 min., Difficulty: Intermediate)


foodforscot Ratings:

Shanon (taste):  9/10
Scot (taste):  8/10
Effort:  4/5
Dishwashing Effort:  3/5

Thursday, April 28, 2011

Stuffed Artichokes


Stuffed artichokes are a part of my soul.  We ate them all the time while I was growing and they were always my FAVORITEST THING EVER.  

I have such great memories sitting around the island with my mom, grandma and siblings eating stuffed artichokes.  For some reason, I think my dad wasn't into them.  And maybe my brother wasn't either.  Maybe it is a girl food?  We never ate them as part of a meal.  They were always some random appetizer/snack.  


I am obsessed with food that is a lot of work/takes a long time to eat.  Chicken wings.  Ribs.  Crab legs.  Lobster.  Longans.  Grapefruits.  Pistachios.  And stuffed artichokes.  You sit, pull off the leaves, scrape every last bit off with your teeth, and look for the next loaded leaf.  

This recipe is not my moms.  But it is very close.  Just a little more fancy schmancy.  With the addition of mint (which I left out), anchovies, white wine, crushed red pepper flakes, pines nuts, and lots of lemon.  All you really need to make these are the breadcrumbs and parmesan, anything else is really bonus.  Make sure to cook them until they are really tender.  

BTW, Scot doesn't like food that is a lot work.  Must be a guy thing.  


Stuffed Artichokes
by Anne Burrell via FoodNetwork

2 lemons
4 medium artichokes
4 cloves garlic, smashed
1/2 bunch mint, picked and cut into a chiffonade (I left this out)
1/2 bunch Italian parsley, leaves picked and finely chopped
1 cup grated Parmesan
1 cup bread crumbs
1/2 teaspoon crushed red pepper
1/2 cup pine nuts, toasted, optional
3 anchovy fillets, minced, optional
Extra-virgin olive oil
Kosher salt
2 cups white wine

Cook's Note: Before starting this recipe be aware that there is a lot of waste involved in artichokes. It's ok. Just accept it and move on. Squeeze 1 lemon into a large bowl filled with water and place the lemon halves in the water.  (Anne wrote this, she is angry.)

Cut off the pointy tops of the artichokes. Remove and reserve the stem of the artichoke. Peel off the tough green outer leaves and discard.

Gently spread the leaves of the artichoke. Using a melon baller, scoop out the hairy "choke" in the center of the artichokes. When clean reserve them in the lemon water. Remove the tough outer skin on the stems and reserve them in the lemon water as well.

In a small bowl combine the garlic, herbs, Parmesan, bread crumbs, crushed red pepper, pine nuts and anchovies, if using. Finely chop the reserved artichoke stems and add them to the bowl. Zest and juice the remaining lemon and add that to the bowl. Slowly drizzle in olive oil until the mixture forms a paste. Season with salt.

Stuff the artichokes with the paste.

Place the artichokes standing up in a saucepan large enough to accommodate them. Add the wine to the saucepan and enough lemon water to come 3/4 up the sides of the artichokes. Add the lemon halves to the pan also. Drizzle generously with olive oil and season with salt.

Cover the saucepan and bring to a boil. Reduce heat to a simmer and cook for 15 to 20 minutes (I think longer than this is better, 30-45 min.) or until the base of the artichokes are tender when poked with a fork.

Serve hot or room temperature drizzled with generous amount of olive oil.

(Servings: 4, Prep time: 45 min., Cook time: 20 min +, Difficulty: Easy)


foodforscot Ratings:

Shanon (taste):  8/10
Scot (taste):  6/10
Effort:  3/5
Dishwashing Effort:  2/5

Sunday, January 9, 2011

Goat Cheese and Chorizo Rolls


We brought this appetizer to some friends' house recently.  It is a phyllo dough roll filled with goat cheese, chorizo and chives with a chimichurri rojo dipping sauce.  I love this appetizer for lots of reasons.  First, these were delicious with very few ingredients.  Second, everything can be prepped in advance and just baked up right before they are served.  Third, yeah, probably the goat cheese did it for me.  


The recipe calls for a dry cured Spanish chorizo.  Something you would find at the deli or by the salami.  I couldn't find it so I just bought fresh Mexican chorizo and cooked it up and chopped it into tiny pieces.  I was careful to drain all the fat and make sure it wasn't too oily.  I thought it tasted great.  

I was kind of rushed when I made these because I had to make them in the morning.  Frozen phyllo dough needs to be defrosted in the fridge for at least 8 hours and then sit out for 2 hours before you can use it.  If you rush it, you will regret it.  It ended up working well for me, but I didn't use enough butter to seal all the rolls so some of them kind of exploded when I baked them.  But they still tasted delicious.  Lastly, the dipping sauce was great (Scot and I agreed that we liked them better with the sauce) but they had plenty of flavor without it too.  


Goat Cheese and Chorizo Rolls

8 ounces fresh goat cheese
1 cup chopped dry chorizo
1 1/2 tablespoons minced chives
Salt and freshly ground black pepper
Nine 12-by-16-inch sheets of thawed phyllo dough
Melted butter, for brushing
Chimichurri rojo dipping sauce (recipe below)

Preheat oven to 400° and line two large baking sheets with parchment paper. In a bowl, combine the goat cheese, chorizo and chives. Season to taste with salt and pepper.

Lay a sheet of phyllo on a clean, dry work surface and brush it with melted butter. Top with two more sheets, lightly buttering each as you go. Cut the layered phyllo into six long rectangles. Place one tablespoon of the goat cheese filling at the base of each rectangle and roll up the phyllo, folding in the sides as you go. Repeat twice more to make 18 rolls total.

Place the rolls on the prepared baking sheets and brush the rolls with butter; bake for 10 minutes, or until golden. Serve hot with chimichurri rojo for dipping.

(Servings: 18 rolls, Prep time: 20 min., Cook time: 15 min., Difficulty: Intermediate)

Chimichurri Rojo

1/2 cup sherry vinegar or red wine vinegar
1/4 cup extra virgin olive oil
1 1/2 tablespoons hot paprika
2 teaspoons cayenne pepper
4 cloves garlic, minced
1 teaspoon freshly ground black pepper
1 teaspoon toasted and ground cumin seeds
1 bay leaf broken in half
1/2 teaspoon kosher salt

Combine all the ingredients in a small bowl and whisk to incorporate.


foodforscot Ratings:

Shanon (taste):  8/10
Scot (taste):  8/10
Effort:  3/5
Dishwashing Effort:  2/5

Thursday, November 18, 2010

Virginia Willis' Cola Glazed Wings


Did you know I used to be a diet soda pop drinker?  Did you know I really call it pop but REALLLY wish I called it soda because I think it sounds way cooler and more sophisticated?  

Back to the diet thing...I used to do diet.  If I drank soda, it was diet.  And I put sweet n' low in my coffee.  I ate light yogurt, which apparently has aspartame in it.  

Then, I moved to Boulder.  

In Boulder, I learned how weird and creepy all that fake sugar is.  Why was I eating it?!?!  I am not even on a diet!  

It kind of makes me angry that I was putting that crazy stuff in my body for all those years.  Not to mention, I can't even stand the taste of that fakey sugar.  Why didn't anyone tell me that real Coke is so amazing?  Mexican Coke is even better!  

These cola wings actually taste nothing like cola.  I wasn't sure if I wanted to post this recipe.  I am definitely a wing girl.  I love dark meat.  I love meat on bones.  Unfortunately, though, I am a spicy wing snob.  These are sweet, sweet wings.  And even though I thought they needed a super hardcore kick of spice, I thought I would share them because I know lots of people love sweet wings.  

Also, I used the broiler method to cook these (as indicated in the recipe), and my wings cooked in about 6 minutes per side.  They would have burned fast if I didn't keep an eye on them.  If you would rather, you can bake them at 400 degrees F for 20 minutes on the first side and 10 minutes on the other side.  

Virginia Willis' Cola Glazed Wings

1 cup cola
Juice of 2 limes
1 1/2 cups firmly packed light brown sugar
1 jalapeno, finely minced (discard the seeds)
1 tablespoon cooking oil
2 pounds chicken wings
1/4 teaspoon coarse salt
Freshly ground black pepper

To make the glaze: In a small sauce pan, bring the soda, lime juice, brown sugar and the minced jalapeno to a boil over high heat. Decrease the heat to mediumlow and simmer until the mixture is syrupy, about 30 minutes; keep warm over low heat.

To prepare the wings: Cut off the wing tip (reserve the tips to make stock), and separate the wings at the joint. Place the wing pieces in a large bowl and season with salt and pepper. Pour about half the glaze over the wings and toss to coat.  Keep the remaining sauce warm over low heat.

To bake the wings: Position an oven rack 4 inches below the broiler element in the oven. Preheat the broiler. Line a baking sheet with aluminum foil. Place the glazed wing on the baking sheet and bake for 10 minutes per side, brushing twice on each side with the reserved glaze. Transfer to a platter.

(Servings: 4, Prep time: 45 min., Cook time:L 20 min, Difficulty: Easy)


foodforscot Ratings:

Shanon (taste):  5/10
Scot (taste):  6/10
Effort:  2/5
Dishwashing Effort:  1/5

Wednesday, September 15, 2010

Salsa


A week or so ago, I was given some home-grown tomatoes.  And kind of a lot of them.  First, I fell in love.  Second, I decided that I HAD to make salsa.  Soon after, I realized that many salsa recipes call for canned tomatoes.  This was slightly depressing.  Because I was so excited to turn this huge bag of tomatoes into a delicious salsa.  It was hard to get this salsa idea out of my head, but I eventually did.  I ended up making a bruschetta topping and other things.

Now that my gift tomatoes are gone, I went back to the salsa idea.  I looked up several recipes and realized there are about a million different versions of the kind of salsa I was trying to make.  So, I just made up my own version.  And let me tell you, it was delicious.  And so ridiculously easy.  


I love fresh salsa, like this.   Lime and cilantro.  Mmmmmmmmmmmmmmm.

I may have already told you about my aversion to raw jalapeno.  I just like to say the word aversion because that is what the food judges always say.  But, I love jalapeno spice and flavor, but hate biting into a chunk of raw jalapeno in salsas.  Am I the only one?!?  

This salsa is all blended up and so I like the raw jalapeno flavor.  In fact, I love it.  

Last thing, this salsa tastes best cold.  All the way cold.  It is hard to wait, but I would recommend putting it in the fridge for a few hours before eating it.  


Salsa

1 28-ounce canned whole tomatoes
3 plum tomatoes, roughly chopped
1/4 of an onion, roughly chopped
2 peppers (I used 1 Serrano and 1 jalapeno), seeded and finely chopped
2 limes (juice)
1 handful of cilantro, chopped
pinch of sugar
salt

Throw everything in the food processor and pulse until it reaches desired consistency.

(Servings: lots, Prep time: 20 min., Difficulty: Easy)

Monday, July 26, 2010

Balsamified Tomato, Olive and Basil Topping for Bruschetta


I have always loved the traditional topping for the bruschetta.  I have been making it for forevs and I am pretty sure it will always be my fave.  

Now, let's be honest, CO, you are not that good at growing fruits and veggies.  Since living in CO, I haven't had one good tomato.  It is sad because homegrown tomatoes might be my favorite thing to eat ever.  Cut in half, with salt and pepper.  Or my ultimate favorite is a tomato sandwich.  OMGGGGGGGGGG.  I miss my tomato sandwiches.  

The thing is...I would rather have a bad tomato than no tomato at all.  And I know this is not how many tomato lovers are.  Instead of being mature and eating something else, I get crabby and curse under my breath while picking out the few roma tomatoes at the grocery store that aren't hard, pink and totally covered in wax.  

BTW, I don't really curse.  Or say the word curse.  I would normally say cuss, but was trying to sound cool.  

So, pretend these tomatoes are beautiful, home-grown tomatoes (preferably grown in the good ol' Midwest).  Mix in some olives and fresh basil (which, btw, our basil from our indoor herb garden has been doing great).  Then, all you do is add a splash of olive oil and balsamic vinegar, season with salt and pepper.  Best bruschetta topping, in my opinion.  

We grilled our bread because of the summer heat.  My sister isn't exactly a fan of our non-air conditioned place.  Baby!


Balsamified Tomato, Olive and Basil Topping for Bruschetta

1 baguette
olive oil
1 clove of garlic, peeled and cut in half
2 tomatoes, seeded and diced
1 handful of black olives, chopped
~20 basil leaves, cut into a chiffonade
1-2 tbsp balsamic vinegar
salt
pepper

Mix tomatoes, olives and basil together. Dress with some olive oil and balsamic vinegar to coat. Season with salt and pepper.

Preheat broiler. Slice baguette on the diagonal. Place on a baking tray. Brush/drizzle with olive oil. Put under broiler until golden brown and toasty. Rub with garlic halves.

Serve bruschetta topped with tomato, olive and basil mixture.

(Servings: 4, Prep time: 15 min., Cook time: 3-4 min., Difficulty: Easy)

Sunday, July 25, 2010

Mexican Layer Dip


I am not afraid to admit that I love a layered dip.  And this is mostly your traditional Mexican layer dip...maybe slightly more fancied up.  But as with any good food, you need give each layer the respect it deserves.  

Each layer should taste delicious on its own.  We will pretend that eating sour cream on its own isn't something we would ever do.  

If you want a healthy dip, don't make this.  And probably don't make a dip.  I suppose you could go with a hummus.  But dips aren't supposed to be healthy.  That is why you share them.  And why they are for parties only.  Or "parties".  Ya know what I mean.  ;)

So, what you have here is a layer of spiced up refried beans (I like them best slightly warm), a layer of cheddar, a layer of sour cream (obv., not fat free/low fat), a layer of guacamole (two avocados, diced tomato, red onion, cilantro and lime juice), Monterey jack cheese, black olives and topped with a homemade pico de gallo.  SOOOO yummy.  


Mexican Layer Dip

1 can Refried Beans
Tabasco Sauce, To Taste
1 can Diced Green Chilies
Ground Cumin, to taste
3/4 cups Grated Sharp Cheddar Cheese
1 cup Sour Cream
1 cup Guacamole
3/4 cups Monterey Jack Cheese
1 can Black Olives
1 cup Pico De Gallo

Begin by throwing the refried beans into a small pan over medium-low heat. Add several dashes of Tabasco sauce and a small can of (undrained) diced green chilies. Stir well. Next, sprinkle a little bit of ground Cumin.

Spread the beans on the bottom of a glass bowl or high-sided dish. Over this sprinkle the sharp cheddar. Next, plop your sour cream. And spread it into a single layer, being careful not to disturb the cheese underneath.

The next layer is the guacamole. Spread it over the sour cream. Follow this with a layer of Monterey Jack Cheese and a nice sprinkling of chopped black olives.

Lastly, place a generous layer of Pico de Gallo. You can also, if you have the gumption for it, sprinkle some diced jalapenos over top.

(Servings: 8-10, Prep time: 20 min., Cook time: 0 min, Difficulty: Easy)

Thursday, July 15, 2010

My Hummus


Guess what?  I am pretty much a chickpea hater.  I think it is the texture.  But, I am a late bloomer when it comes to beans, of any kind.  I couldn't stand even the thought of them until about 6-7 years ago when I finally gave in and included them in my Chipotle burrito.  I hate not liking food, so I basically kept trying them until I liked them.  I am still sensitive about the texture, but now generally really enjoy beans.  

Now chickpeas?  I am still not completely over my fear.  But I can definitely pretend to like them for the most part.  So, you may be wondering, how I could like hummus?  I was wondering the same thing.  But I do love a good hummus.  But HATE a bad one.  Geez...is there any food that can be SO good but also be SO so SO bad?  

I have been experimenting with hummus recipes for the past month.  When I was in Omaha back in June, I ate the best hummus I have ever had.  And it made me realize that I DO love a good hummus.  And I was determined to figure out what I could do to make this amazing hummus.  After lots of failures, this is what I learned (and it turned out totally delicious):

1.  I basically hate that tahini crap.  Lots of recipes call for something like 6 tbsp?!?!  The first recipe I used called for that much and I could barely swallow the resulting hummus.  It tasted like nasty peanut butter.  I guess it is not my thing...I am sure some of you probs will love it that way.  For me, I like about 2 tsp of tahini!

2.  The secret ingredient for me is about a tbsp of crumbled feta.  It gives it this nutty, cheesey flavor.  This kind of evens out the tahini and chickpeas for me.  Totally makes it for me.  

3.  I like lots of lemon juice.  And in general, I like a pretty wet, loose final hummus.


We had our hummus with pita bread, carrots and celery.  And on the side some tabouleh.  


Hummus

4 tbsp of lemon juice, about 1-2 lemons
1/4 cup water
2 tsp of tahini, well mixed
2-3 tbsp of olive oil, plus more for drizzling
1 14 oz. can of garbanzo beans, drained and rinsed
1 tbsp of crumbled feta cheese
1 clove of garlic, finely minced or grated
1/2 tsp of salt
1/4 tsp of cumin
1/8 tsp of cayenne pepper

Combine lemon juice and water in a small bowl or measuring cup. Combine tahini and 2-3 tbsp of olive oil in another small bowl or measuring cup. It is much easier to use something with a spout, if available.

In food processor, process garbanzo beans, garlic, salt, cumin, and cayenne until almost fully ground. Scrape down bowl with rubber spatula. Turn food processor on and with it running, add the lemon-water mixture in a steady stream through
the feed tube. Scrape bowl down and process for an additional minute. With machine continuing the run, add oil-tahini mixture in a steady stream through feed tube. Continue to process until smooth and creamy, scraping down bowl, as needed.

Transfer hummus to serving bowl, drizzle with olive oil and serve.

(Servings: 4-8, Prep time: 25 min., Cook time: 0 min., Difficulty: Easy)

Sunday, July 11, 2010

Barbecued Chinese Chicken Lettuce Wraps


I tried a chicken lettuce wrap recipe about a month ago and loved a lot of things about it, BUT it called for ground chicken and I was really unhappy with the texture/moistness/dryness of it.  It was still good, but I am not crazy about ground poultry.  I wanted to try a lettuce wrap recipe that used chicken breasts for comparison.  And I MUCH prefer the whole chicken breasts diced up fine.  And this recipe is delicious and has very few ingredients.  

I did alter the original recipe slightly.  Rach has some canned water chestnuts in her recipe.  Sorrytobeabrat, but I believe canned water chestnuts should be illegal.  And I hate them.  My parents did always put them in our stir-fry.  So, sorry Mom and Dad.  Nast!


I also added some sriracha, which is my one true love.  Just needed a little heat for me.  Otherwise, if you leave it out, the chicken filling for the lettuce wraps is quite mild and sweet.  These modifications are included in the recipe below.

I really loved the orange with the shiitake mushrooms and red bell peppers.  Scot liked squeezing the orange wedges onto the lettuce wraps.  I thought it was good, but really like just liked eating the wedges solo.  


Barbecued Chinese Chicken Lettuce Wraps
adapted from Rachael Ray via Food Network

2 cups, 4 handfuls, fresh shiitake mushrooms
1 1/3 to 1 1/2 pounds thin cut chicken breast or chicken tenders
2 tablespoons light colored oil, such as vegetable oil or peanut oil
Coarse salt and coarse black pepper
3 cloves garlic, chopped
1 inch ginger root, finely chopped or grated, optional
1 orange, zested
1/2 red bell pepper, diced small
3 scallions, chopped
3 tablespoons hoisin
1-3 tsp of sriracha
1/2 large head iceberg lettuce, core removed, head quartered
Wedges of navel orange -- platter garnish

Remove tough stems from mushrooms and brush with damp towel to clean, Slice mushrooms. Chop chicken into small pieces.

Preheat a large skillet or wok to high.

Add oil to hot pan. Add chicken to the pan and sear meat by stir frying a minute or 2. Add mushrooms and cook another minute or two. Add salt and pepper to season, then garlic and ginger. Cook a minute more. Grate zest into pan, add bell
pepper bits and scallions. Cook another minute, continuing to stir fry mixture. Add hoisin Chinese barbecue sauce and sriracha and toss to coat the mixture evenly. Transfer the hot chopped barbecued chicken to serving platter and pile the quartered wedges of crisp iceberg lettuce along side. Add wedged oranges to platter to garnish. To eat, pile spoonfuls into lettuce leaves, wrapping lettuce around fillings and squeeze an orange wedge over.

(Servings: 4, Prep time: 15 min., Cook time: 10 min., Difficulty: Easy)