Wednesday, June 5, 2013

Vermont Grilled Sandwich


We spent last weekend in Grafton, VT.  It is a cozy town in the Green Mountains.  It is quiet, peaceful, and simple.  You don't have to use Yelp to find a restaurant because there are only a few options.  And they are all good.  Everyone was friendly but not in an annoying, touristy way.  They just seemed so content and happy doing what they do.  It was a gentle kindness.  We felt so relaxed and comfortable all weekend.  

We did some hiking, hiked to a waterfall, visited a dairy farm (to eat ice cream and see cows, which are fairly disgusting animals), had a bonfire, survived 90+ degrees,  stayed in the cutest cabin, bought VT cheddar cheese, dined easy.  


I brought home way too many local VT goods.  Maple Smoked Cheddar Cheese.  Mango Habanero jelly.  (Also a million gallons of maple syrup.)  I always I hate when I find a recipe that calls for weird, impossible to find ingredients.  That is exactly what this recipe is.  Are you going to drive to Grafton, VT to buy the ingredients to make this sandwich?  No.  Don't do that.  

Let me tell you the important parts of this sandwich.  First, tempeh on sandwiches is delicious.  It gives vegetarian sandwiches some substance.  Second, smoked cheese tastes like ham.  Third, spicy jelly on sandwiches is real good.  Maybe I should call this jam.  Jam is a much more pleasant word.  Anyways, this mango habanero jam has all the flavor from the habanero without it being overly spicy.  I don't know how they do it, but it is currently my new favorite thing.  

I crave sandwiches all the time.  I love sandwiches.  We often associate sandwiches with a sandwich place because they are actually not super easy to make at home.  You need freshly baked bread, a sauce, some good cheese, and the prepared fixings.  That is what you need if you want a sandwich equivalent to one you would find at a shop.  They are not always easy to throw together.  Once you prepare each individual component, it can take a while and be expensive if you aren't willing to continue eating the same sandwich several times later to use up all the leftovers.  But, I have realized that good vegetarian sandwiches are hard to find a local sandwich shop.  I will even say...they suck.  Typically you can choose from:

1.  Caprese sandwich (good, but not really a true sandwich)
2.  Egg salad sandwich (also just a different kind of sandwich)
3.  Grilled cheese (get out of here)
4.  Grilled, soggy veggies on bread (let's be honest, no one likes you)

So I have pretty much given up on finding a good vegetarian sandwich anywhere but in my own kitchen.  Most restaurants know they need a vegetarian option but don't give it any respect.  Somewhere "vegetarian" got translated to "I hate my life, don't worry about it."

Also, I am planning to become more a "jam person".  I don't like non-homemade jams.  Never have.  Will I make jam?  Probably not.  But I will eat it.  

To all my Vermont peeps, much love.  


Vermont Grilled Sandwich
by foodforscot

3 slices of tempeh, smokey maple bacon flavor
2 slices of Seeduction bread (a whole grain, nutty bread made at WFM)
1 tbsp of salted butter
1-2 tbsp of mango habanero jelly
2 slices of maple smoked Vermont cheddar
handful of spinach
½ of a roasted red pepper

Prepare all your sandwich fixings. First, slice the bread. Butter one side of each slice. Slice the cheese and remove rind. Cut the roasted red pepper.

Heat a non-stick skillet or griddle over medium heat. Add a little olive oil and brown the tempeh a few minutes on each side. Remove from heat and set aside.

Pick up one of the buttered pieces of bread and slather the jelly on the non-buttered side. Place the slice of bread, butter side down, in the same pan you used to sauté the tempeh. Put a single layer of the cheese on top of the jelly. Then layer on the tempeh, spinach, and roasted red pepper, in that order. Finally, add another single layer of cheese and place the other piece of bread, butter side up, on top. Grill until first side is golden brown. Flip and grill the other side until golden brown.

Once bread is toasty and cheese is melty, remove sandwich and place on a cutting board. Let set for a few minutes. Cut in half. Serve with a pickle.

(Servings: 1, Prep time: 10 min., Cook time: 15 min., Difficulty: Easy)


foodforscot Ratings:

Shanon (taste):  8/10
Scot (taste):  8/10
Effort:  1/5
Dishwashing Effort:  1/5

Monday, June 3, 2013

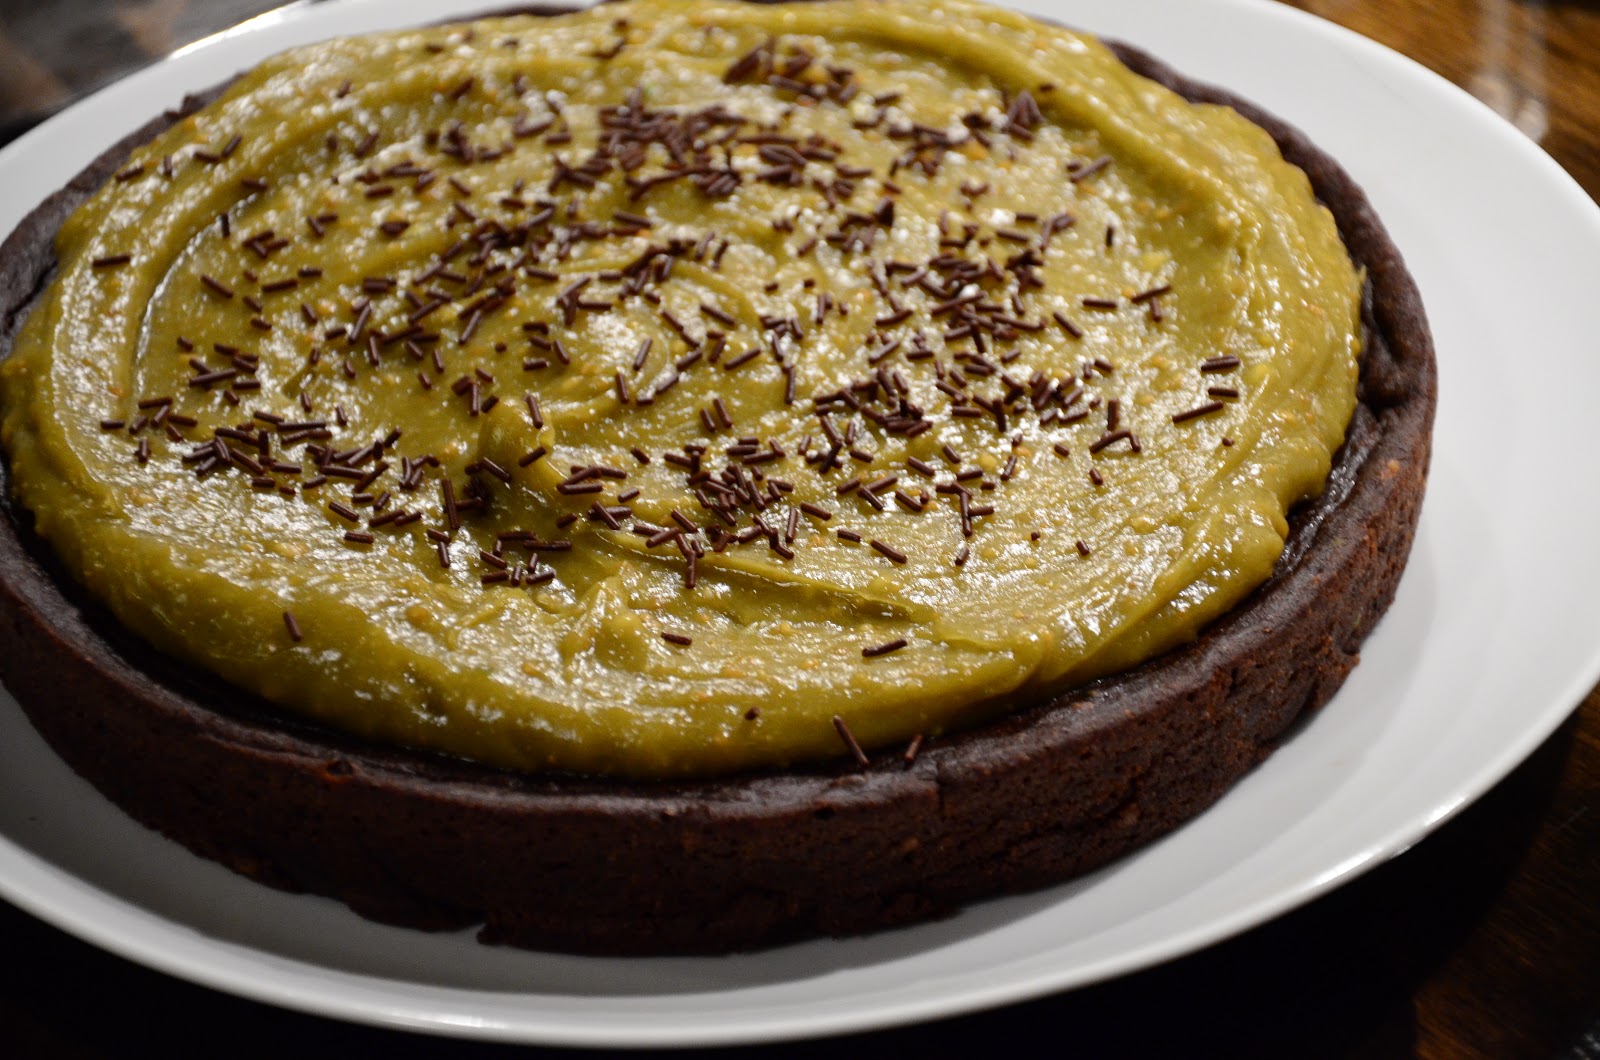
Chocolate Cake with Avocado Peanut Butter Frosting


Things have happened.  I have thought about my blog come back on and off for the past year.  Where have I been?  Nowhere in particular that forced me to stop blogging.  I just fell of the wagon and never got back on.  Now a lot has happened and I don't know where to start.

I was impregnated.  Grew a baby.  Now, we have little Birk Oliver!

He can't eat food yet, but it sure will be fun when he can.  I am quite enjoying him being the adorable baby that he is, so I am in no rush.  
So, that was one big thing that happened.  The other...Scot and I have crossed over to the vegetarian world.  We have always been so close.  But now we are closer.  We basically don't eat meat anymore.  For all practical purposes, we are vegetarians.  For the unpractical purposes, I talk Scot into eating bacon with me zero, once, or twice a month.

The thing is...Scot is a much better vegetarian than me.  He would probably never eat meat again if it weren't for me.  Something I would have never predicted when I met 21 year old Scot.  Little Birk will now grow up vegetarian.

What is worse, we feel guilty eating any animal protein (kidding about the worse thing).  Not that it stops us.  We have done little things like replacing our milk with almond milk.  Thinking more about whether dairy is necessary for different dishes.  We have experimented with vegan favorites like chia seeds instead of eggs, coconut oil, non-dairy milks, etc.

What I am trying to say is...please don't be scared away!  I am still a true foodie.  Cooking vegetarian is easy.  Cooking vegan is actually fascinating.  I am still mostly human.

This year for Scot's birthday, he tasked me with the impossible.  Make him a cake that is healthy so that when he eats a piece everyday for the week following...he doesn't feel AS guilty.  What does healthy mean?  Vegan.  And no white sugar or flour.  So gross, basically.

I told him I couldn't do the refined flour/sugar thing.  It is your birthday not national diabetes awareness day.  But I almost achieved the goal.


I ended up making a chocolate cake.  It is sweetened with maple syrup.  The fat comes from an avocado.  Flour is of the whole wheat variety.  It was a solid chocolate cake.  I underbaked it on purpose and it was anything but dry.

For frosting, I made an avocado frosting.  This has been on my radar for about 5 years.  Replace the butter in frosting with an avocado.  I was most excited to have a beautiful green frosting.  This limited the additional flavor additions.  I ended up going with peanut butter and avocado frosting since it would leave the green.  I would imagine a chocolate avocado frosting would be delicious too, but not green.  Since I used freshly ground peanuts, my frosting was not as smooth as the original.

The frosting recipe is a recommendation at best.  And it has the one nasty, illegal ingredient:  powdered sugar!  Hopefully we survive.

In true foodforscot fashion, I made this late at night.  So enjoy the horrible photos!  But seriously, Scot did very much enjoy his birthday cake.  He ate the entire thing, except the one piece I had on his birthday.  It is really everything Scot is about in cake form.

PS:  Scot is the father.

Chocolate Cake with Avocado Peanut Butter Frosting
adapted from The Diva Dish

For cake:
1.5 cups whole wheat pastry flour
1/3 cup cocoa powder
1 tsp. baking soda
½ tsp. salt
1 avocado, mashed
1 cup almond milk
¾ cup maple syrup
2 tsp. vanilla
1 tsp. apple cider vinegar
handful of chocolate chips (optional)

For Frosting:
1 avocado, mashed
1-2 cups powdered sugar
1-2 tbsp almond milk
½ cup peanut butter (I used freshly ground)

For Cake: Mix dry ingredients in a bowl and set aside. In a separate bowl, mix wet ingredients until combined. Make sure avocado isn’t lumpy (it will probably be a little lumpy, just saying).

Add wet to dry and mix until incorporated.

Pour into a greased 8-inch cake pan and bake in a preheated 350 degree oven for about 20 minutes (check every few minutes after 20 until done).

Once cake is done, remove from oven and let cool completely.

For Frosting: Blend all the ingredients in a food processor until creamy.

Spread frosting on cake and sprinkle with some chocolate jimmies!

(Servings: 6-8, Prep time: 30 min., Bake time: 30 min., Frost time: 20 min., Difficulty: Easy)

Printable Version

foodforscot Ratings:

Shanon (taste): 6/10
Scot (taste): 8/10
Effort: 1/5
Dishwashing Effort: 2/5

Monday, September 17, 2012

Scot's Granola


Are you a cereal person?  Scot is.  Before we met, cereal might have been 50% of his diet.  His favorite is Cinnamon Toast Crunch.  And after we met, I started eating cereal for breakfast too.  It is easy.  And Cinnamon Toast Crunch is unfortunately really delicious.

We weren't allowed to eat that growing up.  My dad only bought Raisin Bran, Off brand Cherrios (not honey nut), Corn Flakes, or even Grape Nuts.  We would beg my dad to let us get things with marshmallows in it and he always claimed that it was just sugar.  Now, I think:  "Go Dad!"  Then, I was just jealous of all the kids on TV who looked so happy eating Cocoa Krispies.  Or do you remember that one cereal which was basically a box of mini chocolate chip cookies?

Anyways, Cinnamon Toast Crunch is delicious.  And even after transitioning to shopping at Whole Foods only, they have their own "Organic, All Natural, Secretly exactly the same as CTC" version.  And it is just as good.  And I was not convincing myself that it was somehow better for me, they just sold it (they don't sell any regular grocery store cereals at WF)...so of course, I bought it.


About a year ago, Scot and I decided to remove all processed foods from our diet.  I am not crazy.  I am not going to refuse processed foods as a guest in someone's house or make my own yogurt.  But we did want to make sure to cut out foods that we regularly eat.  For us, the only thing left to cut out was cereal.  

I remember a while back, I wrote about how I was trying to eat savory breakfasts, instead of sweet.  And I still prefer that.  However, I never jumped on the breakfast soup train.  I still haven't been able to eat leftover dinner food for breakfast.  The only savory option that has stuck with me is eggs and toast.  And I probably eat that over 50% of the time.  Other than that, I either eat oatmeal or granola.


Scot is more like 95% of the time, he eats granola.  And he goes all out.  He starts with the granola, adds milk, then drinks all the milk right away.  He tops it with greek yogurt, a banana and usually some berries (often blueberry).  I usually just do milk and yogurt.

And this recipe is the granola I make him, approximately every two weeks.  Except for the times I am too lazy and we have to buy granola in bulk from WF (which is honestly about 20% as good as this).  It is "his" because it is all the things he really likes:  maple syrup, pecans, and coconut.  And lots of fiber (oats and flax).  We haven't been adding the dried fruit lately because we always put fresh fruit in it.  But it is good both ways.

Lastly, I have to admit that this is the best way to make granola.  But this isn't the only way I make granola.  I do get lazy and skip steps.  Sometimes, I just don't feel like pre toasting everything, so I skip that step (and leave out the amaranth completely).  Sometimes I completely leave out the oil, to make it a little healthier (still tastes great).  Sometimes I throw it in with whatever else is in the oven at the time (I have baked this at 400° and it turned out just fine).  But I love this version the best.  Don't let it overwhelm you though, you can just throw everything into a mixing bowl, roughly measure, pour on a baking sheet and bake until toasty.  Still real good.

PS:  If you are curious about "my" version.  I like only honey, only almonds, and no coconut.  I also really like to add dried currants to mine.  But in general, you can swap out any nuts, sweetener, and/or dried fruits.  And add any extras like coconut and spices.


Scot’s Granola

2 tbsp amaranth
2 cups pecans (whole)
1 cup almonds (whole)
1 cup shredded unsweetened coconut
½ cup light cooking oil
6 cups oats (not instant or 1 minute)
¼ cup flax seeds
½ tsp salt
1 tsp cinnamon
½ cup maple syrup
¼ cup agave nectar
1-2 cups of dried fruit (optional)

Preheat the oven to 325°.

Preheat a dry, stainless steel skillet (with lid) to medium/medium-high heat.  Add 1 tbsp of amaranth, cover with lid and give it a shimmy shake.  Continue until most of the amaranth has popped.  Now, throw that popped amaranth away because you probably burnt it.  Repeat twice until you successfully pop and do not burn 2 tbsp of amaranth.  Transfer popped amaranth to a large mixing bowl. 

Toast nuts in the same skillet.  Once toasted, finely chop and add to mixing bowl.  Toast coconut in same skillet.  Once toasted, add to mixing bowl.  In same skillet, add the oats and the oil.  Cook until fragrant and lightly toasted, then transfer to the large mixing bowl.  Add flax seeds, salt and cinnamon to the mixing bowl and mix to combine all the dry ingredients.

Using the same half-cup measuring cup that you used to measure the oil (because then the syrup won’t stick), measure out the maple syrup and agave nectar (just eye ball it) and add to the mixing bowl.  Mix to combine and then transfer the mixture onto a large baking sheet.  Bake in the oven for 30-45 minutes or until desired crunchiness. 

Once the granola has cooled, mix in dried fruit (if desired) and place in sealed container to store. 

(Servings:  10, Prep time:  45 min., Cook time:  45 min., Difficulty:  Easy) 

Printable Version

foodforscot Ratings:

Shanon (taste):  9/10
Scot (taste):  10/10
Effort:  3/5
Dishwashing Effort:  3/5


Always protecting us from danger.


Thursday, July 12, 2012

Roasted Cauliflower


Cauliflower sometimes doesn't get any respect.  And even though it has never been my favorite thing on the crudite platter, I still eat it.  I guess I have skipped it.  But I don't have hatred towards cauliflower.  I just love the cucumber more.

BUT, lately, we have been eating it a lot.  Two reasons.  Mark Bittman uses a lot of cauliflower and I have made all the recipes in his book (not true).  Also it is in a lot of Indian dishes that I have made.  And I really love it with Indian flavors.

First, in case for some strange reason you have not heard of or tried roasted cauliflower, I am here to tell you...do it.  It tastes like chicken nuggets.  


Second, in case you missed Copper, here he is.  I am not exaggerating to say that I think about how he is the greatest dog in the whole world at least twice a day.  It is not bragging.  It is just true.  I also tell him as often as possible because I read somewhere that it is important for our relationship.

Third, I just wanted to give you some inspiration to use roasted cauliflower.  You can just eat it as a side.  In the photo above I made a spinach/coconut milk soup to dip the cauliflower in.  I put quite a bit of grainy mustard in the soup.

Below, I made a warm salad with roasted cauliflower, chickpeas, zucchini and spinach.  It is seasoned with a very grainy mustard vinaigrette and some Indian spices.  It was really good too.  But I think roasted cauliflower would make a good addition to any salad.


Roasted Cauliflower

1 head of cauliflower, cut into florets
olive oil
salt and pepper

Preheat oven to 425 degrees F.

Toss cauliflower florets in some olive oil and season with salt and pepper.  Spread out in a single layer on a baking sheet.  Roast in the oven until golden brown.

(Servings:  2, Prep time:  5 min., Cook time:  25 min., Difficulty:  Easy)

Roasted Cauliflower, Chickpeas, Spinach and Zucchini Salad

roasted cauliflower, see recipe above
1 onion, diced
1 zucchini, diced
2 14.5 oz. cans of chickpeas, drains and rinsed
½ tsp of cumin
1 tsp of coriander
¼ tsp of turmeric
1.5 tsp of whole grain mustard (with seeds)
1-2 tbsp of white wine vinegar
salt and pepper
olive oil
1 box of baby spinach (5-6 oz)

In a large skillet over medium high heat, sauté onions until translucent (about 5 min.).  Add zucchini and cook until soft (3-5 min.).  Add chickpeas, cumin, coriander, turmeric, salt and pepper and cook until chickpeas are warmed through (3-5 min.).

Make vinaigrette for spinach:  In a large bowl, add mustard, white wine vinegar, salt and pepper.  Whisk to combine and slowly add olive oil until desired balance of vinegar and oil is achieved.  Add to spinach and toss to coat.

Combine everything.  Eat warm or room temp!

(ServingsL  4-6, Prep time:  15 min., Cook time:  25 min., Difficulty:  Easy) 

Printable Version

foodforscot Ratings:

Shanon (taste): 8/10
Scot (taste):  8/10
Effort:  2/5
Dishwashing Effort:  2/5

Friday, June 29, 2012

Greek Veggie Wrap


I am going to tell you a story about my journey with food.

Let's start with my parents.  Growing up, especially when I was young, my mom did a lot of cooking.  She made all the 80s and early 90s favorites like beef stroganoff, tuna casserole, swiss steak, tuna salad, cream chipped beef, meatloaf, roasts, goulash, etc.  But my mom is also 50% Italian, so she also made family recipes like huge vats of homemade marinara with ribs, meatballs, and sausage, stuffed artichokes, salads, sausage and peppers, stuffed peppers, stuffed squash, etc.  Like most families at that time, mine was influenced by popular food culture and marketing.  I think we were all brainwashed into thinking that buying fresh produce was somewhat of a luxury.  Therefore, we ate plenty of canned veggies.  Did the cream of mushroom soup thing.  Plenty of velveeta.  Margarine happened (it is healthier, duh!)

But my mom's core food knowledge was real food.  My family definitely followed the pre-made, packaged, canned food trend, but didn't stray too far and for too long from the real stuff.

My dad also did a lot of cooking.  I remember him making things like drip beef sandwiches, chicken and dumplings, stir fry, etc.  Also, I think for a good 5 years of my life, my dad ate a large, fully loaded salad for dinner.  Every night.  And I share many of my dad's taste buds.  We both like spicy food and now that I am an adult, I realize I share my dad's lack of a sweet tooth.

As a result of mostly positive food influences, I was never in too bad of shape with my general food knowledge.  Especially since my extended family and friends have taught me a lot too.

However...I, too, fell for much of the crap (aka "food") out there at your typical large supermarket.  When I went off to college and started 100% feeding myself, I started with what I knew.  Diet drinks and Sweet N' Low were a part of my regular diet.  Thought it was healthy.  Once I came to my senses and stopped (it was easy), I started noticing it was in EVERYTHING.  Anything labelled "light", which at the time, I thought meant "light on the sugar".  For example, light yogurt, I thought just had less sugar...but no, it just had fake sugar.  I was so mad.  Furious.

And probably my saddest realization was "coffee creamer".  I bought it thinking it was just cream.  Like what comes from a cow.  At one point I was looking at my Coffeemate bottle and noticed it said non-dairy.  WHAT!?!?  Non-dairy?!?!  That is when I decided to start seriously looking at labels and not be tricked again.  This was about 10 years ago.

As I have been continuing to grow my food knowledge and trying more and more types of foods and recipes, I (like so many others) have come a long way.  I never thought I would eat homemade granola for breakfast (and not be able to buy it from the store...)  I never thought I would prefer whole grain wraps to white wraps.  I never thought I would eat a pound of beans each week and only eat meat on occasion.  I never thought I love kale and other dark greens.  I never thought I would be such a...hippie.

Ok, that is a lie.  I always hoped I would.

The point is...I started out with a good relationship to food.  With reasonable knowledge.  With a decent diet.  But it wasn't easy to sort through all the crap that is thrown at us at the grocery store.  You almost have to have a PhD in Food to understand what food trends to follow and what marketing is actually true.

This is the reason that you should never let any package tell you what is good for you.  If food needs to convince you to eat it, they are probably lying.  Have you ever picked up a head of broccoli and pondered whether or not it will do your body any good?  No.  Broccoli has dignity.

Everyone has a journey with food.  I just thought I'd share mine.  Maybe you are at a different stage in your journey.  And I hope you are enjoying it!  :)  My journey is partly being recorded on this blog...so the archives hold my deepest and darkest secrets.  Don't get too excited though.

Now, here is another "burrito" for you.  This time, I went with a Greek-ish filling.  We have baby spinach, a warm chickpea mixture, a greek salsa and some feta cheese all wrapped up in a whole wheat tortilla.  It is summer in your hand.  I will remind you one last time (ha...), buy the feta that comes packed in a liquid.  It is about 7 times better.


Greek Veggie Wrap

2 14.5 oz. cans of chickpeas, drained and rinsed
½ tsp of coriander (heaping)
a pinch (or more) of cayenne
½ of an English cucumber, diced
1 large tomato, seeded and diced
¼ of a medium red onion, finely minced
handful of kalamata olives, chopped
2-3 tbsp of finely chopped flat leaf parsley
1-2 tbsp of white/red wine vinegar (or lemon juice)
1-2 tbsp of olive oil
2 burrito-sized whole wheat tortillas
feta cheese, crumbled
several big handfuls of baby spinach
salt and pepper

Prepare the bean mixture:  put the chickpeas, coriander, cayenne, salt and pepper, and a good splash of water in a skillet.  Cook over medium high heat until water evaporates.  Taste, adjust seasonings and repeat process (add more water, cook until evaporated, taste), until desired texture is reached.  I usually do the process twice.

Prepare the Greek salsa:  combine cucumber, tomatoes, red onion, olives, parsley, vinegar, and olive oil.  Season with salt and pepper.

Prepare wraps:  warm a tortilla over an open flame, the microwave or in the oven.  Put a healthy layer of baby spinach down.  Top with bean mixture, feta cheese and salsa.  Wrap, burrito-style. 

(Servings:  2, Prep time:  20 min., Cook time:  20 min., Difficulty:  Easy) 


Printable Version


foodforscot Ratings:  


Shanon (taste):  8/10
Scot (taste):  7/10
Effort:  2/5
Dishwashing Effort:  1/5

Tuesday, June 19, 2012

Arepas with Black Beans and Guasacaca


In case you were wondering, I am not an edible arrangement kind of person.  If you did gift me one, I wouldn't be mad.  I would probably think  you read this and were playing a joke on me.  But then there is a chance that you were being serious, in which case, I probably would just pretend I liked it.  But honestly, I think that is the most ridiculous successful business out there.  I don't like my food to be shaped into objects.  Plus, those arrangements are weird.

Speaking of gifts, this was Scot's birthday dinner this year.  After returning from a trip to Puerto Rico, we were inspired to have a latin-ish meal.  Yes, I know arepas and tamales are not Puerto Rican.  But the whole time we were in Puerto Rico, Scot kept expressing his desire for corn based goodies.

I don't recommend this particular menu unless you want to be in the kitchen for 10 hours and eat dinner at 11 pm.  But it was delicious.  In addition, I made some cupcakes:


They were ridiculously good.  I used this recipe from smitten kitchen.  I did 1/3 of the cake recipe, and halved the marshmallow filling and chocolate ganache.  It was the perfect amount for 12 cupcakes.  These photos were taken right after I filled and frosted them.  But they taste best if they are refrigerated and the ganache hardens.  I should say: they taste AMAZING after that happens.  The best way to fill is to cut out a little piece out of the top and put in some of the marshmallow filling (or even better, use a piping bag).  Then spoon over some ganache, chill and serve.  I also tried filling with ganache and topping with the marshmallow frosting, but I prefer the opposite way.  The last change I made was I used all bittersweet chocolate.  This was for Scot after all.

Yes, these are basically hostess cupcakes that take two hours to make.

Back to the arepas.  Scot did say, "this is my favorite thing I have ever eaten".  I am pretty sure that isn't the first time he has said that.  If you have never gotten the opportunity to try arepas at a Venezuelan/Colombian restaurant or in SA, you must make these at home.  They really aren't hard to make.  The arepa itself is incredibly straight forward and simple.  With the sauce and the filling, it is a lot of different things going on, but each component individually is very easy.  Also, the guasacaca sauce can be made ahead of time.  And arepas can be filled with whatever you want: meat (shredded, cubed), any cheese, seafood, beans, a chicken salad type thing, chiles, sweet potatoes, plantains, etc.


Arepas with Black Beans and Guasacaca
adapted from use real butter

2 cups harina PAN
2 1/2 cups warm water

1 tsp salt

2-3 tbsp vegetable or canola oil
more oil for cooking
avocado, sliced

14.5 oz. can of black beans, drained and rinsed
1 tsp of pureed chipotles in adobo
salt
Monterey Jack cheese, shredded

guasacaca (see below)

Place the harina in a large bowl and add the warm water, salt, and vegetable oil (we used 3 tablespoons). Gently fold the mixture together until the moisture is roughly evenly distributed. Set the dough aside for at least ten minutes. The longer, the better. Meanwhile you can make the guasacaca (see below). When the dough has sat long enough, mix it together with your hands and moosh out any lumps between your fingers. Make sure it is uniformly mixed. Begin to form patties approximately 1/2-inch thick and 4-5 inches in diameter. You want them to have a uniform surface (avoid cracks) and to be relatively even in thickness. Using a paper towel or brush, apply a thin layer of vegetable oil on a flat pan like a cast iron skillet or something flat (NOT a non-stick pan). Set over medium-high heat. When the pan is hot, place a few patties (like 3 or however many will fit without crowding) on the surface. Let sit for 5 to 10 minutes (depending on your heat and pan) until the bottoms begin to crackle and pop. Check the bottoms for doneness – when they are lightly golden, flip them over. After another 5 to 10 minutes, check the bottoms for doneness. They should be lightly golden and when you tap the arepa, it should be slightly springy. Remove from heat. If you are making a lot, you can keep the cooked arepas in a baking dish in a low oven (like 250°F) until you are ready to serve.   This recipe makes 6 five-inch arepas. 

In the mean time, place the black beans, pureed chipotles in adobo, salt, pepper and some water in a wide skillet over medium high heat.  Cook until all the water evaporates and until beans reach desired texture.  Add water and repeat as need.  Taste and adjust seasonings. 

Slice the top half of an arepa open along the seam with a butter knife. Carefully scrape out some of the moist filling from the entire interior (you can save it to eat later with butter). When the arepa is hollowed out, fill it with avocado, black beans, cheese, and guasacaca.

(Servings: 6, Prep time: 45 min., Cook time: 45 min., Difficulty: Easy)

Guasacaca (guacamole salsa)


1 onion, peeled, topped, and cut into eighths

1 avocado, peeled and pitted

2-3 tablespoons of white or rice wine vinegar (more if necessary)

1 cloves of garlic
1 jalapeño pepper, seeded and cored

2 cups fresh parsley

2 cups fresh cilantro
salt to taste

3 tbsp vegetable oil

Place the onion, avocado, vinegar, garlic, and jalapeño in a blender (or food processor) and purée until smooth. Add the parsley and cilantro and purée until smooth. If it is too dry and won’t blend, add more vinegar and push it toward the blade with a spoon or a spatula between pulses. Add salt to taste and then add the oil last.


Printable Version


foodforscot Ratings:


Shanon (taste):  9/10
Scot (taste):  10/10
Effort:  5/5
Dishwashing Effort:  5/5

Tuesday, June 5, 2012

Black Bean and Guacamole Burritos


Burritos in the daylight.  

I make guacamole a lot.  Especially lately.  And every single time I make it, I profess my love for it.  It might be my current answer for, "What is your favorite food?"  And when we eat it with chips, we have been buying these black bean tortilla chips.  I don't get them because they are healthy, I just love those chips.  And they come in a reasonable sized bag.  

Also, we have been cooking up a batch of beans and eating them throughout the week in various ways.  It is a nice thing to have around.  And it is a really easy ingredient to make various dinners from.  Still haven't perfected the bean making process, but you can't really mess it up.  

This burrito is a combination of black beans, brown rice, queso fresco, lightly dressed greens and guacamole.  I rated it a 10/10 of because it is everything it needs to be.  And we have had it three times in the past week.  

Try brown jasmine rice...it is very good.

Try this brand of whole wheat tortillas.  Not all whole wheat tortillas are created equally.  Whole Foods Boulder makes some amazing burrito sized whole wheat tortillas (in house).  But don't get the 365 brand or the generic whole foods brand...not good.  

Also, queso fresco is amazing and I love it in these.  But with the guac, you could easily leave the cheese out.

Someday I should consider shooting in such a away that avoids AC units and cords in general.  It's art guys.  


Black Bean and Guacamole Burritos

2 cups cooked black beans (or 1 can, drained and rinsed)
1 tbsp pureed chipotles in adobe sauce
2 cups of cooked brown rice
2-3 ounces of queso fresco
1 avocado, seed and skin removed
1 lime
1 small tomato, squeezed lightly to remove some juice and diced
¼ of a small red onion, minced
handful of cilantro, chopped
1 tsp of light oil
4 large handfuls of spring mix or baby spinach
2 burrito sized whole wheat tortillas
salt and pepper

Prepare guacamole by mashing the avocado together with some salt and the juice of half the lime.  Add the diced tomatoes, minced red onion and cilantro and mix to combine.  Taste, adjust seasonings and set aside.

In a skillet over medium high heat, add black beans, pureed chipotles in adobo, and enough water to allow the beans enough liquid to simmer in.  Season with salt and pepper.  Bring to boil and simmer until all the water has evaporated.  Taste, adjust seasonings, and repeat process of adding water and simmering off until you reach the desired texture.  Add brown rice, mix and set aside over low heat until ready to assemble burritos.

Combine the juice of the other half of the lime, salt, pepper and 1 tsp of light oil.  Add in the spring mix or spinach and toss to coat.

Assemble the burrito:  Start by warming one tortilla to make it more pliable (either over an open flame or in the microwave wrapped in a damp towel).  Mound up half the spring mix or spinach, top with half the rice and bean mixture, crumble on half the queso fresco and top with half the guacamole.  Wrap it up burrito style.  Repeat with remaining ingredients to make a second burrito. 

(Servings: 2, Prep time:  25 min., Cook time:  20 min., Difficulty:  Easy)


Printable Version


foodforscot Ratings:


Shanon (taste):  10/10
Scot (taste):  9/10
Effort:  3/5
Dishwashing Effort:  2/5