Tuesday, June 8, 2010

Bacon Cheddar Scones


I made these for Scot's exam a few weeks ago (along with the amazing coffee cake).  I wanted something simple and quick that I could make the morning of the exam.  And these were perf.  

These are totally better the day thet are made.  By a lot.  So, I recommend serving them the same day.  


I have made some biscuits in the past with green onions and/or cheese in them.  When I saw a scone version of the same idea, it sounded so so good.  And they really were.  Probably my favorite scone ever.  But a cinnamon scone with coffee is a close competitor.  

This recipe also strongly encouraged me to buy an electric pepper grinder.  Recipes can encourage.  Don't worry.  Hand grinding tsps or even a tbsp of pepper sucks.  Stinks.  Shucks.


Bacon Cheddar Scones

3 cups all-purpose flour
1 tbsp. baking powder
1 tsp. salt
1-2 tsp. ground black pepper (depending on your preference)
8 tbsp. cold unsalted butter, cut into small cubes
11/2 cups grated cheddar cheese
4 green onions, thinly slices
10 slices bacon, cooked and chopped or crumbled into small pieces
1 cup buttermilk (plus up to 1/2 cup extra, if needed)
1 large egg
2 tbsp. water

Preheat the oven to 400° F. In the bowl of an electric mixer fitted with the paddle attachment, combine the flour, baking powder, salt and black pepper; mix briefly to combine. Add the cubes of butter and mix on low speed until the mixture is crumbly and the butter pieces are about the size of small peas. (Alternatively, this can be done in a regular mixing bowl, using a pastry blender or two knives to cut the butter into the dry ingredients.) Add in the grated cheese and mix just until incorporated.

Mix in the green onions, bacon, and 1 cup of the buttermilk into the flour-butter mixture. Stir by hand just until all the ingredients are incorporated. If the dough is too dry to come together, mix in the remaining buttermilk a tablespoon or two at a time until the dough can be formed into a ball. Transfer the dough to a lightly floured surface and pat the dough into an 8-inch disk. Slice the dough into 8 to 10 wedges.

In a small bowl combine the egg and water and whisk together. Brush each wedge lightly with the egg wash. Transfer the scones to an ungreased baking sheet. Bake for 18-20 minutes, or until golden brown and a toothpick inserted in the center comes out clean.

(Servinngs: 8, Prep time: 30 min., Cook time: 20 min., Difficulty: Easy)

Monday, June 7, 2010

No-Knead Artisan Bread


I have been wanting to take a stab at baking bread for a very long time now.  I did the burger buns a few weeks ago.  They really weren't so hard to make, which gave me a boost of confidence.  

This recipe seems like a good next step.  Maybe the easiest bread recipe out there?  


My sister gave me this recipe last Christmas.  Since then, I have seen it come up a lot.   It seems like it was really popular when it came out in 2006.

The concept is a no-knead crusty loaf of bread.  Instead of kneading, the dough spends lots of time rising to develop the gluten and flavor.  Something like that.  And it really works!


I had Scot throw together the ingredients (which is really most of the work).  He got everything all set up, found a good spot to display the recipe, etc.  It wasn't until after he did the first step that he realized his job only took about 10 minutes.  And that is 5 minutes in non-Scot people time.  

After mixing the 4 ingredients together, there is just a lot of waiting and a few times you do need to move the dough to a new location.  Not bad.  

It is baked in a dutch oven or other heavy pot with a lid.  My dough was way too soft to shape so I just kind of threw it in there.  I also went a little heavy on the corn meal because I didn't want it to stick.  And turns out I probably didn't need it.  But tasted really good.  My loaf is also kind of wider than the pictures I have seen.  Again, it was just so soft.  Maybe because it like 400 degrees outside.  And we don't have AC.  Good thing I was baking, huh?  Smart.  But, it still tasted completely delicious and Scot thinks we should make it every night.    


No-Knead Artisan Bread
originally by Mark Bittman, posted in New York Times

3 cups all purpose or bread flour, more for dusting
1/4 tsp instant yeast
1 1/4 tsp salt
cornmeal as needed

In a large bowl combine flour, yeast, and salt. Add 1 5/8 cups water, and stir until blended; dough will be shaggy and sticky. Cover bowl with plastic wrap. Let dough rest at least 12 hours, preferably about 18, at warm room temperature, about 70 degrees.

Dough is ready when its surface is dotted with bubbles. Lightly flour a work surface and place dough on it; sprinkle it with a little more flour and fold it over on itself once or twice. Cover loosely with plastic wrap and let rest about 15 minutes.

Using just enough flour to keep dough from sticking to work surface or to your fingers, gently and quickly shape dough into a ball. Generously coat a cotton towel (not terry cloth) with flour or cornmeal; put dough seam side down on towel and dust with more flour or cornmeal. Cover with another cotton towel and let rise for about two more hours. When it is ready, dough will be more than double in size and will not readily spring back when poked with a finger.

At least a half-hour before dough is ready, heat oven to 450 degrees. Put a 6- to 8-quart heavy covered pot (cast iron, enamel, Pyrex or ceramic) in oven as it heats. When dough is ready, carefully remove pot from oven. Slide your hand under towel and turn dough over into pot, seam side up; it may look like a mess, but that is OK. Shake pan once or twice if dough is unevenly distributed; it will straighten out as it bakes. Cover with lid and bake 30 minutes, then remove lid and bake another 15-30 minutes, until loaf is beautifully browned. Cool on a rack.

(Servings: 1 loaf, Prep time: 10 min., Rise time: 14-20 hrs., Bake time: 45 min. – 1 hr., Difficulty: Easy)

Sunday, June 6, 2010

San Diego-Style Fish Tacos


A lot of times, Scot and I eat dinner really late.  Like really late.  Like we ate this at 10:30 pm last night.  

I love fish tacos.


We don't ever mean to.  Stuff happens.  I am talking about the late night dinners again.  

For me, I can usually handle a late dinner without too much pain.  Unless we are playing volleyball or something like that, and then I feel like I am going to die about 3 games in, if I haven't had a snack beforehand.  Late breakfast?  Heck no.  98% of the reason I wake up is because I am hungry.  Late lunch?  Very painful.  Sometimes I have to force myself to wait until noon to eat.  

But I love fish tacos.  And tacos.  All kinds.  


I made Our Best Bites grilled fish tacos a few weeks ago.  I always had the intention of making the fried version too.  Secretly couldn't wait.  And obviously, they are amazing.  

I love the beer batter.  I also tried some of the leftover dark beer that I used...out of curiosity.  Pretty sure I got drunk from one sip.  

I also LOVE the dressing, Creamy Cilantro-Lime Dressing.  HVR packet...my best friend.  I am not even going look at the ingredients list, as I normally am so insane about.  Because I don't want to know.  I want to feel like it is magic. 


For crunch, the tacos were topped with sliced cabbage and a pineapple/tomato pico de gallo.  I just chopped up one whole (and huge), tomato, half a pineapple, 1 bunch of cilantro, 1/8th of a red onion (finely chopped) and mixed in the juice of one lime.  


San Diego-Style Fish Tacos

1 c. all-purpose flour
2 Tbsp. cornstarch
1 tsp. baking powder
1/2 tsp. salt
1 egg
1 c. beer (I used a dark beer)
1 lb. cod fillets, rinsed, patted dry, and cut into 1-2 oz. strips
1 qt of light, frying oil (canola, vegetable)
Corn tortillas (as many as you have pieces of fish)
Pineapple/Tomato pico de gallo
Shredded cabbage (packaged coleslaw mix works great)
Creamy Lime-Cilantro Dressing (recipe follows)

Preheat oven to 170 (or lowest setting on your oven).

Combine flour, cornstarch, baking powder, and salt in a large bowl. In a separate bowl, whisk an egg and then whisk in the beer. Add the beer mixture to the flour mixture.

Heat about 1 quart (3-4 inches) of canola oil to 375 degrees (use a candy or frying thermometer) in a heavy cooking pot. Lightly dredge each piece of fish in flour and then dip in beer batter. Gently drop into the hot oil and cook for about 7-8
minutes or until the coating is dark golden-brown and a test piece flakes easily with a fork. Remove from oil and drain on a paper towel-lined plate; stick the plate in the preheated oven to keep warm while you cook your tortillas.

Place tortillas, 1-2 at a time, in the hot oil and cook 1-2 minutes or until they start to get crispy but are still bendable. Remove from oil and drain on a paper towel.

Assemble each taco with a piece of fish, shredded cabbage, pico de gallo, and a drizzling of Creamy Lime-Cilantro Dressing.

(Servings: 4, Prep time: 1 hr., Cook time, 30 min., Difficulty: Intermediate)


Creamy Lime-Cilantro Dressing

1 pack (1oz) Hidden Valley Ranch Dressing Mix
1C mayo
1/2 C milk
1 lime, zest and juice
2 cloves garlic, grated
1/2 C roughly chopped cilantro
1/4 C green salsa (I used Herdez)
hot sauce

Place milk, mayo, lime zest and ranch mix in a blender. Juice the lime in there too, you should get about 2T juice. Toss in the garlic, cilantro and green salsa. Blend 'er up. Sample it and add hot sauce to taste. Make it several hours ahead of time to allow it to thicken.

(Servings: makes 2+ cups, Prep time: 15 min., Chill time: 1 hr +, Difficulty: Easy)


Thursday, June 3, 2010

Roasted Corn and Poblano Polenta with Cumin and Chili Shrimp


I saw this recipe on a new blog that I recently found, elly says opa.  I knew right away that Scot would love this dish.  It has all his favorite things.  He loves Mexican flavors, especially the flavor of corn.  

The idea of transforming a normally Italian polenta dish into something Mexican is pure genius.  I mean, the corn flavor of polenta pairs so well with Mexican.  

I love freshly roasted peppers.  Even though I do use jarred roasted red peppers to speed up a week night meal...roasting them yourself is amazing.  I have never seen other varieties of jarred roasted peppers, so most of the time I have to roast them, anyways.  But they take on a whole new thang.  SO good.  In fact, I used two poblano peppers instead of one, as the original recipe suggested.

We had this polenta with cumin and chili shrimp, as Elly suggested.  Just season cleaned shrimp with salt, pepper, chili powder, and cumin.  Then, saute in a little oil over medium-high heat, 1-2 minutes per side. 

Lastly, the cheese is really optional.  I only added it because I already shredded it.  But, taste the polenta without it.  It is so creamy and delicious.  It doesn't need it at all.  


Roasted Corn & Poblano Polenta
adapted from elly says opa

2 poblano peppers
3/4 cup roasted corn (approximately 2 ears of fresh corn)
2 tsp. butter
1 clove garlic, grated
1-2/3 to 2 cups chicken broth (depending on how thick you want the polenta)
1/4 tsp. paprika
1/2 cup yellow cornmeal
1/4 cup (1 oz.) cheddar or Monterey jack cheese (optional)
salt and pepper

Preheat oven to 375° F. If using fresh, cut kernels off of ears of corn. Spread kernels in a single layer on a baking sheet. Roast for about 10 minutes.

Turn oven to broiler setting, char the poblano peppers on all sides, until the skin is blistery and black. Put in a bowl and cover with plastic wrap. Once cooled, peel and dice.

(Alternatively, you can roast the corn and the poblano peppers on the grill.)

Heat the butter in a small saucepan over medium heat. Add the garlic and stir until just fragrant. Stir in the chicken broth, paprika, and salt and pepper to taste; bring to a boil.

Slowly whisk in the polenta - it will absorb the liquid almost immediately. Add the diced poblano and corn. Reduce the heat to low and continue to simmer, stirring frequently, until cooked, about 10-15 minutes.

Off the heat, stir in the cheese and re-season if necessary. Serve immediately.

(Servings: 2, Prep time: 45 min., Cook time: 20 min., Difficulty: Easy)

Wednesday, June 2, 2010

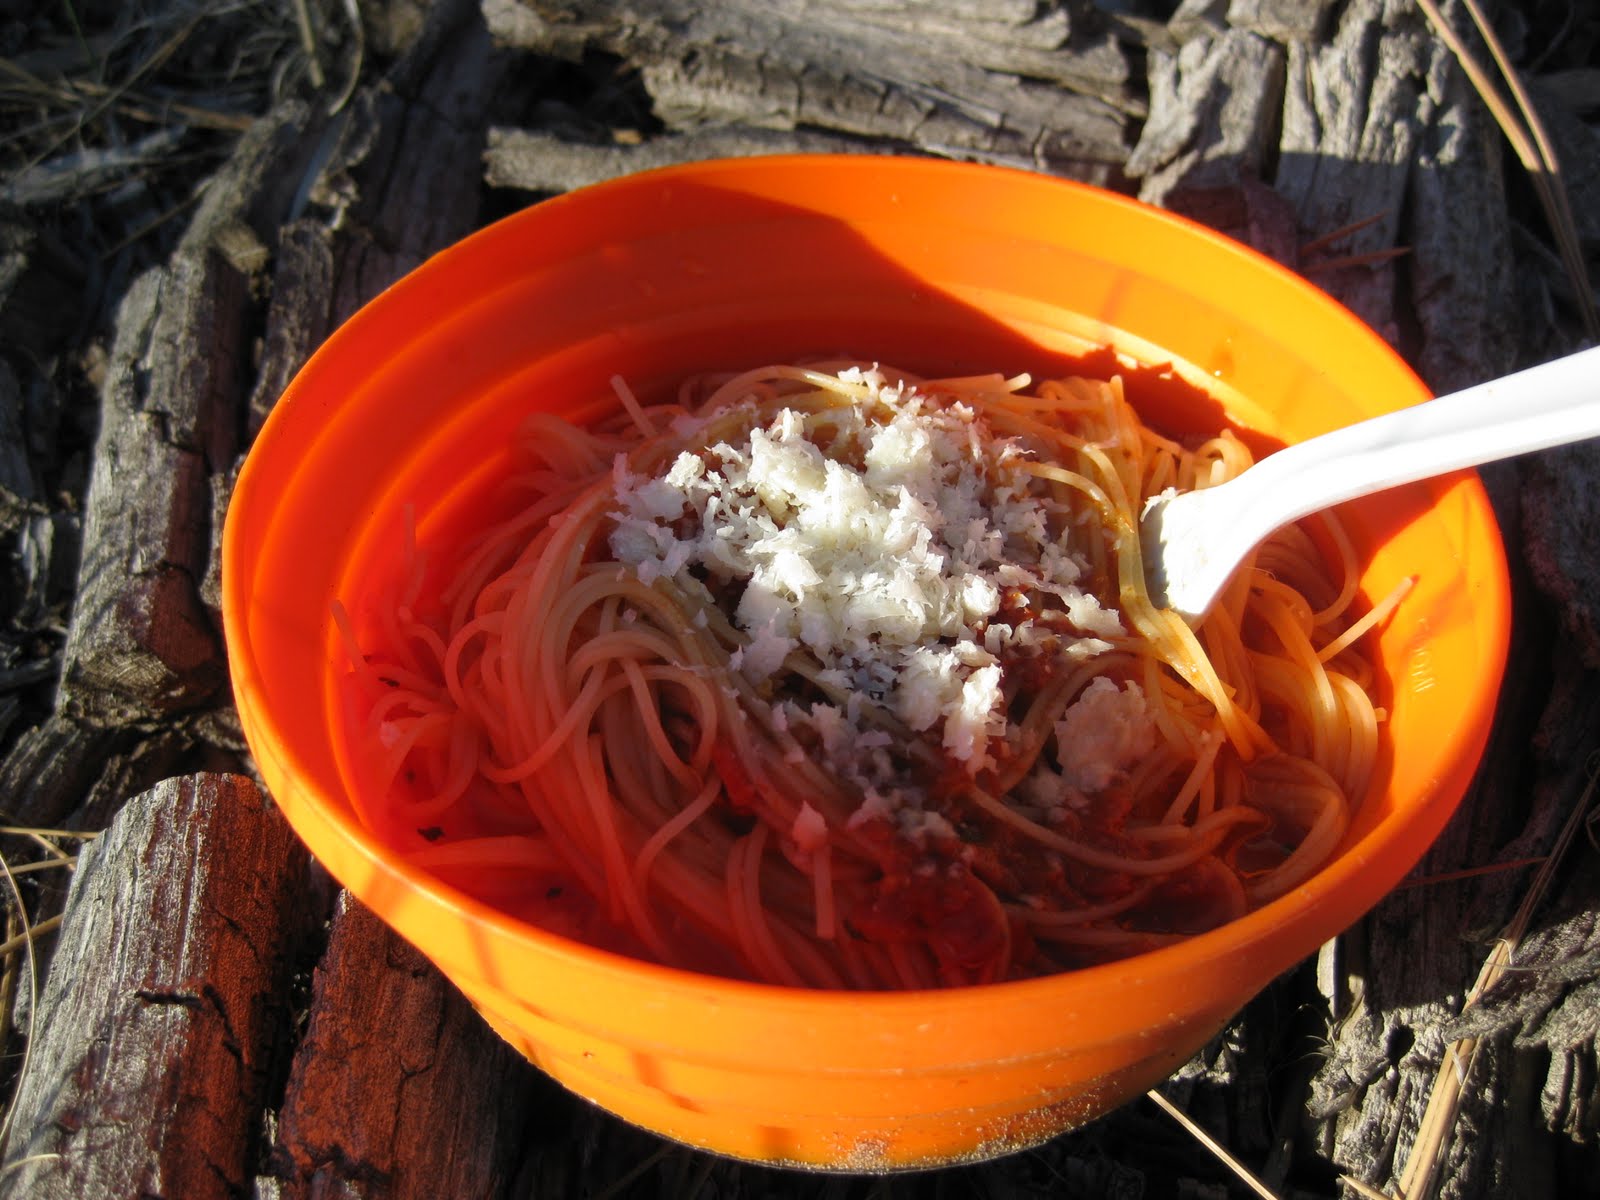
Backpacking Meal: Spaghetti with Marinara Sauce


I really enjoyed everything about this backpacking meal.  Sometimes prepping backpacking meals (that are actually good) can be exhausting.  Even though this still involves a dehydrator, it is a super easy thing to dehydrate. 


And it is totally not spaghetti.  It is angel hair pasta.  But somehow spaghetti sounds better.


Eating pasta with store bought sauce is one of those meals we eat at home when either I am not around to make something better or I am too busy to make something better.  It is one of the meals Scot has mastered.  However, eating it on a backpacking trip...totally gourmet.  

After several backpacking trips of carrying ridiculous things like 3 family size cans of tomato soup, I decided quickly that we needed to massively minimize weight.  And use my brain.  And not carry cans of soup.  Ever again.

So, I have been dehydrating meals, fruits, etc.  And it makes such a difference.  I love dehydrated fruits.  We have lots of favorites including pears, apples, peaches, pineapple (canned), and strawberries.  


All you do for this meal is dehydrate marinara sauce (store bought or homemade).  When the sauce dehydrates, it turns into sauce leathers.  Then, on the trail all you have to do is rehydrate the leathers and cook the pasta.  


This meal is my favorite so far because it is so easy and tastes so good out in the wilderness.  The only slight problem some hardcore backpackers may have is that it isn't super low fuel.  You have to boil the pasta for about 3-4 minutes.  However, I am not hardcore.   Obviously.  


We had this meal on a recent backpacking trip to the Sand Dunes.  It was wicked hot.  And I ate about as much sand as I did spaghetti.  And my poor dog will be sleeping for weeks.  He is so tired.  Running up and down Sand Dunes is hard.  And there was no choice.  How can you resist?  


Also, he is pretty cute.


Backpacking Meal: Spaghetti with Marinara Sauce

1 24 ounce jar of marinara sauce (or 3 cups homemade)—choose one low in fat
1 lb angel hair pasta
grated parmesan cheese, to taste

At home: Dehydrate the marinara sauce. To do this, cover a dehydrator tray with plastic wrap (even if you are using leather tray). Pour out the sauce onto the plastic wrap in one thin layer (one tray worked perfectly for me). Dehydrate at 130° F for about 24 hours or until the sauce is leathery but not at all wet. Sauces that are lower in fat will dehydrate better.

After dehydrating, pull apart leather into small pieces and place in re-sealable plastic bag.

In a separate bag, place angel hair pasta broken into thirds. And put the grated parmesan in a third bag.

On the trail: Boil 3 cups of water. Place sauce leather pieces in a bowl (preferably one with a cover or that can easily be covered) and pour boiling water over leathers. Let soak, stirring occasionally until leathers dissolve.

Using your biggest pot, fill with water leaving one inch of room at the top. Boil. Add pasta and cook 3-4 minutes or until al dente.

Drain pasta. Top with marinara sauce and grated parmesan.

(Servings: 3-4, Prep time: 24 hours, Cook time: 20 min., Difficulty: Easy)

Tuesday, June 1, 2010

Chocolate Overdose Cake


Happy Birthday Scot!  A few days ago.  I made this cake for him.  

As I have mentioned, Scot loves chocolate.  Not only does he love chocolate, but he sometimes forgets that desserts without chocolate are still desserts.  Good thing I am around.


But still, it is his birthday, so I knew I needed to find the most ridiculous chocolate cake.  In the past, I have made several different chocolate cake recipes.  One birthday I made him a yellow cake with chocolate frosting.  He almost had a heart attack until he realized how good yellow cake with chocolate frosting was.  


This year, I did find the most ridiculous chocolate cake.  This cake has a brownie base layer.  On top of that, a layer of chocolate mousse.  Then, a layer of chocolate cake.  Frosted with chocolate ganache.  


I was scared of this cake.  For a few reasons.  First, I was afraid I would mess it up.  And I made it after work one day and as you can see...it isn't that quick.  But, honestly, it wasn't that hard to make.  Minus the six hours.  Second, I was afraid I wouldn't like it.  The other people who have made this mentioned it has over two pounds of chocolate in it.  I didn't know if I could handle it.  But, I really liked it.  So, I would like to argue that this cake is not JUST for chocoholics.  Since it has so many different types and textures of chocolate, I really enjoyed it.  And I love mousse.  The mousse and brownie did it for me.  

(Here is what it looks like after several days in the fridge)

This was my first attempt at piping.  I finally bought a piping bag and tips.  I figured it was time.  And it was way fun.  Definitely not perfect but a good effort.  

Scot really liked it.  He also liked licking the many bowls, spoons, attachments, etc. as I made this over the course of the night.  By about 11:30 pm, when it was ready, he kind of regretted that.  But he still ate a piece like a champ.  You can always count on him for these types of things.  

Chocolate Overdose Cake

For the brownie base:
1/2 cup plus 2 tbsp. cake flour
1/4 tsp. salt
1/2 tsp. baking powder
3 oz. unsweetened chocolate, chopped fine
6 tbsp. unsalted butter, cut into 6 pieces
1 1/8 cups sugar
2 large eggs
2 tsp. vanilla extract

For the chocolate mousse filling:
6 oz. semi-sweet chocolate, broken into 1/2-oz. pieces
1 7/8 cups heavy cream
1 tbsp. sugar

For the chocolate cake:
2 oz. unsweetened chocolate, coarsely chopped
1/8 cup Dutch-processed cocoa
1/4 cup hot water
7/8 cup sugar, divided
7/8 cups unbleached all-purpose flour
3/4 tsp. baking soda
1/2 tsp. salt
1/2 cup buttermilk
1 tsp. vanilla extract
2 large eggs
1 large egg yolk
6 tbsp. unsalted butter, soft

For the ganache:
1 1/2 cups heavy cream
2 tbsp. unsalted butter
18 oz. semisweet chocolate, broken into 1/2-oz. pieces

To make the brownie base, line the bottom of a 9-inch springform pan with a round of parchment paper and spray the sides with nonstick cooking spray. Center a rack in the oven and preheat to 325 degrees F. In a medium bowl, combine the cake flour, salt and baking powder. Stir with a fork to mix. Melt the chocolate and butter in a large heatproof bowl set over a saucepan of almost simmering water, stirring occasionally, until smooth.

When the chocolate mixture is completely smooth, remove the bowl from the saucepan and gradually whisk in the sugar. Add the eggs one at a time, whisking after each addition until thoroughly combined. Whisk in vanilla. Add in the flour mixture in two additions, folding with a rubber spatula until completely homogenous.

Transfer the batter to the prepared pan and smooth with a spatula. Set aside, prepare the cake batter, and bake the two layers at the same time.

To make the cake, line the bottom of a 9-inch round cake pan with a round of parchment paper. Grease and flour the sides of the pan. Combine the chocolate, cocoa and hot water in a medium heatproof bowl; set the bowl over a saucepan containing 1-inch of simmering water and stir with a rubber spatula until chocolate is melted, about 2 minutes. (Note: at this point, my mixture was pretty thick and I thought I had ruined it, but mixing in the sugar was like magic and it made it smooth and liquidy again.) Add 1/4 cup of sugar to the chocolate mixture and stir until thick and glossy, 1 to 2 minutes. Remove bowl from heat and set aside to cool.

Whisk flour, baking soda and salt in a medium bowl; set aside. Combine buttermilk and vanilla in a small bowl.

In the bowl of a stand mixer fitted with the whisk attachment, whisk the eggs and yolks on medium-low speed until combined, about 10 seconds. Add remaining sugar, increase speed to high, and whisk until fluffy and lightened in color, 2 to 3 minutes. Replace whisk with paddle attachment.

Add the cooled chocolate mixture to the egg/sugar mixture and mix on medium speed until thoroughly incorporated, 30-45 seconds, pausing to scrape down sides of bowl with rubber spatula as needed. Add softened butter one tablespoon at a time, mixing about 10 seconds after each addition. Add about one third of the flour mixture followed by half of the buttermilk mixture, mixing until incorporated after each addition (about 15 seconds). Repeat using half of remaining flour mixture and all of remaining buttermilk mixture (batter may appear separated). Scrape down the sides of the bowl and add remaining flour mixture; mix at medium-low speed until batter is thoroughly combined, about 15 seconds. Remove bowl from mixer and fold batter once or twice with rubber spatula to incorporate any remaining flour. Pour into prepared pan; smooth batter to edges of pan with an offset spatula.

Bake the brownie and cake layers at the same time: the brownie for 25-30 minutes and the cake for 30 minutes, or until a toothpick inserted in the center of each comes out clean. Transfer the pans to a wire cooling rack. Allow the brownie to cool completely in the pan. Allow the cake to cool in the pan for 15 minutes, then invert onto the wire rack and allow to cool completely.

Once the brownie layer has cooled, run a knife around the edges to separate it from the pan. Remove the sides of the springform but leave the brownie layer on the springform base. Form a ring of parchment paper around the brownie layer and extending up the sides of the springform pan – reclose the springform so that the parchment is fitted tightly to the sides.

To make the chocolate mousse filling, place a stand mixer bowl and whisk attachment in the freezer or fridge. Heat 1-inch of water in the bottom half of a double boiler over medium heat. Place the semisweet chocolate in the top half of the double boiler. Tightly cover the top with plastic wrap and allow to heat for 8- 10 minutes. Remove from the heat and stir until smooth. Transfer the melted chocolate to a stainless steel bowl and set aside until needed.

Place heavy cream and sugar in the well-chilled bowl of an electric mixer fitted with the chilled whisk attachment. Whisk on high speed until stiff peaks form, about 1 1/2 minutes. Remove the bowl from the mixer. By hand, whisk to combine 1/4 of the whipped cream into the melted chocolate until smooth and completely incorporated. Add the combined whipped cream and chocolate to the remaining whipped cream and use a rubber spatula to fold together.

Spread the mousse over the top of the brownie base evenly. Use an offset spatula to smooth the top. Place the cooled cake round over the mousse, pressing down lightly. Chill for at least 1 hour.

To make the ganache, heat the heavy cream and the butter in a saucepan over medium high heat. Bring to a boil. Place the semisweet chocolate in a 3-quart stainless steel bowl. Pour the boiling cream over the chocolate and allow to stand for 5 minutes. Stir until smooth. Chill 1 cup of ganache for 1 hour. Allow the remaining ganache to come to room temperature (about 40 minutes).

Remove the springform ring and parchment collar from the assembled cake. Carefully transfer the cake to a serving platter, removing the springform base and parchment round. Use a spatula to smooth the room temperature ganache over the cake top and sides, covering evenly.

Place the chilled ganache in a pastry bag fitted with a shell tip and pipe a shell border around the base of the cake. Pipe 12-16 rosettes around the top of the cake to indicate servings. Serve chilled and store leftovers in the fridge. Cut the cake with a hot, dry knife.

(Servings: 8-10, Prep time: 5 hrs, Cook time: 1 hr, Difficulty: Intermediate)

Wednesday, May 26, 2010

Salmon Ravioli with Roasted Red Pepper Sauce


Another great recipe from Cara's Cravings.  Cara has posted a few ravioli dishes that I have been wanting to try.  I love using wonton wrappers to make ravioli.  I made homemade pasta last summer with my little sister when she was visiting.  I had her cutting them and we laid them all on top of each other.  Of course, they all stuck together because I wasn't thinkin' straight.  And we were kind of able to save some and eat some stuck together pieces.  But...man, was I frustrated.  

Luckily, my sister is not a picky eater.  She is amazing.  She told me it was still delicious.  But even when she was little, she was a pretty adventurous eater.  I like to give myself the credit for forcing her to eat weird things.  I can do that (that is, give myself the credit) because I am 9 years older.  At many points in my life, I was pretty cool to her.  Not sure on the status of that currently.

What I am trying to get at...is I have been putting off making homemade ravioli because I am still mad at pasta dough.  Why do you stick together?  Why did you take me two hours to make and then ruin everything?!?!  So, using wonton wrappers makes me feel so so good.  

But really, it just makes everything easier.  I don't think I have ever ordered ravioli out.  I like it but I like a lot of other things a lot more.  So, I pretty much only have it at home when I want something different.  And those refrigerated raviolis in the deli?  Ew.  The dough is so thick.  And chewy.  And the fillings are worse.  Sorry Butoni.  Or whatever you are.  I hate you.  Seriously.  

Um, what was I talking about?  Oh yeah, so this is the perfect solution for a quick (er) ravioli.  And you can fill it something other than ricotta cheese.  Why am I being such a snot.  Not sure. 

But try this combo.  It is great.  And healthy!  I didn't exactly follow the recipe because I doubled it and was being lazy.  I used jarred roasted red peppers...again because I am lazy but also because right now they are cheaper than fresh.  If you cook them a bit with the rest of the sauce ingredients, you can't even tell.  I also just cooked the sauce in a sauce pan and used my immersion blender to puree.  And I never froze the ravs after assembling.  Mostly because I made the sauce first.  

I am tired.  Bye.


Salmon and Goat Cheese Ravioli with Roasted Red Pepper Sauce

6 oz salmon fillet
1/2 of a lemon
salt and pepper
1 clove garlic, minced
1 tbsp chopped fresh parsley
2 oz goat cheese
4 oz wonton wrappers (for the brand I buy, from an Asian grocery store, this is about 20 wrappers)
2 medium red bell peppers
1/4 cup chopped onion
1 clove garlic, minced
1/4 tsp crushed red pepper
dash of oregano, salt & pepper
1/4-1/2 cup chicken broth

Preheat oven to 350F. Squeeze lemon juice over salmon and sprinkle with salt and pepper. Roast in oven for about 15-20 minutes, or until cooked through.

Remove from oven and cool. Chop finely in food processor, and combine with garlic, parsley and goat cheese. Place 1 tsp of filling onto each wonton wrapper, wet edges with water, and press together to seal. Place in freezer while preparing sauce.

Preheat broiler to high. Spray peppers with cooking spray, place on a baking sheet, and cook under broiler for several minutes on each side, until all sides are charred. Remove from oven and place in a bowl covered with plastic wrap until
cool enough to handle. Meanwhile, saute onion in a small pan coated with cooking spray, over medium heat, for about 5 minutes or until soft. Add garlic, crushed red peppers, oregano, salt, and pepper; cook 1 minute more. Remove skin and stems from peppers and place in blender along with onion mixture and broth; puree until smooth. Transfer to a small saucepan to keep warm.

Cook ravioli in boiling water for 3-4 minutes. To serve, place a ladle of sauce on a plate, place ravioli on top, and drizzle with remaining sauce. Garnish with freshly grated pecorino romano cheese, if desired.

(Servings: 2, Prep time: 45 min., Cook time: 20 min., Difficulty: Easy)